- Disconnect the negative battery cable.
- Locate and unplug the blue and orange connector.
Protect this connector from accidental electrical contact, including static
electricity.
- The air bag is now disarmed and the battery can be
connected to perform electrical testing on other systems.
- When ready to reconnect the air bag; disconnect the
battery, connect the air bag connector, install the cover or panel and
make sure no one is in the vehicle when connecting the battery.
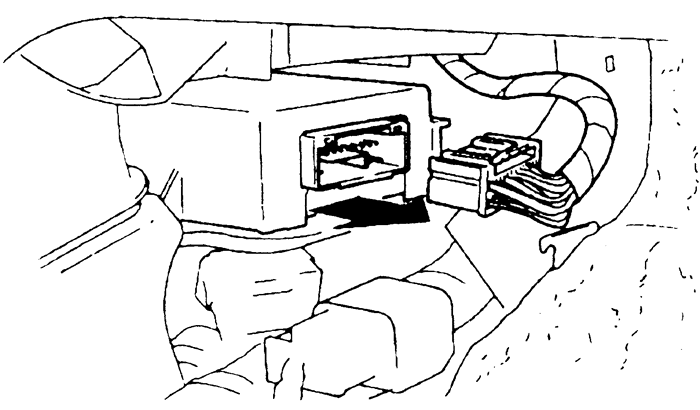
| Fig. 1:SAS unit and harness connector -- 1995-97
Protege
|
- Turn the ignition switch to LOCK.
- Disconnect the negative battery cable.
- Remove the interior right kick panel.
- Disconnect the SAS unit connector.
CAUTION
The air bag system must be disarmed before removing the steering wheel.
Failure to do so may cause accidental deployment, property damage or personal
injury.
- Deactivate the audio anti-theft system.
- Disconnect the negative battery cable.
- Remove the lower panel under the steering wheel,
then disconnect the orange and blue clock spring connectors.
- The air bag is now disarmed and the battery can be
connected to perform electrical testing on other systems.
- If removing the unit, remove the mounting nuts, disconnect
the support rope, disconnect the electrical connectors and remove the
air bag.
-
When ready to reconnect the air bag; disconnect the battery, connect
the air bag connectors, connect the support rope and mount the air bag.
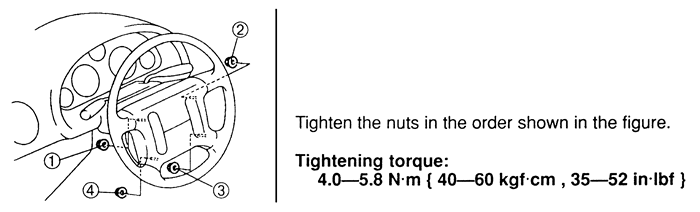
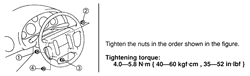
Torque the nuts in sequence to 35-52 in. lbs. (4.0-5.8 Nm).
| Fig. 2:Driver side air bag mounting nut torque sequence --
1996 Miata
|
- Connect the negative battery cable. Turn the ignition
switch ON. Verify that the air bag system warning light illuminates for
four to eight seconds and then goes off.
- Deactivate the audio anti-theft system.
- Disconnect the negative battery cable.
- Remove the glove compartment and the undercover.
- Disconnect the orange and blue passenger side air
bag module connectors.
- The air bag is now disarmed and the battery can be
connected to perform electrical testing on other systems.
- If removing the unit, remove the mounting nuts, disconnect
the electrical connectors and remove the air bag module.
- When ready to reconnect the air bag; disconnect the
battery, connect the air bag connectors and mount the air bag module.
Torque the nuts in sequence to 13.1-20.2 ft. lbs. (17.7-27.4 Nm).
- Connect the negative battery cable. Turn the ignition
switch ON. Verify that the air bag system warning light illuminates for
four to eight seconds and then goes off.
- Deactivate the audio antitheft system.
- Turn the ignition switch to LOCK.
- Disconnect the negative battery cable and wait for
more than one minute to allow the backup power supply to deplete its stored
power.
- Remove the driver side undercover and lower dash
panel. Disconnect the orange and blue clock spring connectors for the
drivers side air bag.
- Remove the glove compartment and disconnect the orange
and blue passenger side air bag module connectors.
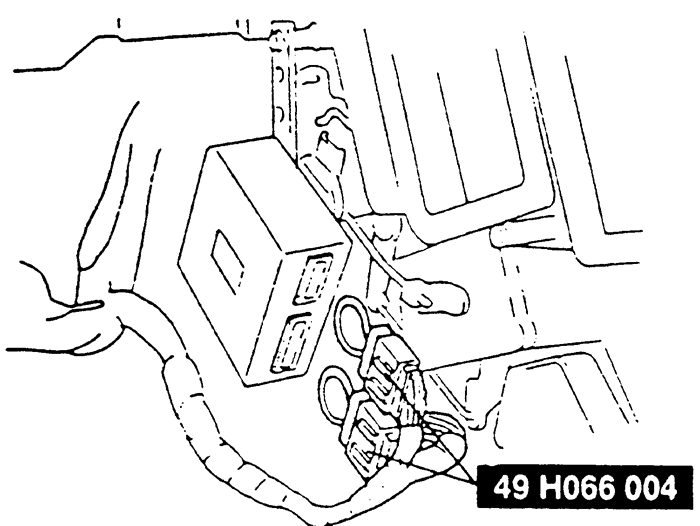
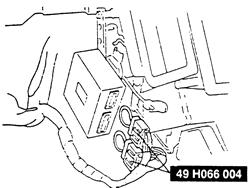
| Fig. 3:Air bag diagnostic connector -- 1995-97 RX7
|
- Deactivate the audio antitheft system, if equipped.
- Disconnect the negative battery cable.
- Disconnect the electrical connectors at the diagnostic
module and connect special tool 49 H066 004.
- Arming is the reverse of disarming.