Previous Next

REMOVAL & INSTALLATION

1990–94 Vehicles
  1. Disconnect the negative battery cable.
  2. Raise and safely support the vehicle. Remove the left wheel and tire assembly.
  3. For 2.0L engines, remove the left side undercover from the vehicle.
  4. If equipped with A/C, remove the condenser electric fan motor and shroud assembly.
  5. Remove the alternator, water pump and air conditioner compressor drive belts.
  6. Remove both of the water pump pulleys.
  7. Remove the alternator top brace.
  8. Disconnect the alternator wiring, then remove the alternator from the vehicle.

    Fig. 1: Exploded view of the alternator and related components — 1990–94 1.8L and 2.0L engines

    To install:

  9. Manuever the alternator into position, then connect the electrical harness.
  10. Install the alternator top brace to the engine and tighten the mounting bolt to 20 ft. lbs. (27 Nm).
  11. Install the alternator mounting bolt loosely.
  12. Install the water pump pulleys and tighten retainer bolts to 7 ft. lbs. (10 Nm).
  13. Install the drive belts and adjust until the proper tension is achieved. Secure the lower alternator through-bolt nut to 18 ft. lbs. (25 Nm) and the upper alternator lock bolt to 11 ft. lbs. (15 Nm).
  14. Install the condenser electric fan motor and shroud assembly.
  15. Install the left side undercover from the vehicle, if removed.
  16. Connect the negative battery cable. Start the engine and check the alternator for proper operation.
1995–98 Vehicles
2.0L NON-TURBO ENGINE
  1. Disconnect the negative battery cable.
  2. Raise and safely support the vehicle.
  3. Remove the left side wheel and tire assembly. Remove the under cover side panel.
  4. For 2.0L non-turbo engines equipped with auto-cruise control, remove the speed control assembly.
  5. Remove the alternator drive belt, as outlined in Section 1 of this manual.

    Fig. 2: Exploded view of the alternator mounting — 1995–98 2.0L non-turbo engine

  6. Detach the alternator harness connector(s).

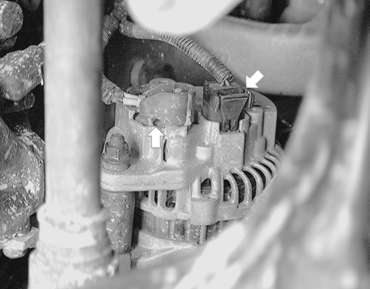
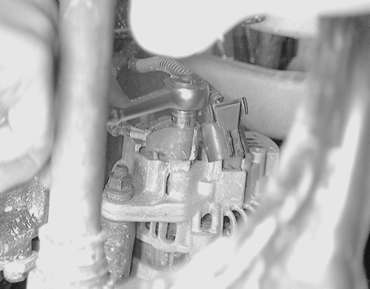
    Fig. 3: There are two electrical connections found on the back of the alternator

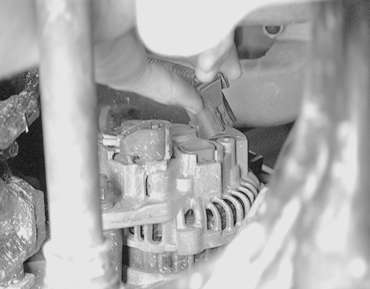
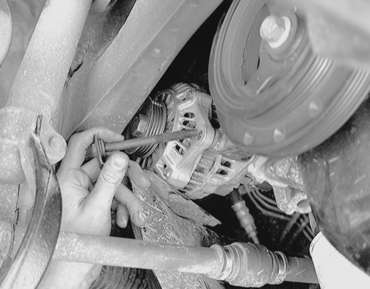
    Fig. 4: With the vehicle raised and supported, unplug the electrical connector from the rear of the alternator

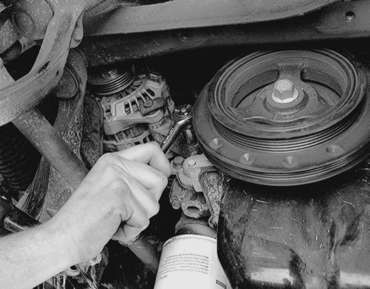
    Fig. 5: Unfasten the BAT terminal retaining nut from the rear of the alternator

  7. Remove the lower alternator bracket.

    Fig. 6: Remove the alternator adjusting bolt

  8. Remove the alternator adjusting bolt.
  9. Remove the mounting bolts, then remove the alternator from the vehicle.

    Fig. 7: Remove the alternator mounting bolts, then carefully lower the alternator and remove it from vehicle

    To install:

  10. Install the alternator brace and secure with the retainers.
  11. Position the alternator and bracket.
  12. Attach the alternator harness connectors.
  13. Install the alternator drive belt. Adjust the tension as outlined in Section 1 of this manual.
  14. Install the under cover side panel and the wheel and tire assembly.
  15. Carefully lower the vehicle, then connect the negative battery cable.
2.0L TURBO AND 2.4L ENGINES
  1. Disconnect the negative battery cable.
  2. If necessary, partially raise and support the vehicle.
  3. Remove the left side wheel and tire assembly. Remove the under cover side panel.
  4. Remove the alternator drive belt.
  5. Unplug the alternator harness connector(s).
  6. For the 2.0L turbo engine, perform the following:

    NOTE: Do NOT disconnect the oil pump hose.

    1. Remove the mounting bolt of the power steering oil pump, and hold the pump above the engine mount bracket. Use a rag to prevent scratching of the rocker cover.

      Fig. 8: Exploded view of the alternator and related components

      Fig. 9: Position the power steering pump aside with a rag underneath

    2. With the alternator facing as shown in the accompanying figure, lift upward and remove the alternator from the vehicle.

      Fig. 10: On the 2.0L engine, lift the alternator up and out of the vehicle

  7. For the 2.4L engine, perform the following:
    1. Remove the oil pressure switch terminal.

      Fig. 11: On the 2.4L engine, you must remove the oil pressure switch terminal for room to remove the alternator

    2. Remove the alternator from the underside of the vehicle.
  8. If necessary to remove the alternator brace, perform the following:
    1. Remove the power steering drive belt.
    2. Remove the water pump pulley.
    3. Remove the power steering pump pulley.
    4. Remove the alternator brace from the vehicle.

      To install:

  9. Installation is the reverse of the removal.
  10. Note that the alternator is installed from the top of the engine for the 2.0L turbo engine and from underneath the vehicle on the 2.4L engine.
  11. During installation, make sure to tighten all retainers to the specifications shown in the accompanying figures.
  12. Install the undercover side panel, then carefully lower the vehicle.
  13. Connect the negative battery cable.

Previous Next