Previous Next

Water Pump

REMOVAL & INSTALLATION

1990–94 Vehicles
  1. Disconnect the negative battery cable.

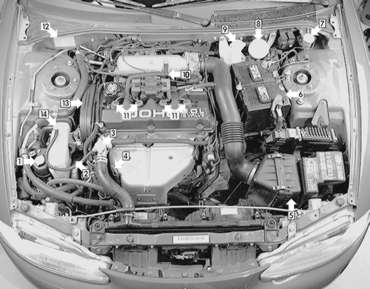
    Fig. 1: Water pump and related components — 1.8L engine shown, others similar

  2. Drain the cooling system into a suitable container.
  3. Remove the accessory drive belts, as outlined in Section 1.
  4. Remove the engine undercover.
  5. Remove the clamp bolt from the power steering hose. Remove the tensioner pulley bracket.
  6. Support the engine with the appropriate equipment, then remove the engine mount bracket.
  7. Remove both the outer and the inner timing belts from the front of the engine. If reusing old belt, mark the direction of rotation on the outer belt surface. This will assure belt rotation in the original direction and extend belt life.
  8. Remove the alternator brace from the front of the water pump.
  9. Unfasten the retaining bolts, then remove the water pump and gasket from the engine. Discard the gasket.
  10. Remove the O-ring where the water inlet pipe(s) joins the pump. Clean all mating surfaces and inspect for cracks or other damage. Replace components that are damaged or cracked.

    To install:

  11. Thoroughly clean and dry both gasket surfaces of the water pump and block.
  12. Install a new O-ring into the groove on the front end of the water inlet pipe. Do not apply oils or grease to the O-ring. Wet with water only.
  13. Install the gasket and pump assembly and tighten the bolts. Note the marks on the bolt heads. Those marked 4 should be tigthened to 9–11 ft. lbs. (12–15 Nm). Those bolts marked 7 should be tigthened from 15–19 ft. lbs. (20–27 Nm).
  14. Connect the hoses to the pump.
  15. Reinstall the timing belt and related parts.
  16. Install the engine undercover.
  17. Fill the system with coolant.
  18. Connect the negative battery cable, run the vehicle until the thermostat opens and fill the radiator completely.
  19. Once the vehicle has cooled, recheck the coolant level.
1995–98 Vehicles
  1. Disconnect the negative battery cable.
  2. Drain the engine coolant into a suitable container.
  3. Remove the timing belt, as outlined later in this section.
  4. If necessary, remove the alternator brace from the water pump.
  5. Unfasten the retainers, then remove any brackets for access to the rear cover.
  6. If necessary, remove the timing belt rear cover.

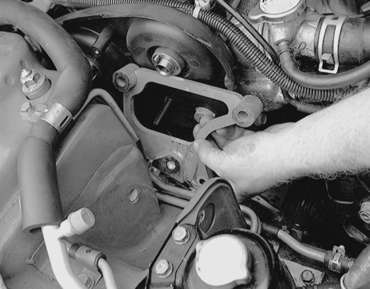
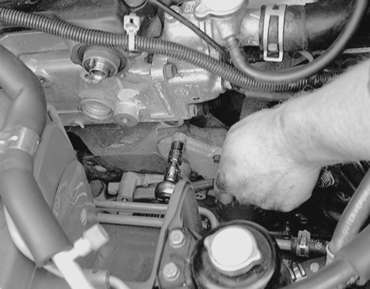
    Fig. 2: Remove the bracket retaining bolts . . .

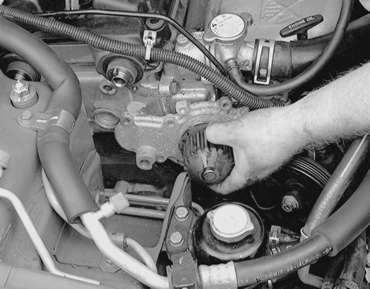
    Fig. 3: . . . then remove the bracket for access to the rear cover

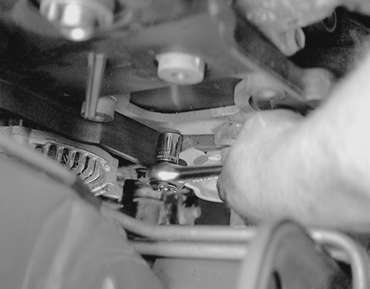
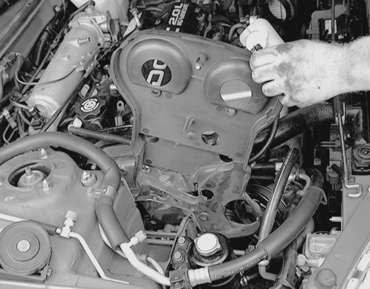
    Fig. 4: Remove the rear timing belt cover retaining bolts . . .

    Fig. 5: . . . then remove the rear timing belt cover in order to access the water pump

  7. Remove the water pump mounting bolts.

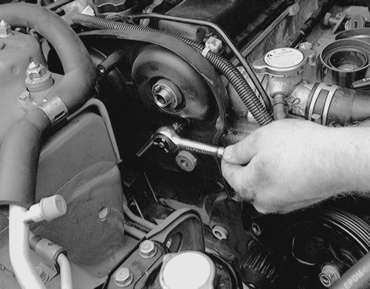
    Fig. 6: Unfasten the water pump mounting bolts

  8. Remove the water pump, gasket and O-ring. Discard the gasket and O-ring and replace with new ones during installation.

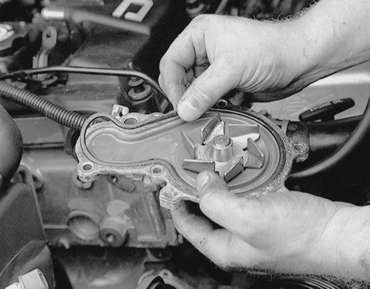
    Fig. 7: Remove the water pump assembly from the vehicle

    Fig. 8: Remove and discard the water pump gasket

    Fig. 9: Exploded view of the water pump mounting — 1995–98 2.0L non-turbo engine

    Fig. 10: Exploded view of the water pump mounting — 1995–98 2.0L turbo and 2.4L engines

    To install:

  9. Install a new O-ring on the water inlet pipe. Coat the O-ring with water or coolant. Do not allow oil or other grease to contact the O-ring.
  10. Use a new gasket and install the water pump to the engine block. Tighten the mounting bolts to 8.7–11 ft. lbs. (12–15 Nm). Install the alternator brace on the water pump. Tighten the brace pivot bolt to 17 ft. lbs. (24 Nm).

    Fig. 11: When installing a new water pump gasket, make sure to position it properly to avoid leakage

  11. If removed, install the timing belt rear cover.
  12. Install the timing belt.
  13. Install the remaining components.
  14. Refill the engine with coolant.
  15. Connect the negative battery cable, start the engine and check for leaks.

Previous Next