Remember that the diagnostic trouble code identification refers only to the
circuit, not necessarily to a specific component. For example, fault code 14
may indicate an error in the throttle position sensor circuit; it does not necessarily
mean the TPS sensor has failed. Testing of all related wiring, connectors and
the sensor itself may be required to locate the problem.
The ECU memory is capable of storing multiple codes. During diagnosis the codes
will be transmitted in numerical order from lowest to highest, regardless of
the order of occurrence. If multiple codes are stored, always begin diagnostic
work with the lowest numbered code.
Make a note of the following:
- When battery voltage is low, no detection of failure is possible. Be sure
to check the battery voltage and other conditions before starting the test.
- Diagnostic items are erased if the battery or the engine controller connection
is disconnected. Do not disconnect either of these components until the diagnostic
material present in the engine control module has been read completely.
- Be sure to connect and disconnect the scan tool to the data link connector
with the ignition key OFF. If the scan tool in connected or disconnected
with the ignition key ON, ABS diagnostic trouble codes may be
falsely stored and the ABS warning light may be illuminated.
The procedure listed below is to be used only as a guide, when using Chrysler's
DRB III, Mitsubishi's MUT-II, or equivalent scan tool. For specific operating
instructions, follow the directions supplied with the particular scan tool being
used.
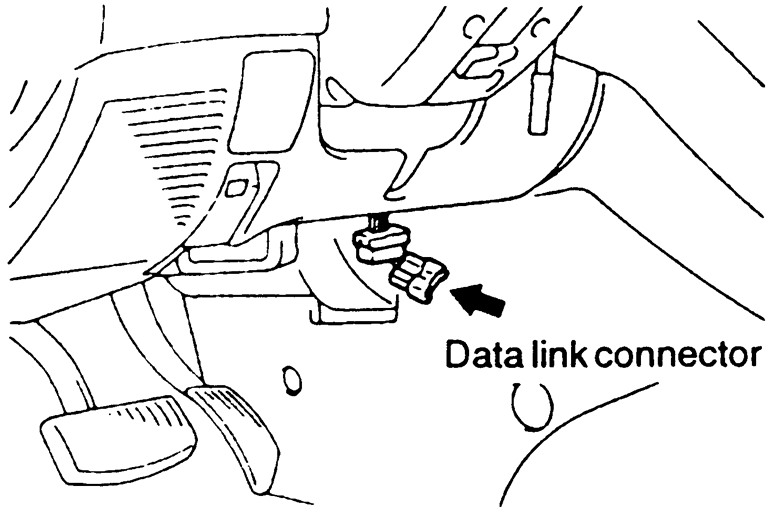
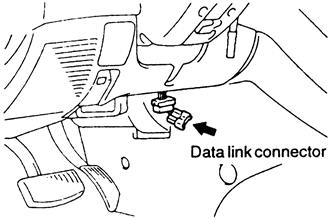
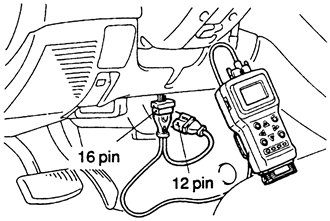
- Remove the under dash cover, if equipped. Connect the scan tool to the data
link connector, located on the left underside of the instrument panel.
| Fig. 1: The data link connector is located on the
left under side of the instrument panel
|
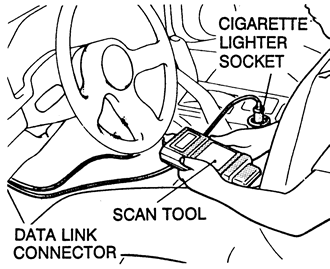
| Fig. 2: Proper connection of the scan tool to read
codes on 1990–94 vehicles
|
- Using the scan tool, read and record the on-board diagnostic output.
- Diagnose and repair the faulty components as required.
| Fig. 3: Connections for the scan tool and data link
connector to retrieve trouble codes on 1995–98 vehicles
|
- Turn the ignition switch OFF and then turn it ON.
- Erase the diagnostic trouble code.
- Recheck the diagnostic trouble code and make sure that the normal code is
output.
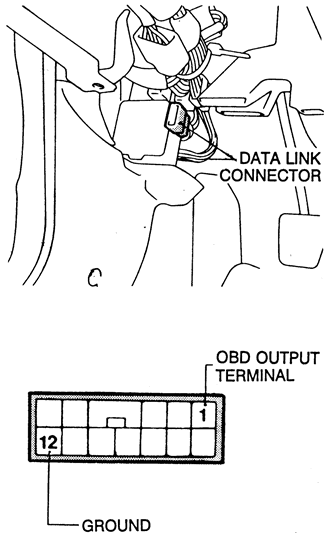
- Remove the under dash cover, if equipped.
- Connect an analog voltmeter between the on-board diagnostic output terminal
of the data link connector and the ground terminal.
| Fig. 4: Location of the On-Board Diagnostic (OBD)
output and ground terminal locations on the data link connector
|
- Turn the ignition switch ON.
- Read the on-board diagnostic output pattern from the voltmeter and record.
- Diagnose and repair the faulty components as required.
- Erase the trouble code.
- Turn the ignition switch ON, and read the diagnostic trouble
codes, checking that a normal code is output.
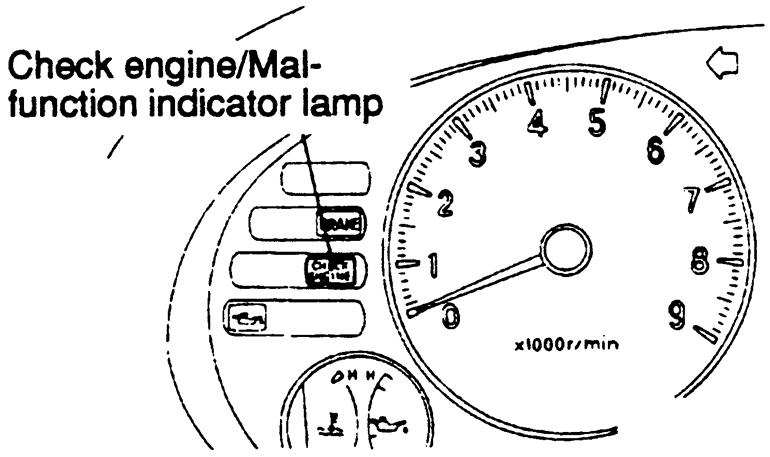
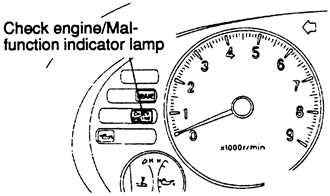
- Cycle the ignition key ON - OFF - ON - OFF - ON,
within 5 seconds.
- Count the number of times the check engine lamp on the instrument panel
flashes on and off. The number of flashes represents the trouble code. There
is a slight pause between the flashes representing the first and second digits
of the code. Longer pauses (about 4 seconds) separate individual trouble codes.
| Fig. 5: Count the check engine light flashes to get
the trouble codes
|
- Diagnose and repair the faulty components as required.
- Disconnect the negative battery cable for 10 or more seconds, then reconnect
the cable to the battery.
- Start the engine and let it run at idle for about 15 minutes after the engine
has reached normal operating temperatures.