Previous Next

Hood

REMOVAL & INSTALLATION

  1. Open the hood completely.
  2. Protect the cowl panel and hood from scratches during this operation. Apply protection tape or cover body surfaces before starting work.
  3. Scribe a mark showing the location of each hinge on the hood to aid in alignment during installation.

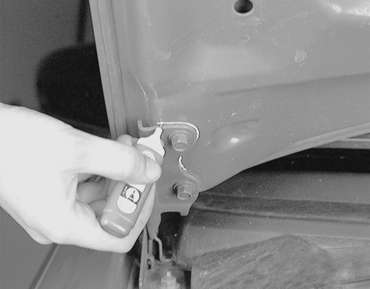
    Fig. 1: Use a paint marker to matchmark the installed position of the hood hinges

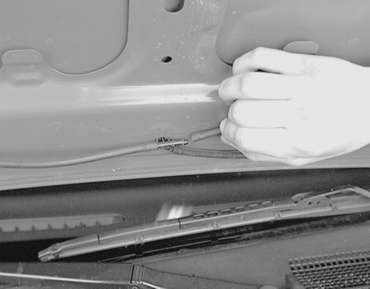
    Fig. 2: Unplug the windshield washer fluid connection from the center of the hood

  4. Have an assistant help hold the hood while you remove the hood-to-hinge bolts. Use care not to damage hood or vehicle during hood removal.

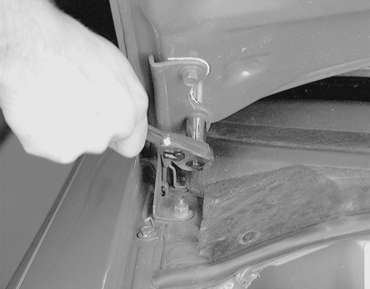
    Fig. 3: With an assistant supporting the hood, unfasten the retaining bolts

  5. Disconnect the connection for the washer tubes and nozzles. Lift the hood off of the vehicle.

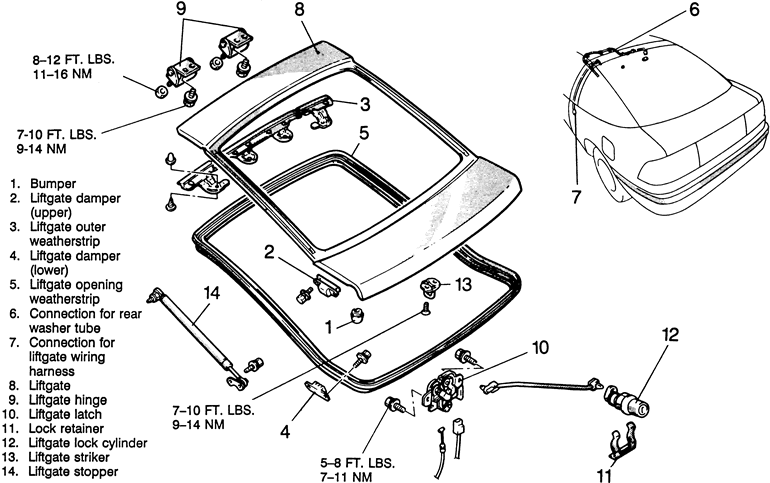
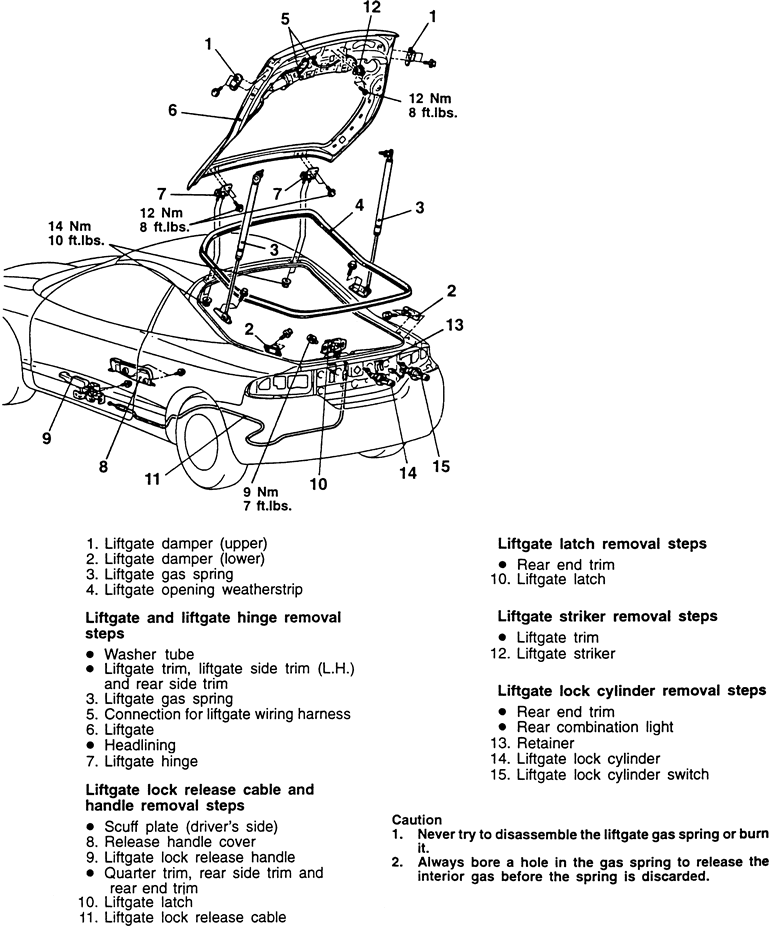
    Fig. 1: Liftgate and related components as seen on a 1993 Laser/Talon — 1990–94 vehicles similar

    Fig. 2: Exploded view of the rear liftgate assembly — 1995–98 vehicles

  6. Remove the liftgate-to-hinge bolts and remove the tailgate from the vehicle.

    To install:

  7. Position the liftgate on the vehicle and align the hinge scribe marks.
  8. Install the liftgate-to-hinge bolts and tighten to 8–10 ft. lbs. (12–14 Nm).
  9. Install the liftgate stopper and tighten mounting bolt, if removed.
  10. Install and reconnect the electrical harness to all connectors at the liftgate.
  11. Install all interior trim panels removed.
  12. Close the liftgate slowly to check for proper alignment. Adjust liftgate positioning, if necessary.

Previous Next