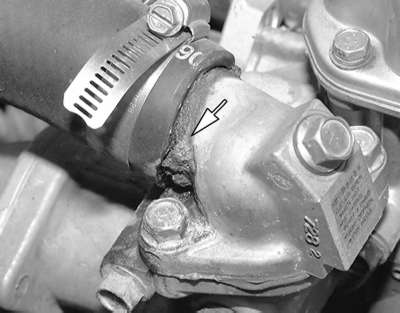
| Fig. 1: A visual inspection for leaks will sometimes
find a leak. This photo shows evidence of a leak at the upper radiator
hose-to-thermostat housing junction
|
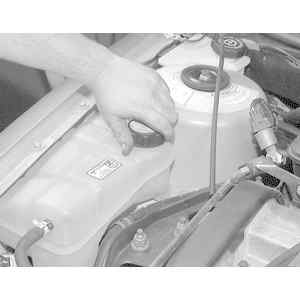
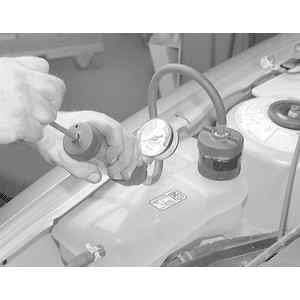
| Fig. 2: Remove the recovery tank cap to allow the pressure
tester to be connected to the system
|
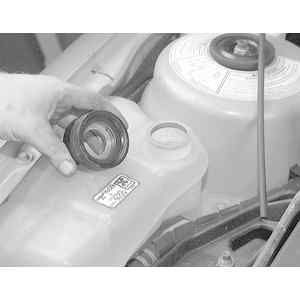
| Fig. 3: This cooling system requires a threaded adapter
for the recovery tank to allow the pressure tester to be connected
|
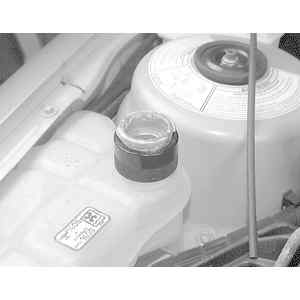
| Fig. 4: Thread the adapter onto the recovery tank
|
| Fig. 5: Pump the cooling system with pressure, making
sure not to overpressurize the system or damage can occur
|
| Fig. 6: Watch the gauge on the system and observe the
pressure reading
|
If a the fluid level of your cooling system is constantly low, the chances of a leak are probable. There are several ways to go about finding the source of your leak.
The first way should be a visual inspection. During the visual inspection, look around the entire engine area including the radiator and the heater hoses. The interior of the car should be inspected behind the glove box and passenger side floorboard area, and check the carpet for any signs of moisture. The smartest way to go about finding a leak visually is to first inspect any and all joints in the system such as where the radiator hoses connect to the radiator and the engine. Another thing to look for is white crusty stains that are signs of a leak where the coolant has already dried.
If a visual inspection cannot find the cause of your leak, a pressure test is a logical and extremely helpful way to find a leak. A pressure tester will be needed to perform this and if one is not available they can be purchased or even rented at many auto parts stores. The pressure tester usually has a standard size radiator cap adapter on the pressure port, however, other adapters are available based on the size of the vehicle's radiator neck or recovery tank depending on where the pressure tester connects. when pressurizing the cooling system, make sure you do not exceed the pressure rating of the system, which can be found on the top of the radiator cap, however, if you have and aftermarket or replacement cap that does not have the rating on it, 16psi is a standard to use but some cars are higher. Overpressurizing the system can cause a rupture in a hose, or worse, in the radiator or heater core and possibly cause an injury or a burn if the coolant is hot. Overpressurizing is normally controlled by the radiator cap which has a vent valve in it which is opened when the system reaches it's maximum pressure rating. To pressure test the system:
NOTE: The pressure test should be performed with the engine OFF.
Another way coolant is lost is by a internal engine leak, causing the oil to be contaminated or the coolant to be burned in the process of combustion and sent out the exhaust. To check for oil contamination, remove the dipstick and check the condition of the oil in the oil pan. If the oil is murky and has a white or beige "milkshake" look to it, the coolant is contaminating the oil through an internal leak and the engine must be torn down to find the leak. If the oil appears okay, the coolant can be burned and going out the tailpipe. A quick test for this is a cloud of white smoke appearing from the tailpipe, especially on start-up. On cold days, the white smoke will appear, this is due to condensation and the outside temperature, not a coolant leak. If the "smoke test" does not verify the situation, removing the spark plugs one at a time and checking the electrodes for a green or white tint can verify an internal coolant leak and identify which cylinder(s) is the culprit and aiding your search for the cause of the leak. If the spark plugs appear okay, another method is to use a gas analyzer or emissions tester, or one of several hand-held tools that most professional shops possess. This tools are used to check the cooling system for the presence of Hydrocarbons (HC's) in the coolant.