Crankshaft Damper
REMOVAL & INSTALLATION
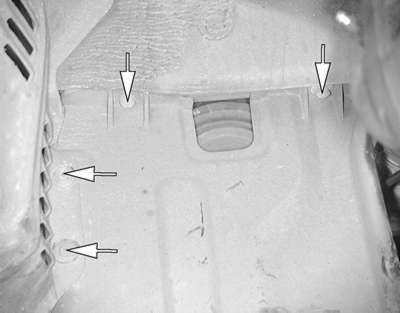
Fig. 1: Remove the fasteners, then remove the side inner fender splash shield
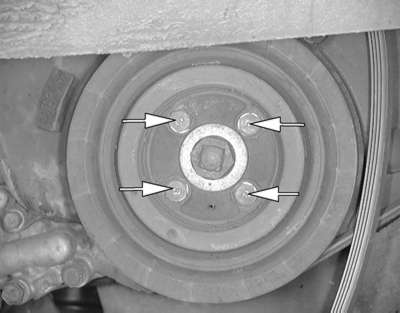
Fig. 2: Unfasten the crankshaft pulley retaining bolts, then remove the pulley
Disconnect the negative battery cable.
Remove the accessory drive belts from around the crankshaft pulley. Refer to Section 1.
Raise and support the vehicle.
Remove the passenger side front wheel.
Remove the passenger side inner fender splash shield to gain access to the crankshaft damper.
On the 1.5L, 1.6L, 2.0L and 2.4L engines, remove the pulley-to-sprocket bolts.
On the 1.5L, 1.8L, 3.0L and 3.5L engines, remove the crankshaft pulley center retaining bolt.
Remove the damper from the crankshaft using a suitable puller.
To install:
Place the damper onto the crankshaft, ensuring the key-way is aligned.
On the 1.5L, 1.8L, 3.0L and 3.5L engines, install the crankshaft pulley center retaining bolt and tighten the bolt as follows:
1.5L engine: 51–72 ft. lbs. (70–100 Nm)
1.8L and 3.5L engines: 134 ft. lbs. (185 Nm)
3.0L engines: 108–116 ft. lbs. (150–160 Nm)
On the 1.5L, 1.6L, 2.0L and 2.4L engines, install the pulley-to-sprocket bolts and tighten the bolts as follows:
1.5L engine: 10 ft. lbs. (14 Nm)
1.6L and 2.0L engines: 14–22 ft. lbs. (20–30 Nm)
2.4L engine: 18 ft. lbs. (25 Nm)
On the 1.6L and 2.0L engines, install the pulley-to-sprocket bolts and tighten them to 14–22 ft. lbs. (20–30 Nm).
Install the splash shield.
Install the wheel, then carefully lower the vehicle.
Install the accessory drive belts. Refer to Section 1.
Connect the negative battery cable.