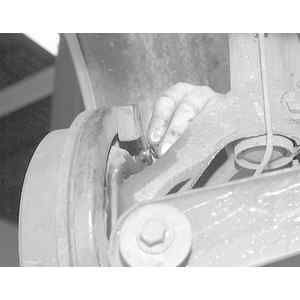
| Fig. 5: Remove the bleeder screw cap
|
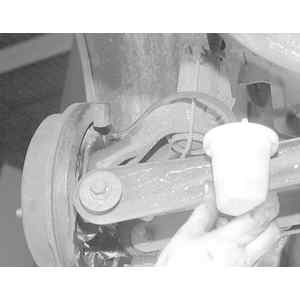
| Fig. 6: Install a hose and container to the bleeder screw
|
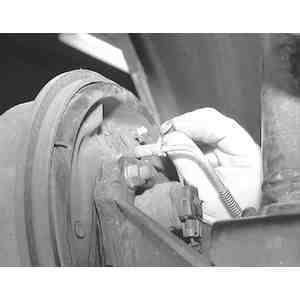
| Fig. 7: Slowly crack open the bleeder screw while an
assistant presses down the brake pedal
|
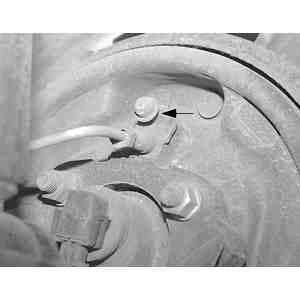
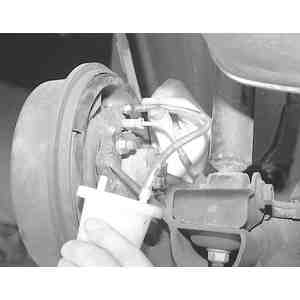
| Fig. 8: The bleed screw for the rear brakes is located
on the rear of the backing plate, just above the brake line
|
| Fig. 9: Remove the protective rubber cap for the bleed
screw
|
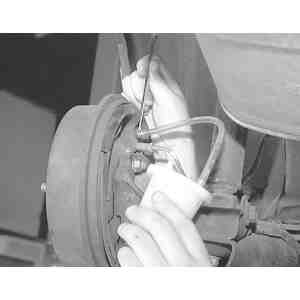
| Fig. 10: Attach a hose connected to a bottle with a small
amount of brake fluid in it to the bleed screw
|
| Fig. 11: Slowly open the bleed screw and have an assistant
depress the brake pedal while observing the hose for bubbles
|
| Fig. 12: Brake bleeding sequence — 1993
Galant
|
| Fig. 13: Brake bleeding sequence — Mirage
and Diamante
|
When any part of the hydraulic system has been disconnected for repair or replacement, air may get into the lines and cause spongy pedal action (because air can be compressed and brake fluid cannot). To correct this condition, it is necessary to bleed the hydraulic system so to be sure all air is purged.
When bleeding the brake system, bleed one brake cylinder at a time, beginning at the cylinder with the longest hydraulic line (farthest from the master cylinder) first. ALWAYS keep the master cylinder reservoir filled with brake fluid during the bleeding operation. Never use brake fluid that has been drained from the hydraulic system, no matter how clean it is.
The primary and secondary hydraulic brake systems are separate and are bled independently. During the bleeding operation, do not allow the reservoir to run dry. Keep the master cylinder reservoir filled with brake fluid.
CAUTION
Brake fluid contains polyglycol ethers and polyglycols. Avoid contact with
the eyes and wash your hands thoroughly after handling brake fluid. If you
do get brake fluid in your eyes, flush your eyes with clean, running water
for 15 minutes. If eye irritation persists, or if you have taken brake fluid
internally, IMMEDIATELY seek medical assistance.