CAUTION
Brake pads and shoes contain asbestos, which has been determined to be a cancer
causing agent. Never clean the brake surfaces with compressed air! Avoid inhaling
any dust from brake surfaces! When cleaning brakes, use commercially available
brake cleaning fluids.
NOTE: Do not let air into the master cylinder by allowing the reservoir to empty or complete system bleeding will be required.
To install
NOTE: Use caution not to twist brake hose during installation.
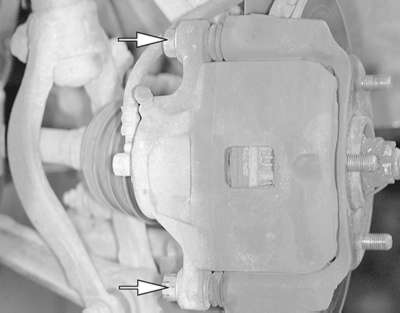
| Fig. 2: The brake caliper is mounted to the caliper
support with two bolts
|
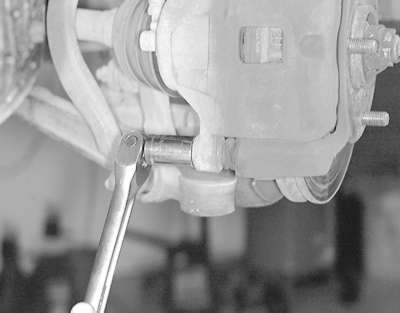
| Fig. 3: Remove the brake caliper-to- caliper support
retaining bolts
|
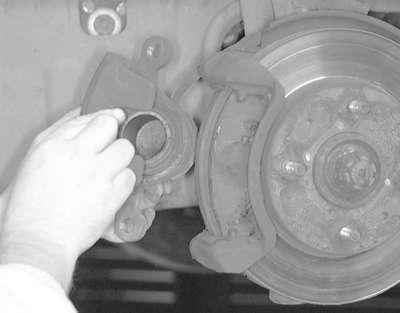
| Fig. 4: Grasp the caliper and lift it from the caliper
assembly from the caliper support
|
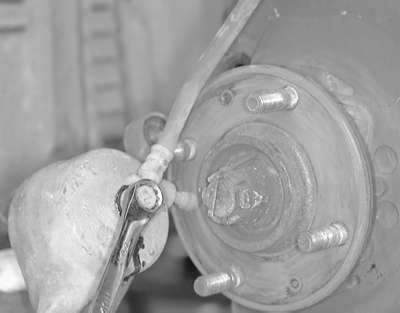
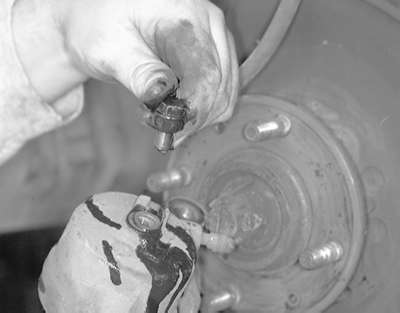
| Fig. 5: Loosen the caliper hose banjo bolt . . .
|
| Fig. 6: . . . then remove the bolt from the fitting
|
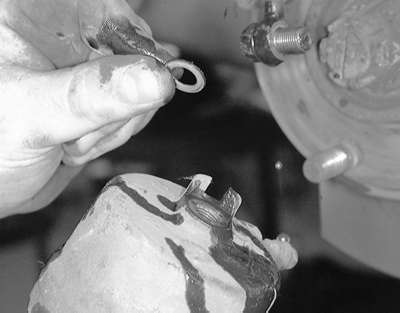
| Fig. 7: Make sure that you remove the copper washers
and replace them with new ones during reassembly
|
Unlike most rear disc brake designs, this system does not incorporate the parking brake system into the rear brake caliper. Therefore, the rear brake system is serviced the same as the front system.
NOTE: Do not allow the master cylinder reservoir to empty. An empty reservoir will allow air to enter the entire brake system and complete system bleeding will be required.
CAUTION
Brake fluid contains polyglycol ethers and polyglycols. Avoid contact
with the eyes and wash your hands thoroughly after handling brake fluid.
If you do get brake fluid in your eyes, flush your eyes with clean, running
water for 15 minutes. If eye irritation persists, or if you have taken
brake fluid internally, IMMEDIATELY seek medical assistance.
To install
NOTE: Use caution not to twist the brake hose during installation.
WARNING
Clean, high quality brake fluid is essential to the safe and proper operation
of the brake system. You should always buy the highest quality brake fluid
that is available. If the brake fluid becomes contaminated, drain and
flush the system, then refill the master cylinder with new fluid. Never
reuse any brake fluid. Any brake fluid that is removed from the system
should be discarded. Also, do not allow any brake fluid to come in contact
with a painted surface; it will damage the paint.