Previous Next

Wheel Cylinders

REMOVAL & INSTALLATION

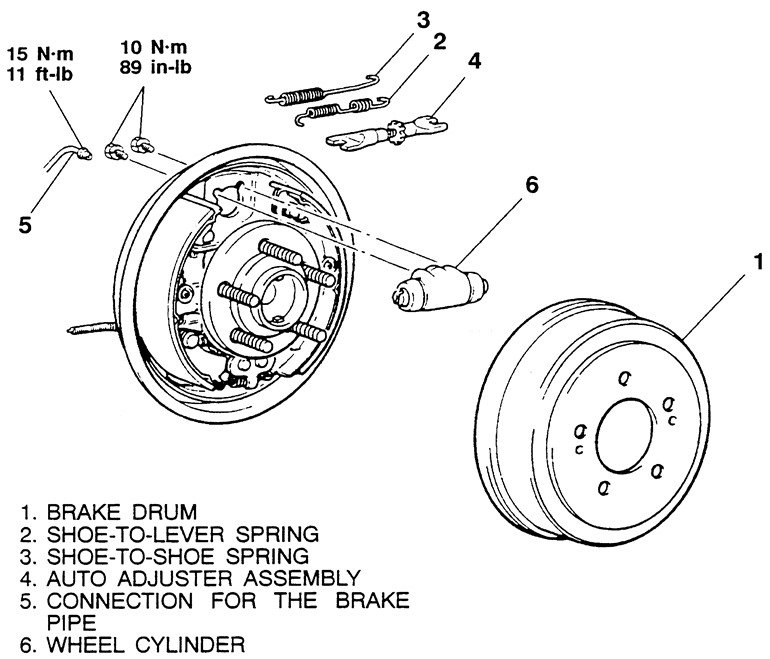
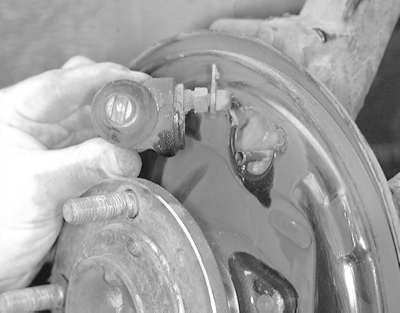
Fig. 1: Wheel cylinder removal — Galant

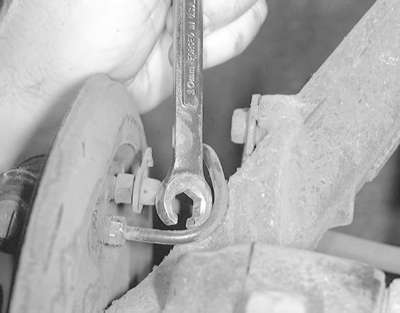
Fig. 2: Use an appropriate size wrench to remove the brake line from the wheel cylinder

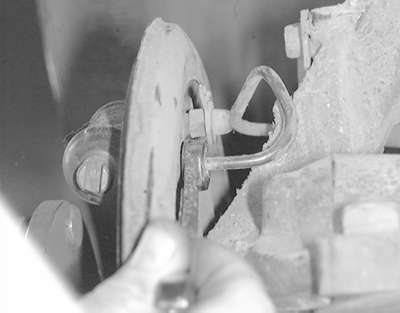
Fig. 3: When the line is sufficiently loosened, brake fluid will flow out of the fitting

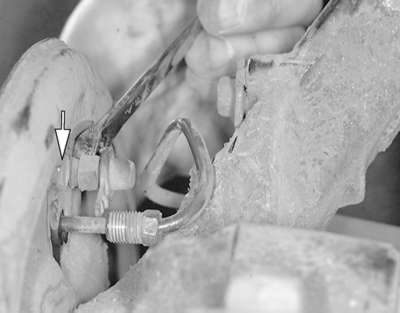
Fig. 4: The wheel cylinder is held by two retaining bolts; remove the bolts . . .

Fig. 5: . . . then remove the wheel cylinder from the backing plate

  1. Safely raise and support the vehicle.
  2. Remove the rear wheel and the drum.
  3. Remove the spring on the adjuster lever.
  4. Remove the shoe-to-shoe spring.
  5. Remove the auto adjuster assembly.

    NOTE: Special flare nut wrenches should be used on all line fittings to prevent damage to the flats on the nut.

  6. Place a drain pan under the wheel to catch the brake fluid and disconnect the brake line from the rear of the wheel cylinder.
  7. Remove the wheel cylinder mounting bolts and the wheel cylinder.

    To install:

  8. Install the wheel cylinder on the backing plate. Tighten the mounting bolts to 7 ft. lbs. (10 Nm).
  9. Connect the brake line the wheel cylinder. Tighten the line fitting to 11 ft. lbs. (15 Nm).
  10. Add brake fluid to the reservoir and leave the wheel cylinder bleeder screw loose. Brake fluid will start the flow into the wheel cylinder and may save time when bleeding the brake system later.
  11. Install the auto adjuster assembly.
  12. Install the shoe-to-shoe spring.
  13. Install the spring on the adjuster lever.
  14. Install the drum and the wheel assembly.
  15. Lower the vehicle and bleed the brake system.

Previous Next