To install:
NOTE: The intake camshaft has a J stamped on the hexagon and the exhaust camshaft has a K or N.
NOTE: Be sure to keep the valvetrain components labeled and in proper order for reassembly.
To install:
NOTE: Lubricate the valvetrain components with clean engine oil.
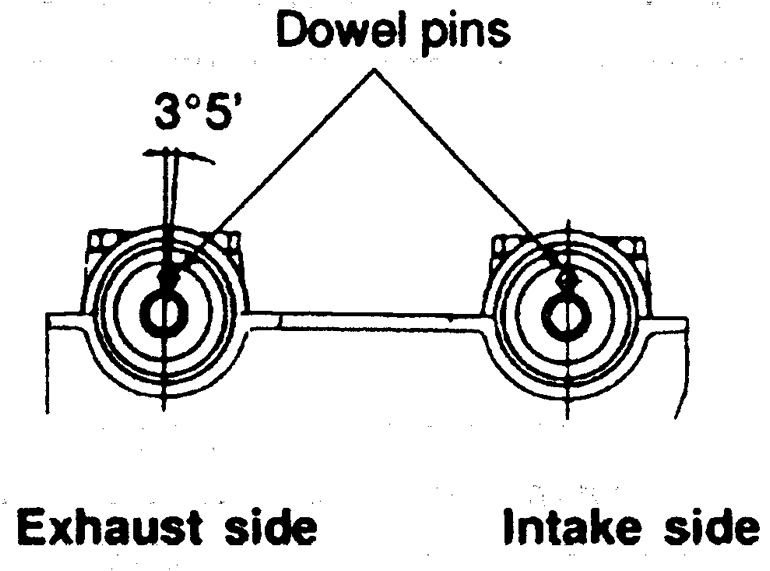
| Fig. 1: Proper positioning of the camshaft knock
pins — Diamante 3.0L DOHC engine
|
WARNING
Be sure to properly position the knock pins of the camshaft to prevent valve
to piston interference.
NOTE: The intake camshaft on the Diamante has a B or J stamped on the hexagon. The exhaust camshaft on the Diamante has a D or K stamped on the hexagon.
NOTE: Be sure to note the position of the rocker arms, rocker shafts and bearing caps for reinstallation purposes.
To install:
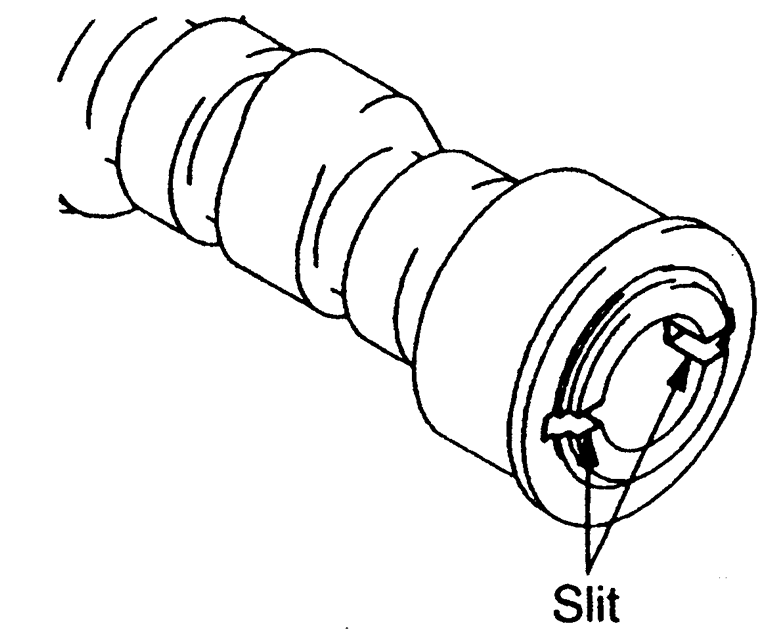
NOTE: The right bank camshaft is identified by a 4mm slit at the rear end of the camshaft.
| Fig. 2: Right bank camshaft identification — Diamante
3.0L SOHC engine
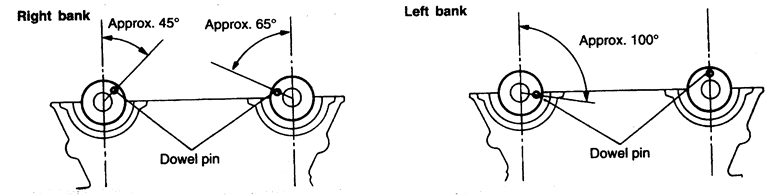
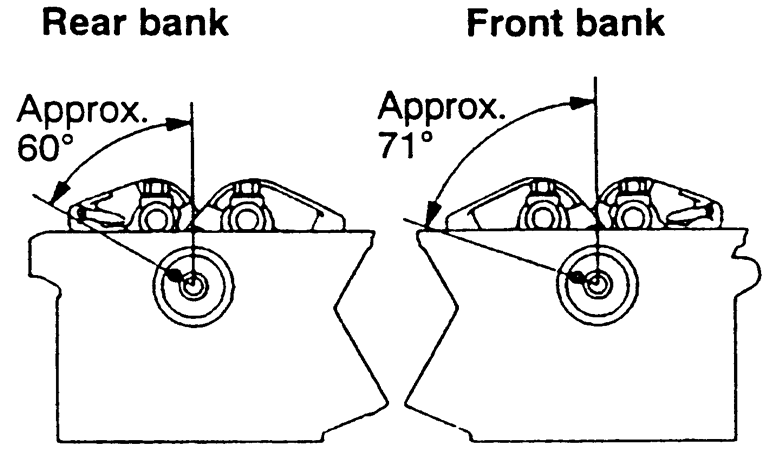
|
| Fig. 3: Proper positioning of the camshafts — Diamante
3.0L SOHC engine
|
| Fig. 4: Alignment of the rocker shafts and application
of sealant — Diamante 3.0L SOHC engine
|
To install:
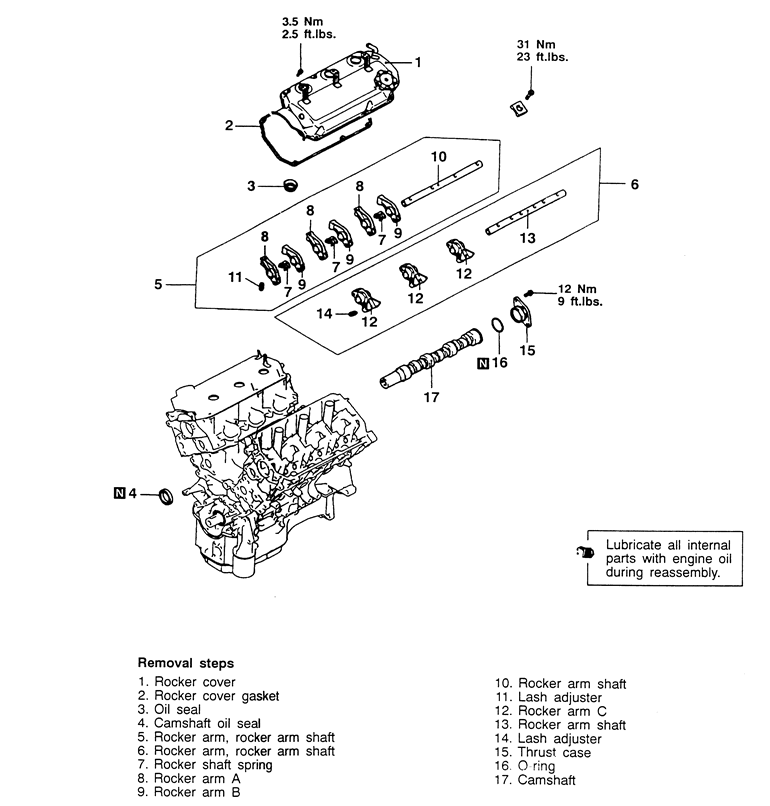
| Fig. 5: Exploded view of the camshaft mounting — 3.5L
engine
|
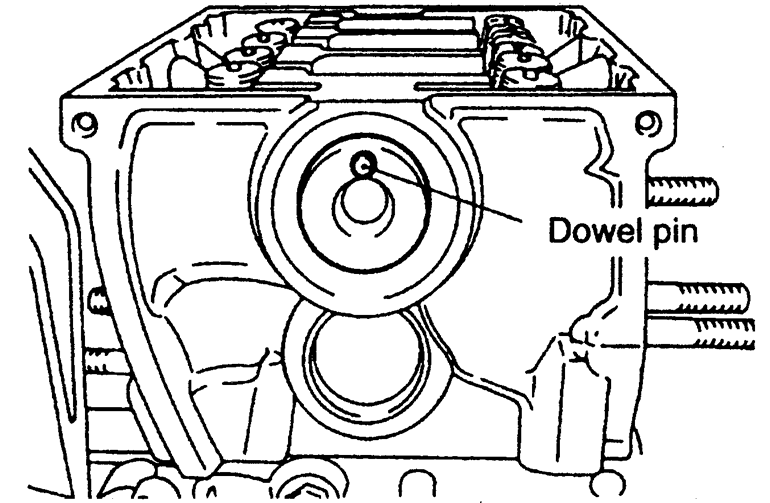
| Fig. 6: Camshaft dowel position during installation — 3.5L
engine
|
| Fig. 7: Position the camshafts with the dowels facing
up — Eclipse 2.0L (4G63) engine
|
To install:
NOTE: Bearing caps and rocker arms must be installed in the same location that they were removed from.
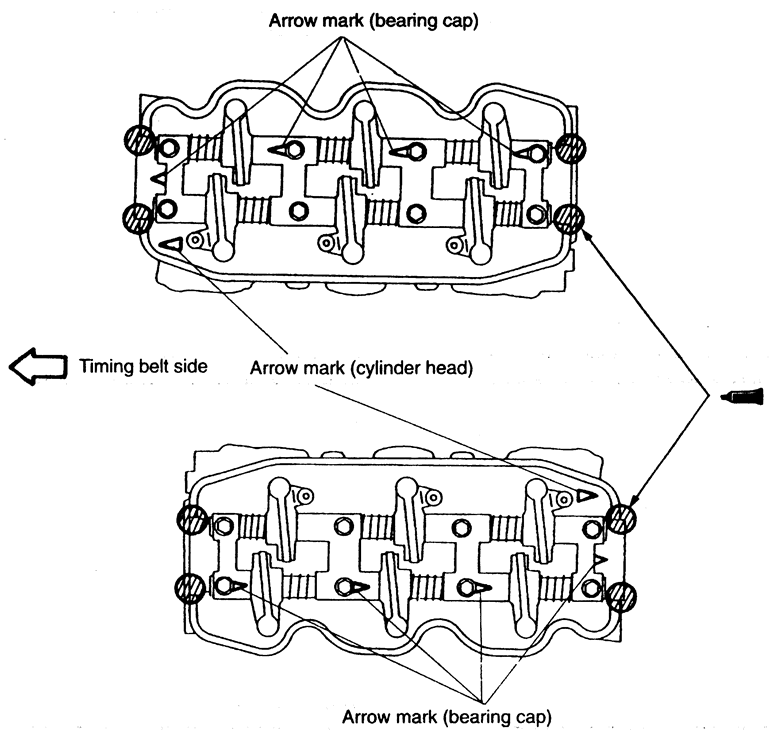
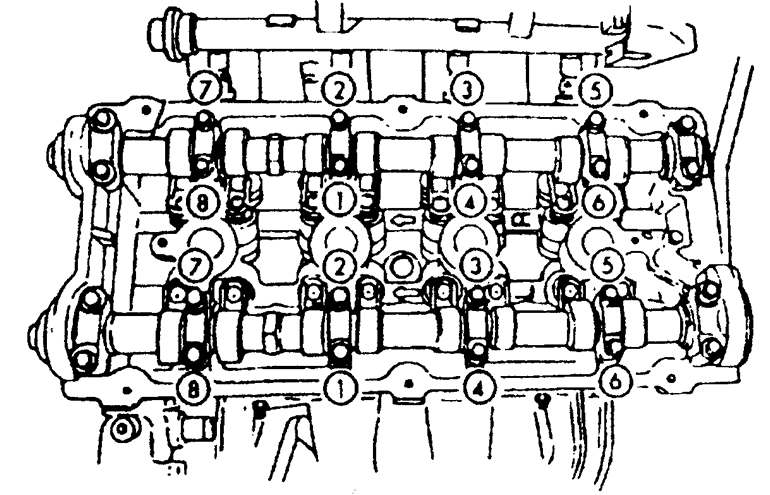
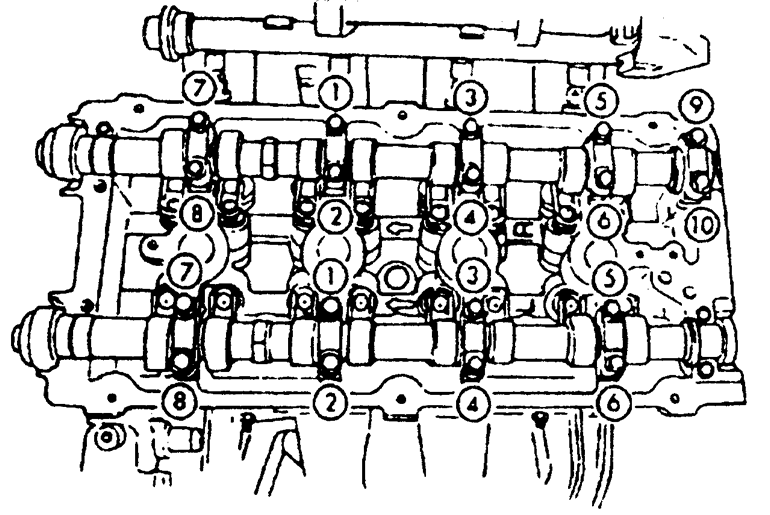
| Fig. 8: Camshaft bearing cap bolt removal sequence — Eclipse
2.0L (420A) engine
|
NOTE: Keep the bearing caps in order. They must be installed in the location that they were removed from.
To install:
| Fig. 9: Camshaft bearing cap bolt installation sequence — Eclipse
2.0L (420A) engine
|
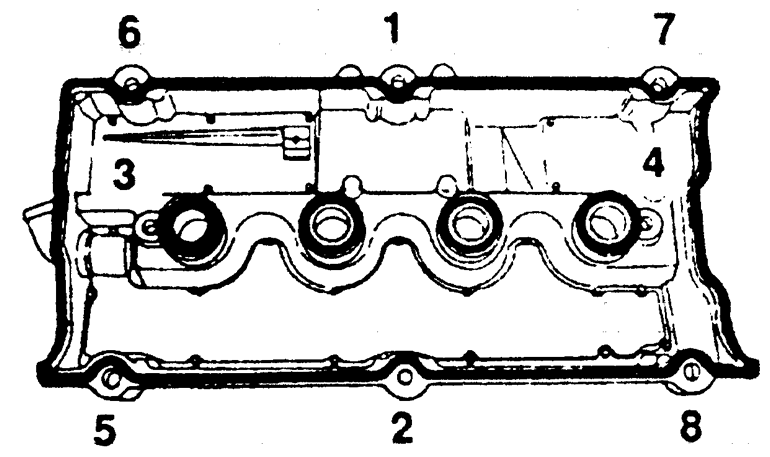
| Fig. 10: Tighten the cylinder head cover bolts
in the sequence shown — Eclipse 2.0L (420A) engine
|
To install:
To install:
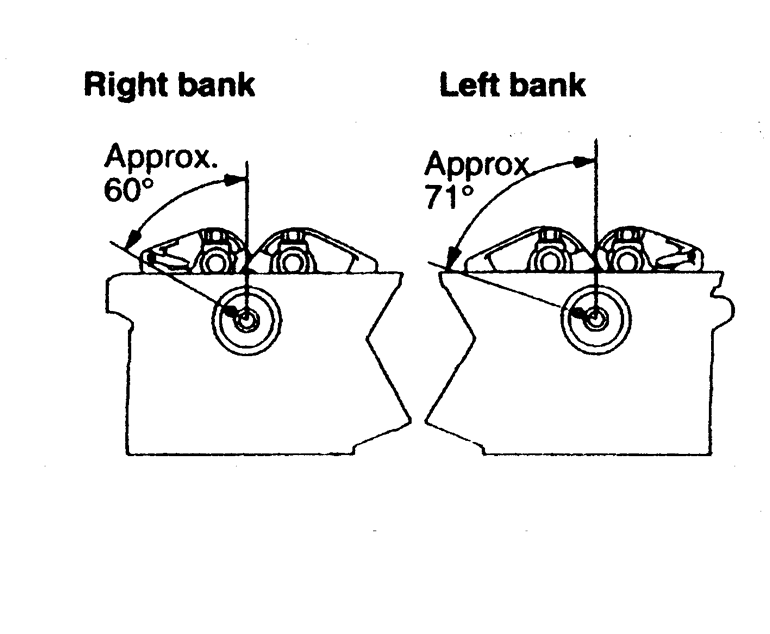
| Fig. 11: Camshaft identification — 2.4L
(4G64) engine
|
To install:
| Fig. 12: Positioning of the camshaft dowel pin — Mirage
1.5L (4G15) engine
|
To install: