To install:
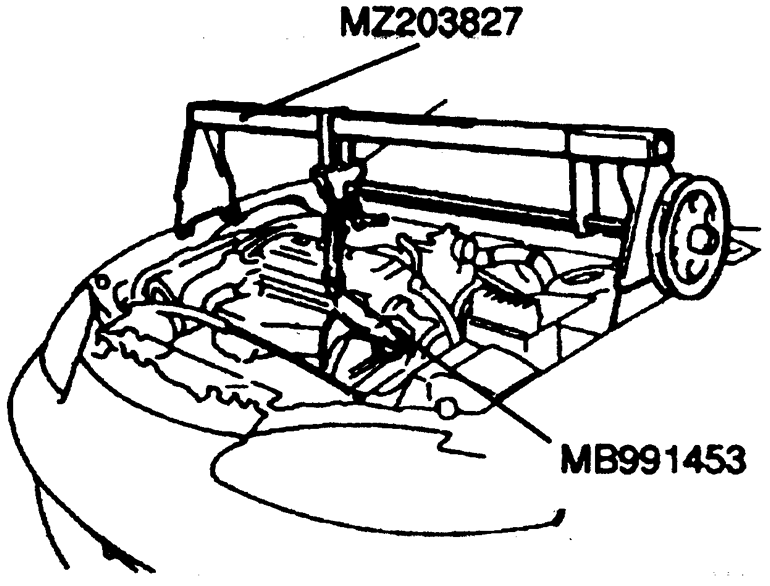
| Fig. 1: Proper method of supporting the engine
assembly for transaxle removal
|
To install:
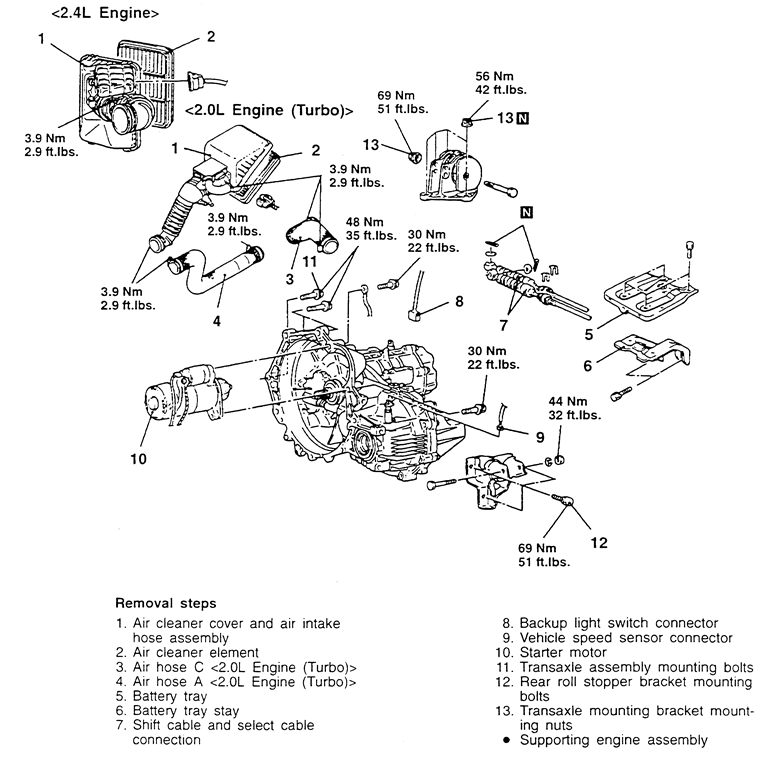
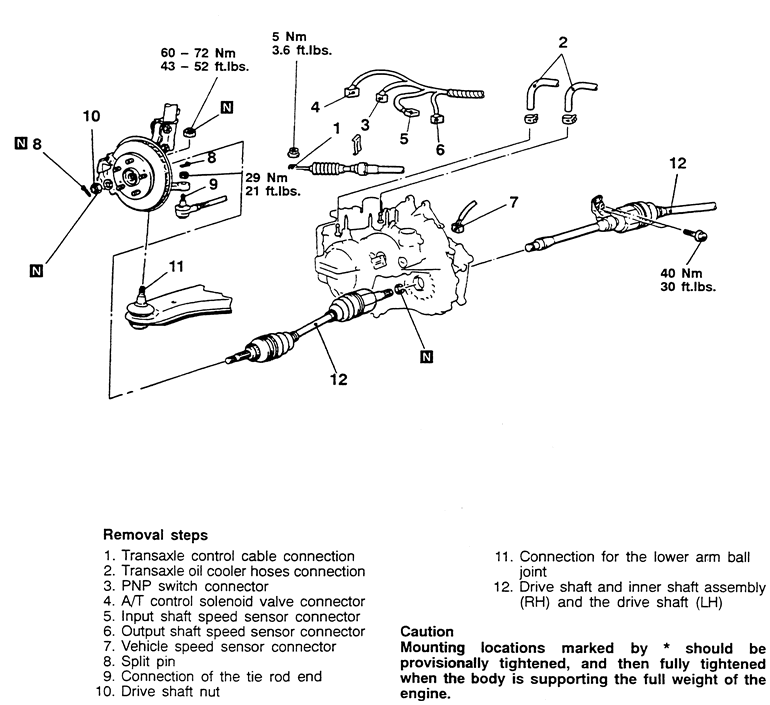
| Fig. 2: Exploded view of the manual transaxle
mounting (1 of 2) — FWD Eclipse with 2.4L engine
|
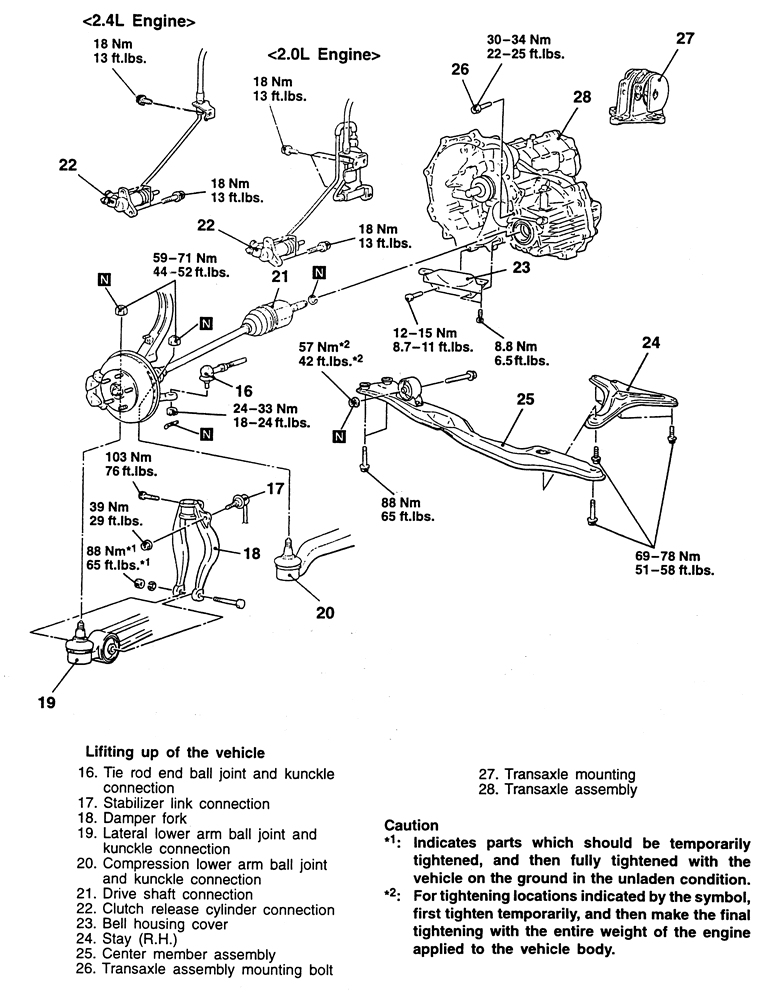
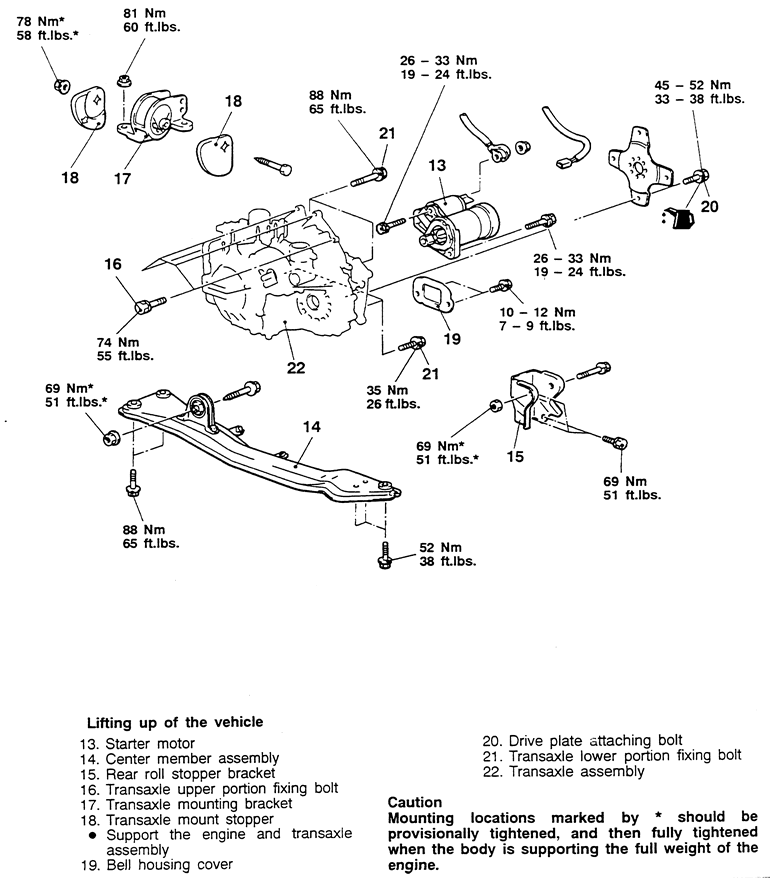
| Fig. 3: Exploded view of the manual transaxle
mounting (2 of 2) — FWD Eclipse with 2.4L engine
|
NOTE: The coupling bolt threads from the engine side into the transaxle and is located just above the halfshaft opening.
To install:
To install:
NOTE: When installing the halfshafts, use new circlips on the axle ends.
To install:
| Fig. 4: Location of 4-wheel steering oil pump mounting
bolts — Diamante with a F4A33 automatic transaxle
|
To install:
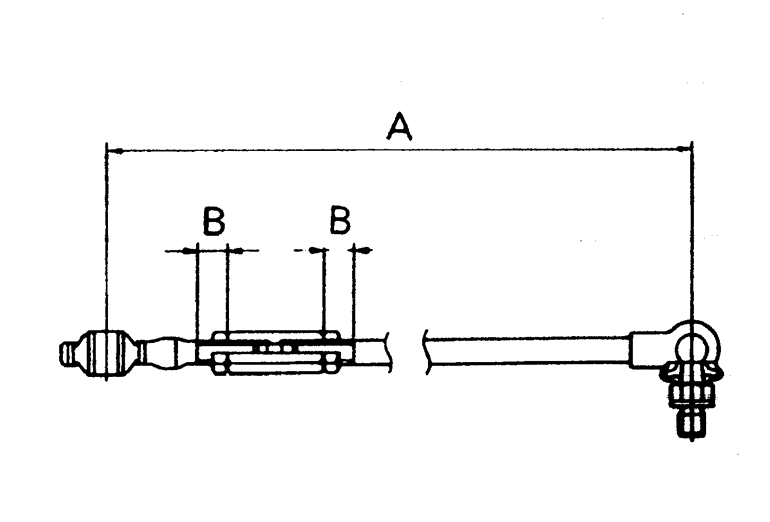
| Fig. 5: Height sensor rod adjustment — Diamante
with a F4A33 automatic transaxle
|
NOTE: One of the upper bolts has a grounding strap to secure under the bolt.
| Fig. 6: Transaxle removal — Diamante
with F4A51 transaxle 1 of 2
|
| Fig. 7: Transaxle removal — Diamante
with F4A51 transaxle 2 of 2
|
To install:
NOTE: The coupling bolt threads from the engine side into the transaxle and is located just above the halfshaft opening.
To install:
To install: