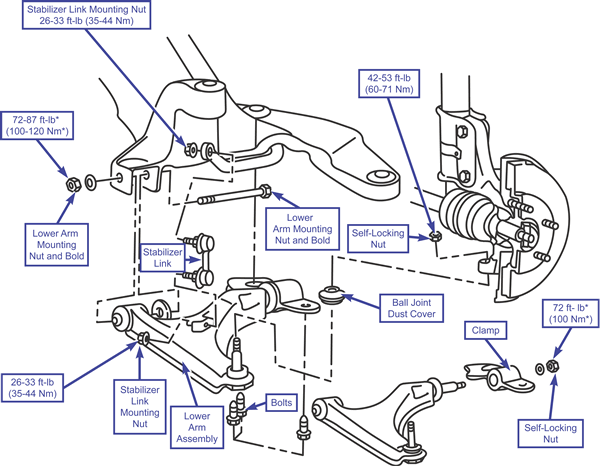
To Remove:
NOTE: Fasteners marked with * should be hand tightened until the vehicle is back on the ground, then they should be fully torqued to their specifications.
- Remove the stabilizer link mounting nuts.
- Remove the stabilizer link.
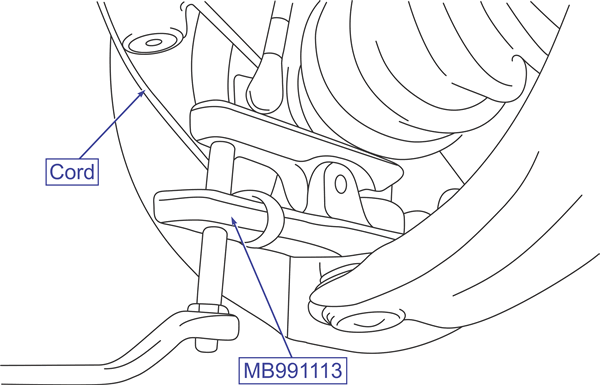
NOTE: Make sure to tie the cord on the special tool (MB991113) to a part. Also, loosen the nut but do not remove it.
- Remove the self-locking nut to disconnect the Lower Arm Ball Joint and Knuckle.
- Remove the lower arm mounting nut and bolt and the additional bolts under the lower arm assembly.
- Remove the lower arm assembly.
- Remove the ball joint dust cover.
- Remove the self-locking nut and the clamp.
To Install:
NOTE: Fasteners marked with * should be hand tightened until the vehicle is back on the ground, then they should be fully torqued to their specifications.
- Install the clamp.
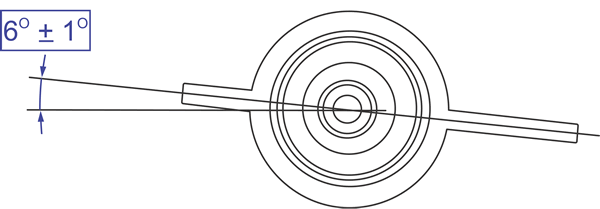
- First, position the clamp at the angle shown in the illustration, then install the self-locking nut.
- Install the ball joint dust cover.
- Install the lower arm assembly and the bolts underneath it.
- Install the lower arm mounting nut and bolt.
- Install the self-locking nut.
- Install the stabilizer link.
- Install the stabilizer link mounting nuts.