Previous Next

Shock Absorber

REMOVAL & INSTALLATION

Front

Fig. 1: Common shock absorber and upper control arm components

  1. Before servicing the vehicle, refer to the precautions in the beginning of this section.
  2. Remove the upper shock mounting nut, washer and bushing.
  3. Remove the lower mounting bolts.
  4. Remove the shock absorber.

    To install:

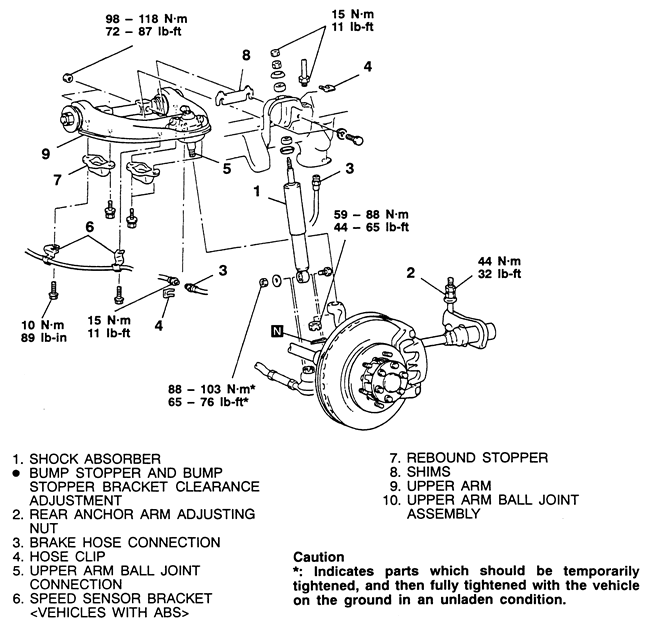
    NOTE: If the shock absorber has a white paint mark on the lower end, be sure the mark faces the outside of the vehicle when installed.

  5. Install the shock absorber. Torque the lower nut to 65-76 ft. lbs. (88-103 Nm) and the upper nut to 11 ft. lbs. (15 Nm).
  6. Test drive the vehicle and check the alignment.
Rear
  1. Before servicing the vehicle, refer to the precautions in the beginning of this section.
  2. Support the rear axle assembly with a hydraulic floor jack, so that the shock absorber may be removed.
  3. Remove the upper and lower mounting nuts and bolts that attach the shock to the frame and bracket.
  4. Remove the shock absorber from the vehicle.

    To install:

  5. Install the shock absorber
  6. Remove the floor jack from under the axle assembly.

Previous Next