To Remove:
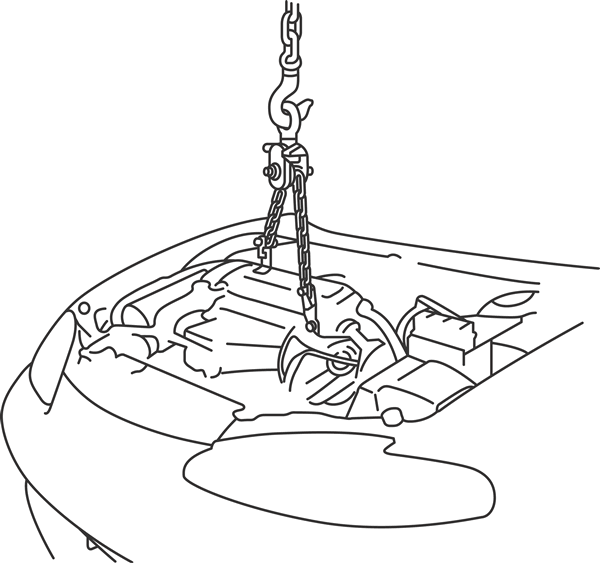
| Engine removal/installation
|
To Install:
To Remove:
| Engine removal/installation
|
To Install:
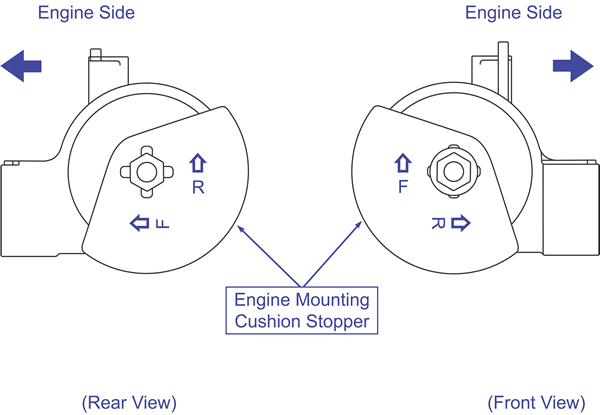
| Engine mount stopper installation direction
|
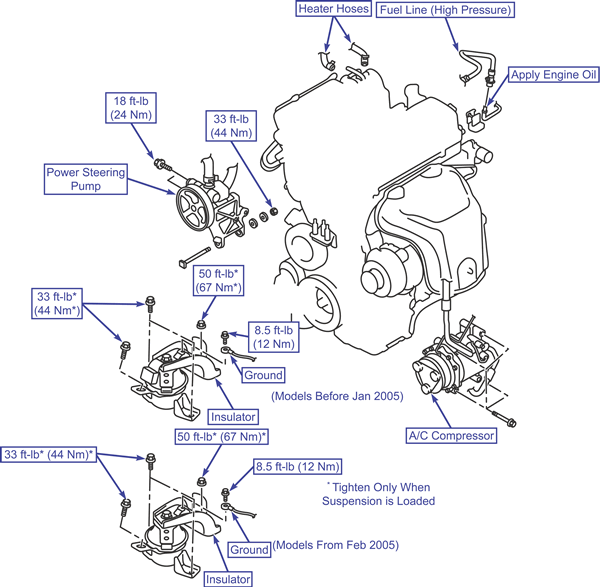
To Remove:
| Engine mount insulator removal/installation (2.4L)
|
| Engine removal/installation
|
To Install: