To Remove:
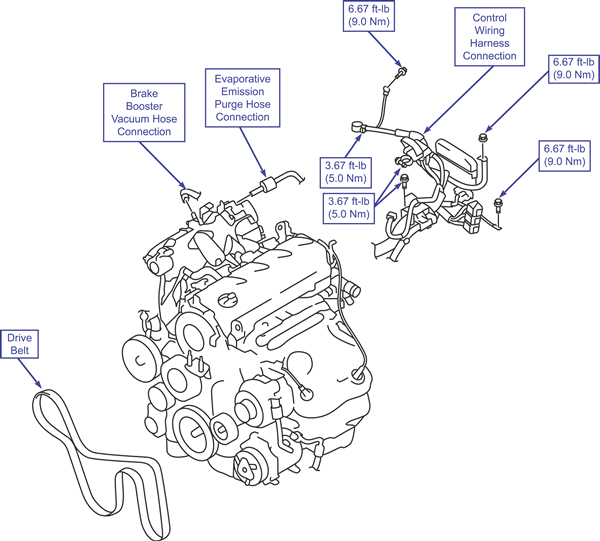
| Engine assembly (2.4L) 1st view
|
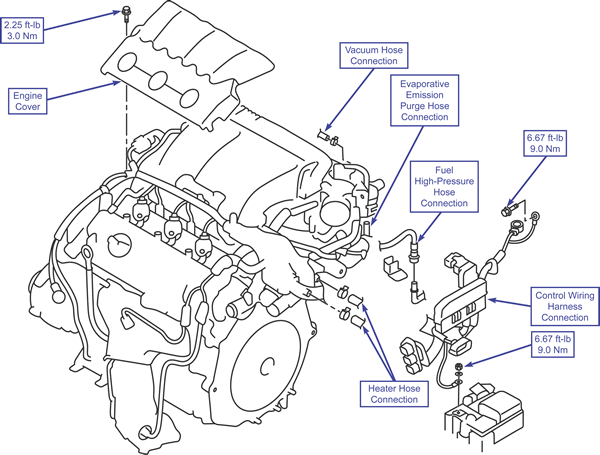
| Engine assembly (2.4L) 2nd view
|
CAUTION
If you plan to reuse the drive belt, use chalk to draw an arrow on the back of the belt to show the rotating direction.
CAUTION
When removing the transaxle assembly on a manual transmission vehicle, do not remove the flywheel bolt because the flywheel assembly will then be out of balance and get damaged.
To Install:
| Engine assembly (2.4L) 1st view
|
| Engine assembly (2.4L) 2nd view
|
CAUTION
Once the fuel high-pressure hose is connected, slightly pull on it to ensure it is properly installed. Also check to make sure there is a play of about 0.12 in (3 mm). After that, install the stopper.
To Remove:
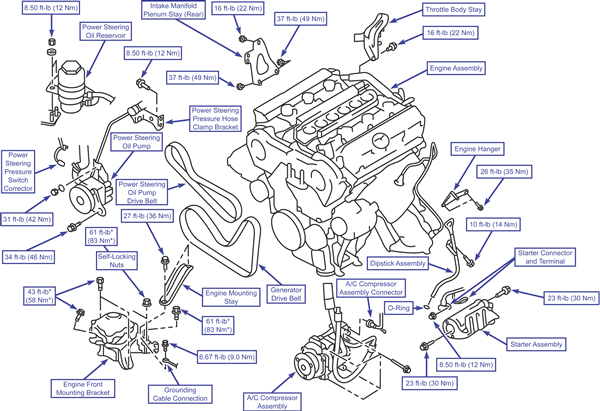
| Engine assembly (3.8L) 1 of 2
|
| Engine assembly (3.8L) 2 of 2
|
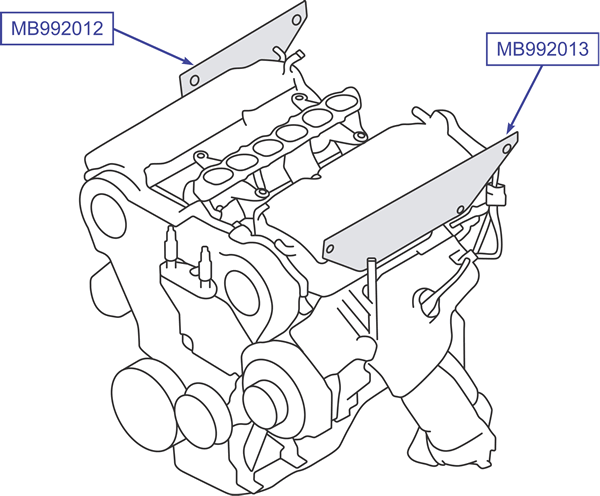
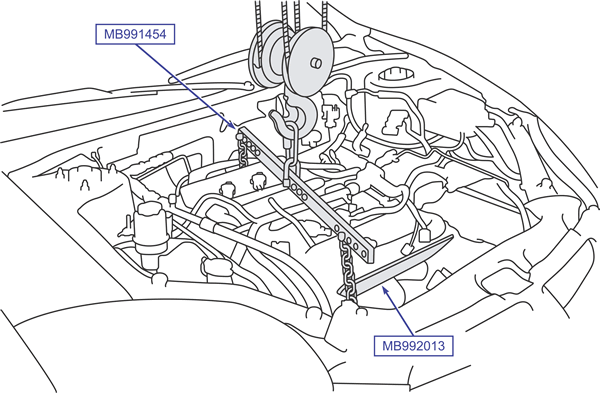
NOTE: Once you remove the intake manifold plenum stay (rear), throttle body stay, engine oil dipstick assembly, and engine hanger, place the engine hanger plates (special tools #MB992012 and #MB992013) as shown.
| Engine hanger plates (3.8L)
|
| Engine hanger balancer #MB991454
|
To Install:
| Engine assembly (3.8L) 1 of 2
|
| Engine assembly (3.8L) 2 of 2
|
| Engine hanger balancer #MB991454
|
NOTE: The engine hanger balance can be adjusted by sliding the slide bracket.
CAUTION
Once you have connected the fuel high-pressure hose, lightly pull it to make sure that it is installed correctly. Be certain there is a play approximately 0.12 in (3 mm). Then install the stopper properly.