Previous Next

REMOVAL

  1. Remove the cylinder head, following correct procedures listed earlier in this section.
  2. Remove the oil pan, following correct procedures listed earlier in this section.
  3. The connecting rods are marked to indicate which surface faces front, but the bearing caps should be matchmarked with numbers (front to rear) before disassembly. Use a marking punch and a small hammer; install the number over the seam so that each piece will be re-used in its original location.
  4. Remove the connecting rod cap bolts, pull the caps off the rods, and place them on a bench in order.

    Fig. 1: Exploded view of pistons, connecting rods and related parts — 2.6L engine

    Fig. 2: Mark the side of the piston rod and rod cap with the cylinder number

    Fig. 3: Place lengths of rubber hose over the connecting rod studs in order to protect the crankshaft and cylinders from damage

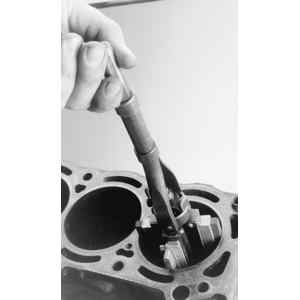
    Fig. 4: Carefully tap the piston out of the bore using a wooden dowel

    Fig. 5: Use a ring expander tool to remove the piston rings

    Fig. 6: Clean the piston grooves using a ring groove cleaner

    Fig. 7: A piece of an old ring can be used to clean out the grooves, BUT be careful — the ring is very sharp

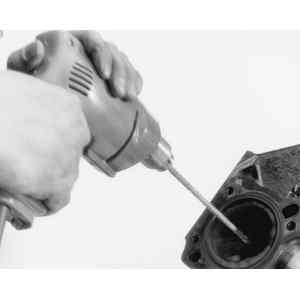
    Fig. 8: Remove the glazing on the cylinder walls with a flexible drill hone

    Fig. 9: Remove the ridge from the cylinder bore using a ridge cutter

  5. Inspect the upper portions of the cylinder (near the head) for a ridge formed by ring wear. If there is a ridge, it must be removed by first shifting the piston down in the cylinder and then covering the piston top completely with a clean rag. Use a ridge reamer to remove metal at the lip until the cylinder is smooth. If this is not done, the rings will be damaged during removal of the piston.
  6. Once the ridges have been removed, the pistons and rods may be pushed upward and out of the cylinders. Place pieces of rubber tubing over the rod bolts to protect the cylinder walls. Use a piece of wood or a hammer handle under the piston to tap it upward.If you're working under an engine that's still installed in the vehicle with the crankshaft still in position, turn the crankshaft until the crankpin for each cylinder is in a convenient position. Be careful not to subject the piston and/or rod to heavy impact and do not allow the piston rod to damage the cylinder wall on the way out. The slightest nick in the metal can cause problems after reassembly.
  7. Clean the pistons, rings and rods in parts solvent with a bristle brush. Do not use a wire brush, even to remove heavy carbon. The metal may be damaged. Use a piston groove cleaner to clean the lands (grooves) in the piston.

Previous Next