WARNING
The air conditioning lines and pipes are easily damaged. Always counterhold
joints with a second wrench when loosening or tightening. Start each connection
by hand to insure correct threading. Tighten joints only to the correct torque;
the seal is established by the O-ring, not by the tightness of the fitting.
- Disconnect the negative battery cable.
- Using an approved R-12 or R-134a recovery/recycyling station, safely discharge
the air conditioning system. See Section 1.
- Remove the glove box.
- Remove the air duct just below the glove box.
- Remove the defroster duct.
- Loosen the duct joint beside the evaporator case.
- Disconnect the electrical harness for the relays and switch.
- In the engine compartment, use two wrenches and carefully disconnect the
pipe joints running to the condenser.
- Disconnect the drain hose from the case.
- Remove the retaining nuts and bolts and remove the cooling unit from the
truck.
- After repairs, carefully install the assembled case into the vehicle. Tighten
the mounting bolts and nuts. Connect the drain hose to the case.
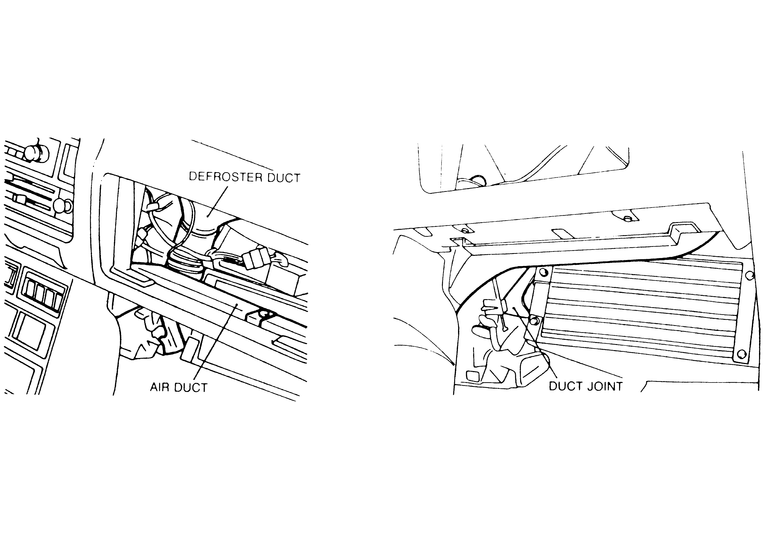
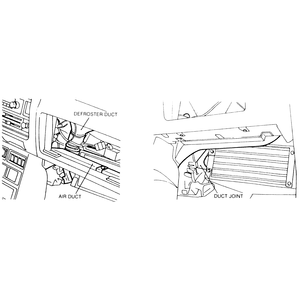
| Fig. 1: All ducts must be loosened or removed to
gain access to the evaporator assembly — 1983–86
Pick-ups
|
- Replace the O-rings and connect the lines in the engine compartment.
- Connect the wiring to the relays and switch behind the dash to their wiring
harnesses.
- Secure the duct joint.
- Install the defroster duct and the small lap heater duct (behind the glove
box).
- Install the glove box.
- Connect the negative battery cable.
- Using an approved R-12 or R-134a recovery/recycyling station, evacuate and
recharge the air conditioning system. See Section 1.
- Disconnect the negative battery cable.
- Using an approved R-12 or R-134a recovery/recycyling station, safely discharge
the air conditioning system. See Section 1.
- In the engine compartment, use two wrenches to carefully disconnect the
liquid line and the suction line at the firewall fittings.
- Remove the retaining nut, located just above the hoses.
- Remove the glove box from the dashboard.
- Remove the defroster duct.
- Disconnect the main electrical harness connector running to the evaporator
case.
- Loosen the duct joint between the evaporator case and the heater case.
- Remove the drain hose.
- Remove the retaining bolts and remove the evaporator case from the vehicle.
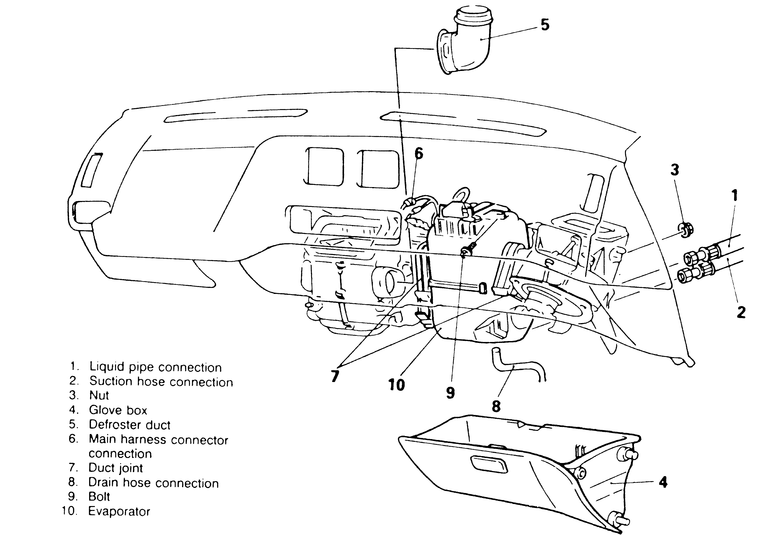
| Fig. 2: Air conditioning evaporator case and core
assembly — 1983–91 Monteros
|
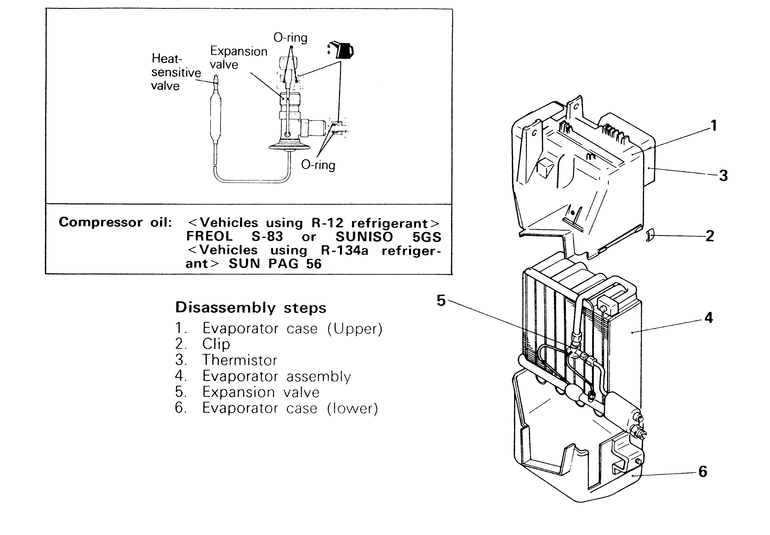
| Fig. 3: Disassembly and assembly components of the
air conditioning evaporator unit — 1983–91 Monteros
|
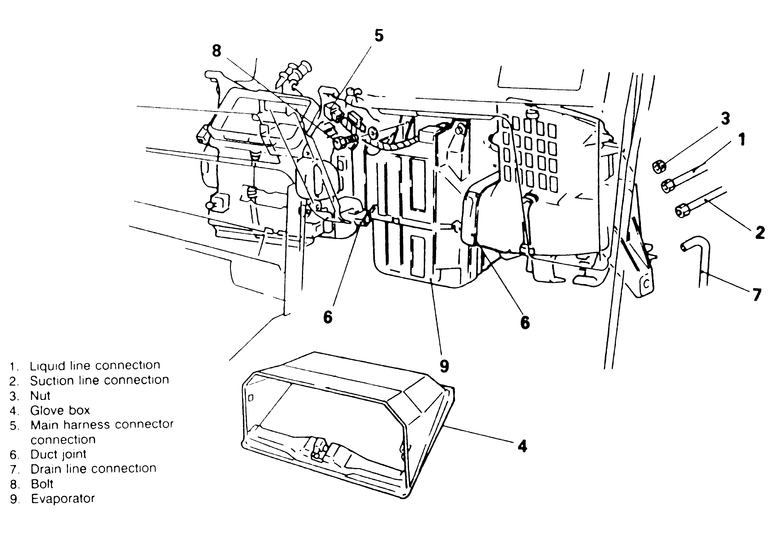
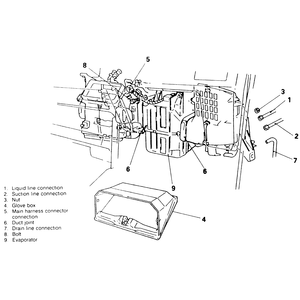
| Fig. 4: Air conditioner removal and installation
components — 1987–95 Pick-ups
|
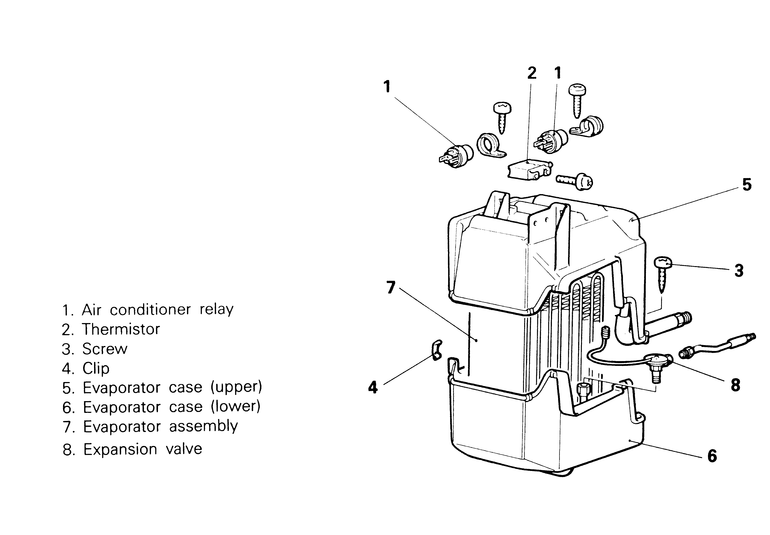
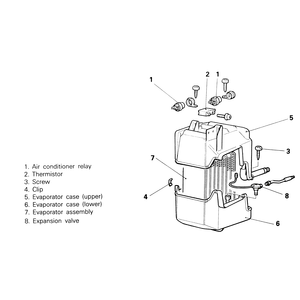
| Fig. 5: Disassembly and assembly components of the
air conditioning evaporator unit — 1987–95 Pick-ups
|
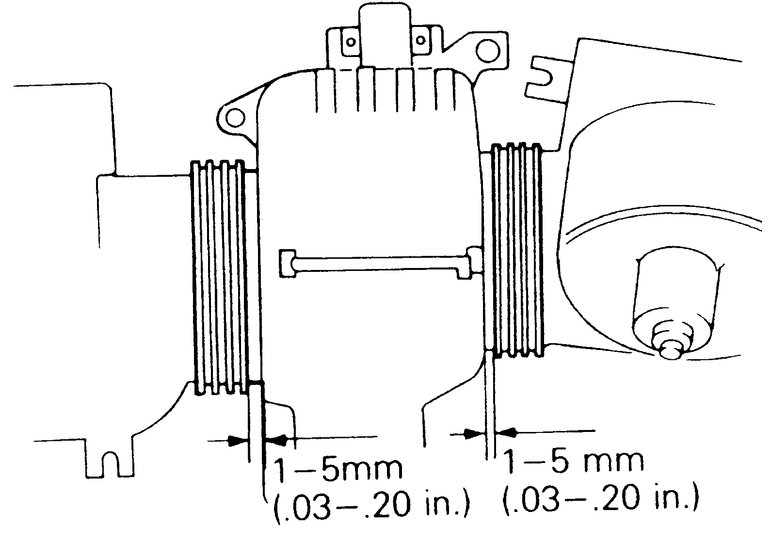
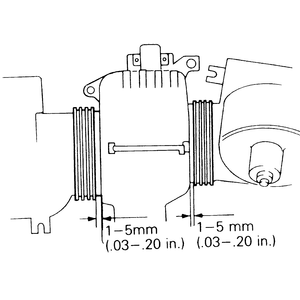
| Fig. 6: Upon installation, adjust the clearance between
the evaporator and the duct joints — 1987–95
Pick-ups
|
- After repairs, carefully install the assembled case into the vehicle. Tighten
the mounting bolts and nuts. Connect the drain hose to the case.
- Install the duct joints on either side of the evaporator. Correctly installed,
the evaporator case should have about 0.12 in. (3mm) clearance to the joint
on each side.
- Connect the main harness electrical connectors.
- Install the defroster duct.
- Install the glove box.
- Under the hood, install the retaining nut if not already done during installation.
- Replace the O-rings on each line and coat each ring lightly with compressor
oil.
- Connect and tighten the lines, using a second wrench to counterhold the
opposite side of the joint.
- Connect the negative battery cable.
- Using an approved R-12 or R-134a recovery/recycyling station, evacuate and
recharge the system. See Section 1.
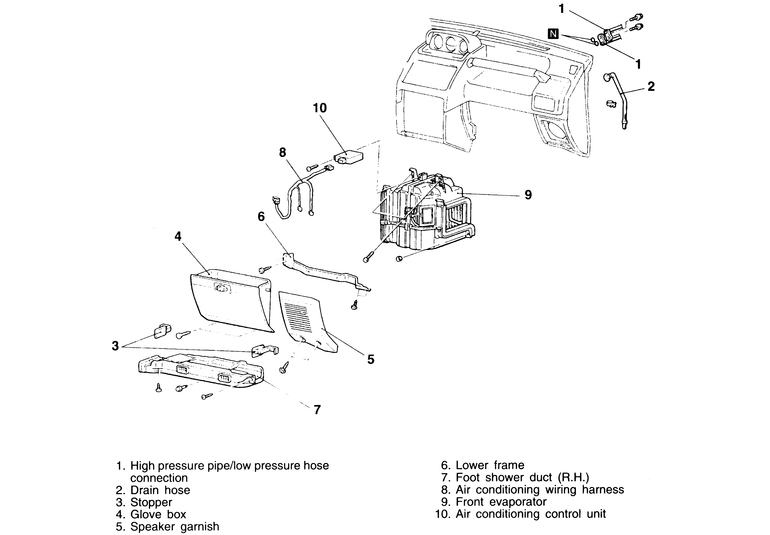
- Disconnect the negative battery cable.
- Using an approved R-12 or R-134a recovery/recycyling station, safely discharge
the air conditioning system. See Section 1.
- In the engine compartment, use two wrenches to carefully disconnect the
high pressure pipe and the low pressure hose at the firewall fittings. Two
new O-rings will be needed upon installation.
- Remove the drain hose.
- Remove the glove box stopper from the instrument panel, then remove the
glove box assembly.
- Unscrew the speaker grille retaining screws and remove the grille.
- Unbolt the four bolts holding the lower frame in place and remove the frame
from under the instrument panel (dashboard).
- Extract the right-hand side foot shower duct and unplug the A/C wiring harness
from the A/C control unit.
- Remove the retaining bolts and remove the evaporator case from the vehicle.
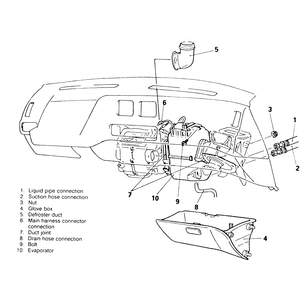
| Fig. 7: Air conditioning evaporator unit removal
and installation components — 1992–95 Monteros
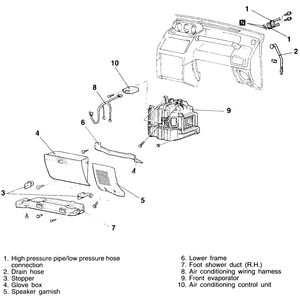
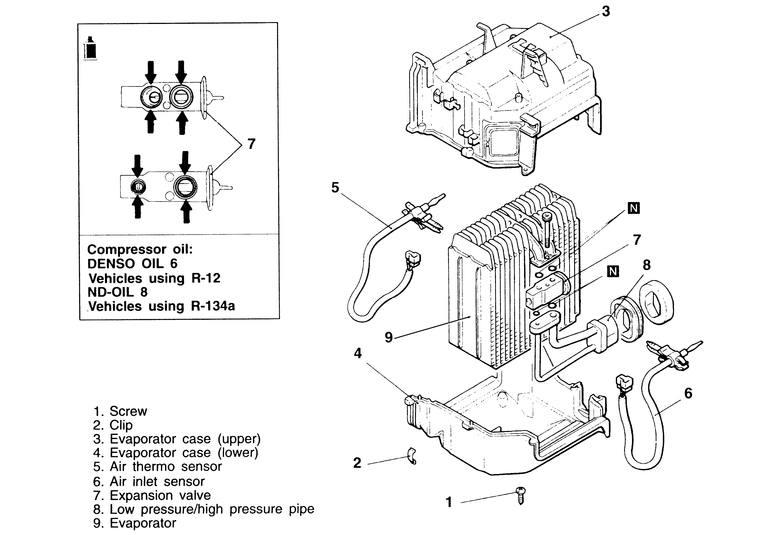
|
| Fig. 8: Evaporator unit disassembly and reassembly
components — 1992–95 Monteros
|
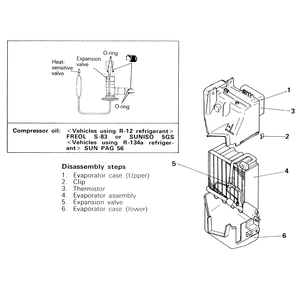
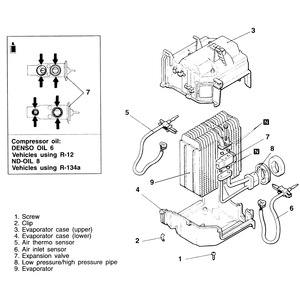
- At this point in time, the evaporator can be disassembled and repaired.
The evaporator unit assembly is made up of the A/C control unit, the upper
and lower evaporator case, the air thermo sensor, the air inlet sensor, the
expansion valve, the low pressure and high pressure pipes and the evaporator
itself.
NOTE: When replacing the evaporator with a new unit, fill
the evaporator with the specified amount of compressor oil and install it
in the vehicle. Vehicles using R-12 refrigerant need 2.0 fl. oz. (60 cm3)
of NIPPONDENSO OIL 6, vehicles using R-134a refrigerant need 1.4 fl. oz.
(40 cm3) of ND — OIL 8.
- After repairs, carefully install the assembled case into the vehicle. Tighten
the mounting bolts and nuts. Connect the drain hose to the case.
- Connect the A/C wiring harness to the A/C control unit.
- Install the right-hand side foot shower duct.
- Bolt the lower frame in place with the four mounting bolts.
- Secure the speaker grille in place with its retaining screws.
- Install the glove box and glove box stopper.
- Under the hood, attach the drain hose.
- Replace the O-rings on each line and coat each ring lightly with compressor
oil.
- Connect and tighten the lines, using a second wrench to counterhold the
opposite side of the joint.
- Connect the negative battery cable.
- Using an approved R-12 or R-134a recovery/recycyling station, evacuate and
recharge the system. See Section 1.