Raise the vehicle and support it safely on jackstands.
Remove the wheel — refer to the previous instructions in
this section.
Remove the lower control arm — refer to the procedures later
in this section.
Remove the ball joint retaining nuts and bolts and remove the ball joint
from the arm.
Install the new ball joint. Tighten the ball joint retaining nuts and bolts
to the following amounts:
1983–95 4WD Pick-ups — 39–54 ft. lbs. (54–74
Nm)
1983–95 2WD Pick-ups — 22–30 ft. lbs. (30–42
Nm)
1983–91 Monteros — 39–54 ft. lbs. (54–74
Nm)
1992–95 Monteros — 60 ft. lbs. (81 Nm)
Install the lower control arm and connect the ball joint to the knuckle.
Tighten the ball stud nut to 87–130 ft. lbs. (120–180 Nm) and
install a new cotter pin.
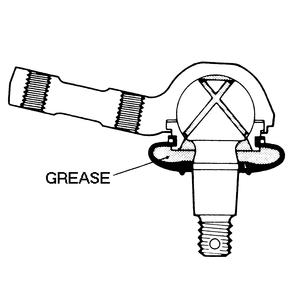
Lubricate the ball joint with a grease gun.
Install the wheel and lower the vehicle back to the ground.
Adjust the riding height, if equipped with a torsion bar, and align the
front end.
Fig. 1: The internal construction of a lower ball
joint found on some Pick-ups and Monteros