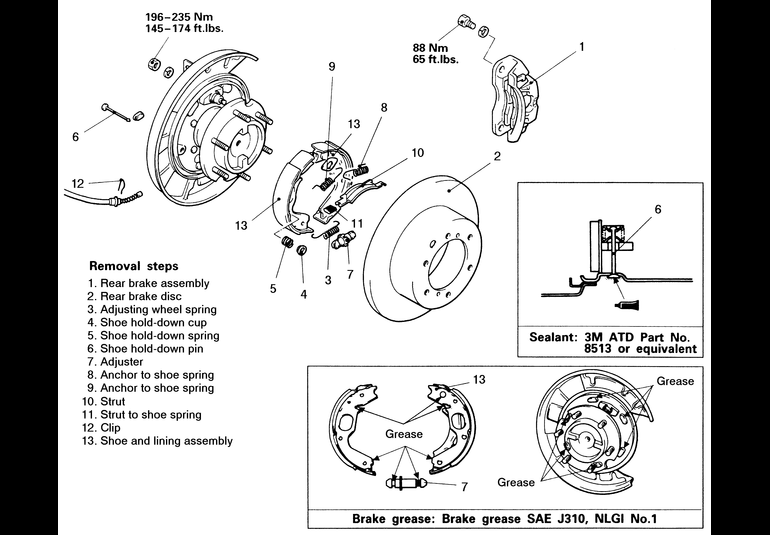
NOTE: This procedure requires the disassembly of easily confusing
springs and components. Make certain that the direction as well as the location
of the various parts is known before disassembly. Work on each side one at a
time so that if confusion is created as to the locations of components during
reassembly the other wheel can be used as an example.
- Raise and safely support the Montero on jackstands and remove the rear wheel(s).
Block the front wheels and make sure that the parking brake is not applied.
- Remove the rear brake caliper from the disc. Do not disconnect the brake
hose from the caliper; suspend the caliper from the frame of the vehicle with
stiff wire or cord.
- Matchmark the disc and one of the rear lug studs, then pull the rotor off
of the axle.
- Check the brake shoes and rotor:
- Measure the thickness of the brake lining at several places. The standard
value is 0.256 in. (6.5mm) and the minimum is 0.177 in. (4.5mm). Replace
the brake shoes if any part of the thickness of the brake lining is the
minimum value or less.
- Measure the brake disc drum inner diameter at two or more places. The
standard value is 7.756 in. (197mm) and the minimum value is 7.795 in.
(198mm). Replace the brake disc if the drum inner diameter is the limit
value or more.
- Disconnect the adjusting wheel spring from the bottom of both of the brake
shoes.
- Push the shoe hold-down spring in and twist it so that the slots in the
shoe hold-down cup align with the tangs on the shoe hold-down pin. Release
the spring and remove the spring, the cup and the pin from each shoe.
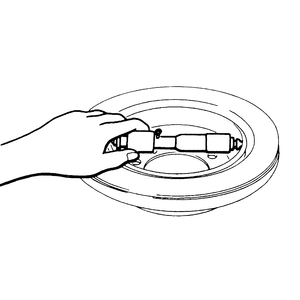
- Remove the adjuster from in between the bottom of the two shoes.
- Remove the two anchor to shoe springs from the top of the assembly.
- Remove the centrally located strut and strut spring from in between the
shoes.
- Remove the retainer clip holding the parking brake cable into the back of
the brake backing plate.
- Remove each of the shoes, making sure to disconnect the rear parking cable
from the one shoe.
| Fig. 1: Parking brake drum assembly removal and installation
components — 1992–95 Monteros

|
| Fig. 2: Use a micrometer to measure at least two
positions around the inside of the drum — replace
the rear brake disc if any distance is greater than 7.795 in. (198mm)
|
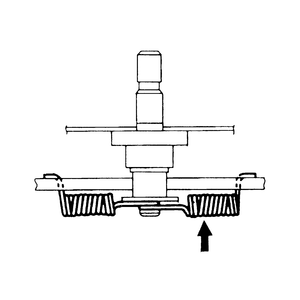
| Fig. 3: Mount the painted anchor to shoe spring where
the arrow indicates — 1992–95 Monteros
|
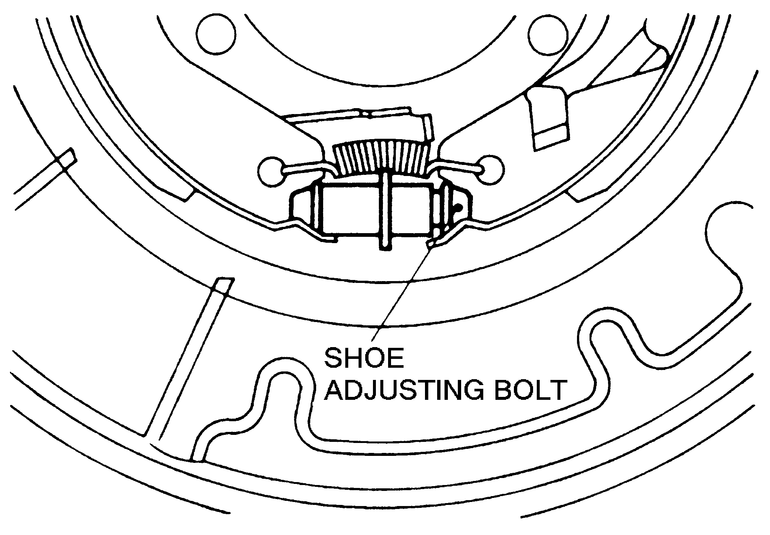
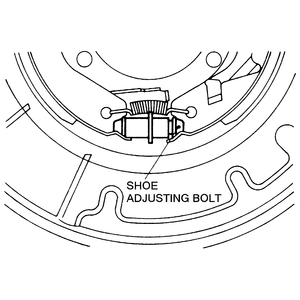
| Fig. 4: Install the shoe adjusting bolt so that on
the left-hand wheel it is towards the rear and on the right-hand wheel
it is toward the front — 1992–95 Monteros
|
- To install, attach the parking brake cable to the one shoe, then install
the retainer clip to hold the parking brake cable in the backing plate.
- Install the two shoes to the backing plate, after greasing the backing plate
and shoes in the specified areas (illustration).
- Install the strut spring to the strut, then install the strut to the two
shoes. Make sure the strut is installed in the correct direction.
- Since the load is different for each anchor to shoe spring, the spring which
is to be installed on the outside (right side spring) of the other (left side
spring) is painted for identification purposes.
- Install the adjuster so that the shoe adjusting bolt for the left-hand wheel
is towards the rear of the vehicle, and the shoe adjusting bolt for the right-hand
wheel is towards the front of the vehicle.
- Install the two shoe hold-down springs (along with the cups and pins) to
both shoes.
- Install the adjusting wheel spring to both of the shoes.
- Slide the rear brake disc onto the lug studs so that the matchmarks line
up.
- Install the caliper to the disc and tighten the mounting bolts to 65 ft.
lbs. (88 Nm).
- Adjust the parking brake — refer to the procedures in this
section.
- Install the wheels and make sure that the rear brakes are not rubbing too
much.
- Lower the vehicle to the ground and remove the wheel blocks.