Elevate and safely support the vehicle on stands. Make certain all four
stands are securely placed on both the ground and the truck. The support must
be extremely solid.
Remove the filler neck cover or protective panel.
Disconnect the filler neck at the body end.
Disconnect the rear wiring harness.
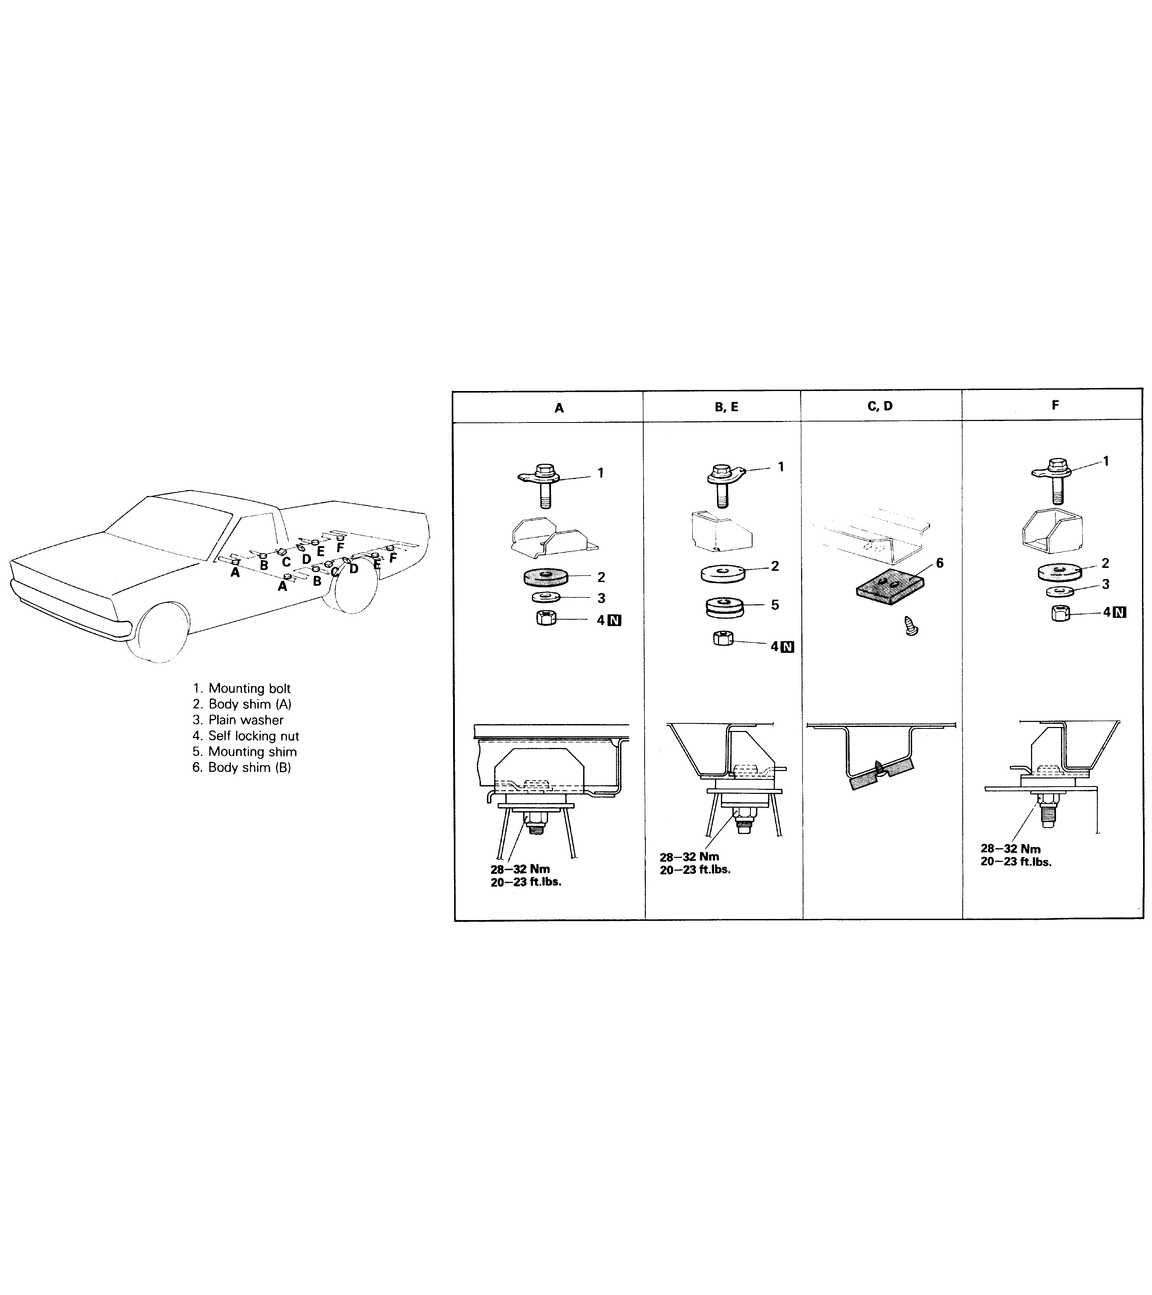
Loosen and remove the rear body mounting nuts; discard the nuts and use
new ones at reassembly. Disassemble one mount at a time and pay great attention
to the order and placement of washers, pads, spacers etc. They must be reassembled
correctly.
Either with the use of an overhead lift or several helpers, remove the cargo
bed from the truck frame.
When reinstalling, lift the bed into place and align the bolt holes. Assemble
each mounting bolt with the proper hardware and install it properly. Leave
each finger-tight so that the bed may be moved slightly if hole alignment
is needed.
Tighten each nut to 20–23 ft. lbs. (28–32 Nm). Resist the temptation
to tighten these nuts to extremes; overtightening crushes the pads causing
both excessive noise and reducing the natural motion of the bed.
Plug the rear wiring harness connectors back together.
Install the filler neck and neck cover.
Lower the Pick-up back to the ground.
Fig. 1: Make certain to install the correct nuts,
washers and bushings on each mounting pad of the truck bed