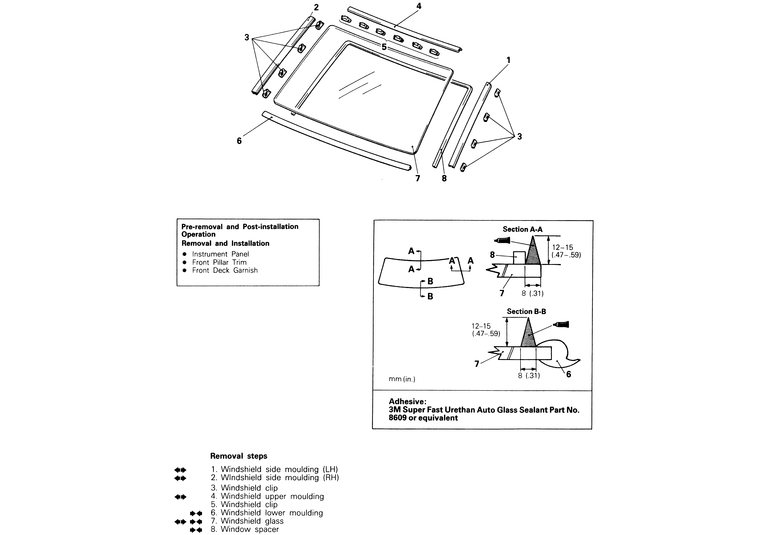
| Fig. 1: Windshield assembly removal and installation
components — Monteros
|
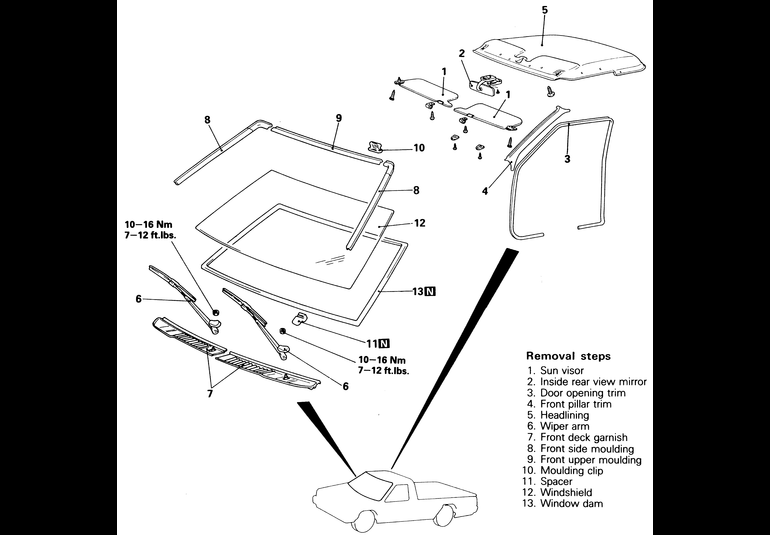
| Fig. 2: Windshield removal and installation components — Pick-ups
|
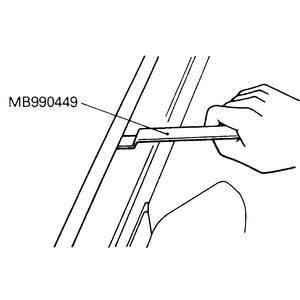
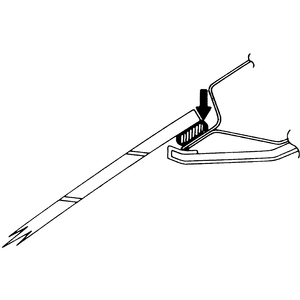
| Fig. 3: Use the special Mitsubishi clip removing
tool (MB990449) to remove the trim moulding
|
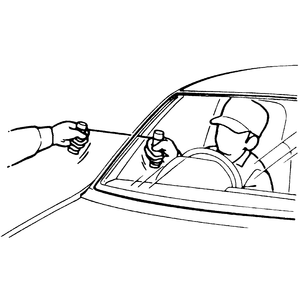
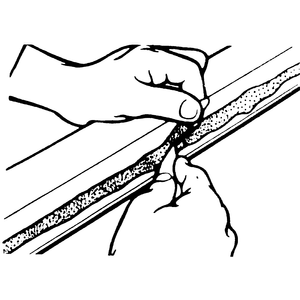
| Fig. 4: Have an assistant help with cutting the adhesive
to remove the windshield
|
| Fig. 5: Use a sharp knife to cut the old adhesive
off of the body mounting flange
|
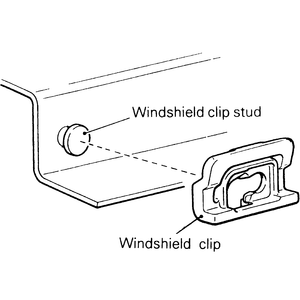
| Fig. 6: Replace any broken moulding retaining clips
with new ones
|
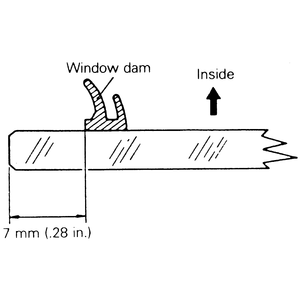
| Fig. 7: Install the window dam at the position shown
in the illustration — Pick-ups
|
| Fig. 8: Install the adhesive as shown in the illustration — Pick-ups
|
| Fig. 9: Make certain that the adhesive and window
dam are in the correct position — Pick-ups
|
NOTE: If the windshield being removed is to be reinstalled, place it on a protected bench or holding fixture.
To install:
CAUTION
Do not touch any surface from which the grease has been removed using isopropyl
alcohol.
CAUTION
Do not touch the primer coated surface.
NOTE: Be careful not to remove more adhesive than necessary, and also not to damage the paint work on the body surface with the knife. If the paint work is damaged, repair the damaged area with touch-up paint or Tectyl.
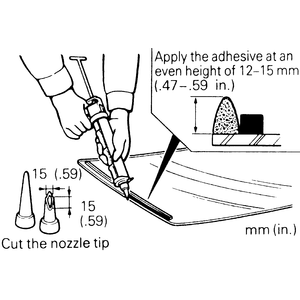
NOTE: Cut the nozzle tip into a V shape to facilitate adhesive application.
NOTE: Do not move the glass and mouldings after installing them to the body. Place the glass in the previously marked position. Use care not to close the water groove (in the lower corner of the pinch weld flange) with adhesive.
WARNING
If it is necessary to move the vehicle, move it slowly.
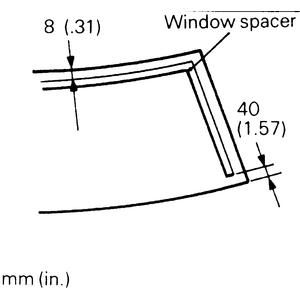
| Fig. 10: Install the new windshield spacer onto
the window with the dimensions shown — Monteros
|
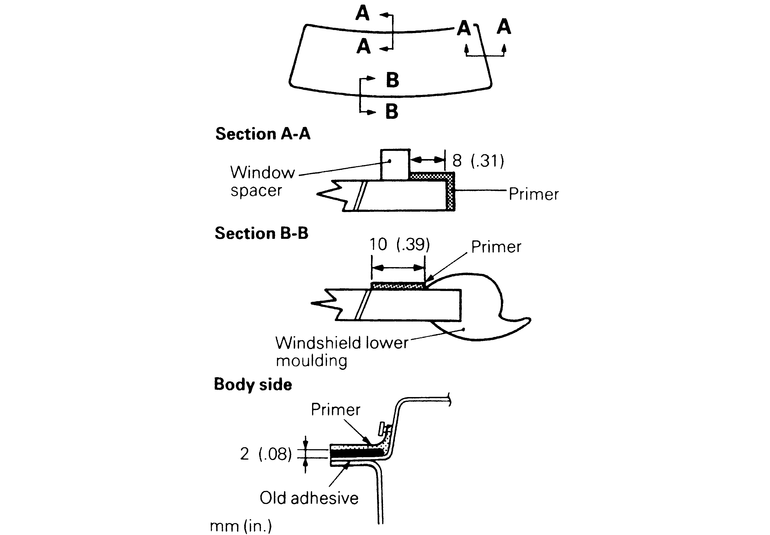
| Fig. 11: Install the primer to the windshield
in the areas shown in the illustration — Monteros
|
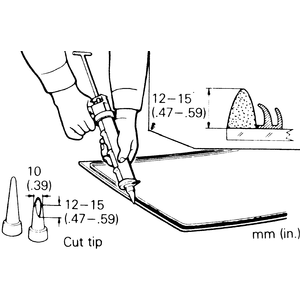
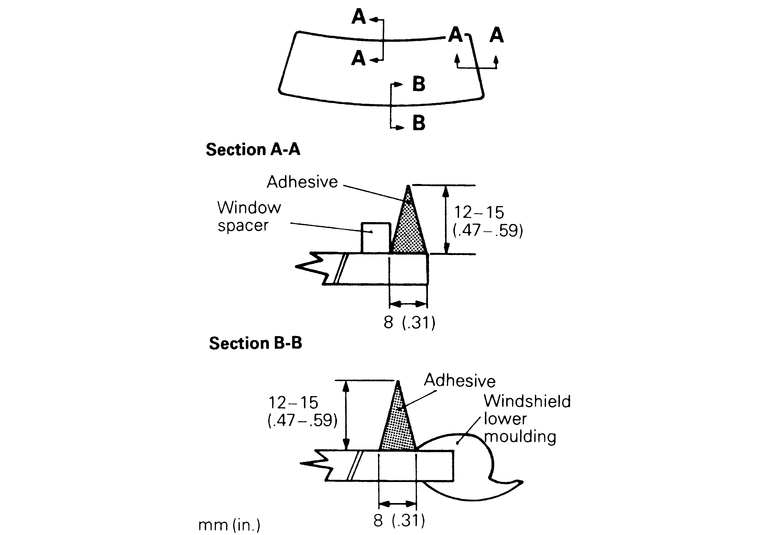
| Fig. 12: Apply the adhesive at an even height
and 0.47–.59 in. (12–15mm) high — Monteros
|
| Fig. 13: Apply the adhesive to the areas shown
in the illustration — Monteros
|
NOTE: The primer increases the adhesive strength, so be sure to apply it evenly around the entire circumference. Also, a too thick of an application will cause a decrease of the adhesive strength. Do not touch the coated surface.
NOTE: Cut the nozzle tip of the sealant gun into a V shape to facilitate the adhesive application.
WARNING
If heat is applied with an infra-red lamp to shorten the setting time,
keep the surface temperature of the adhesive below 212°F (100°C).
NOTE: If moving the vehicle, it should be done gently. When testing for water leakage, do not pinch the end of the hose to spray the water.