Several methods of repairing damaged threads are available. Heli–Coil® (shown here), Keenserts® and Microdot® are among the most widely used. All involve basically the same principle, drilling out stripped threads, tapping the hole and installing a pre-wound insert, making welding, plugging and oversize fasteners unnecessary.
Two types of thread repair inserts are usually supplied, a standard type for most Inch Course, Inch Fine, Metric Coarse and Metric Fine thread sizes and a spark plug type for to fit most spark plug port sizes. Consult the individual manufacturer's catalog to determine exact applications. Typical thread repair kits will contain a selection of pre-wound threaded inserts, a tap (corresponding to the outside diameter threads of the insert) and an installation tool. Spark plug inserts usually differ because they require a tap equipped with pilot threads and a combined reamer/tap section. Most manufacturers also supply blister-packed thread repair inserts separately in addition to a master kit containing a variety of taps and inserts plus installation tools.
Before effecting a repair to a threaded hole, remove any snapped, broken or damaged bolts or studs. Penetrating oil can be used to free frozen threads. The offending item can be removed with locking pliers or with a screw or stud extractor. After the hole has been cleared, the thread can be repaired as follows:
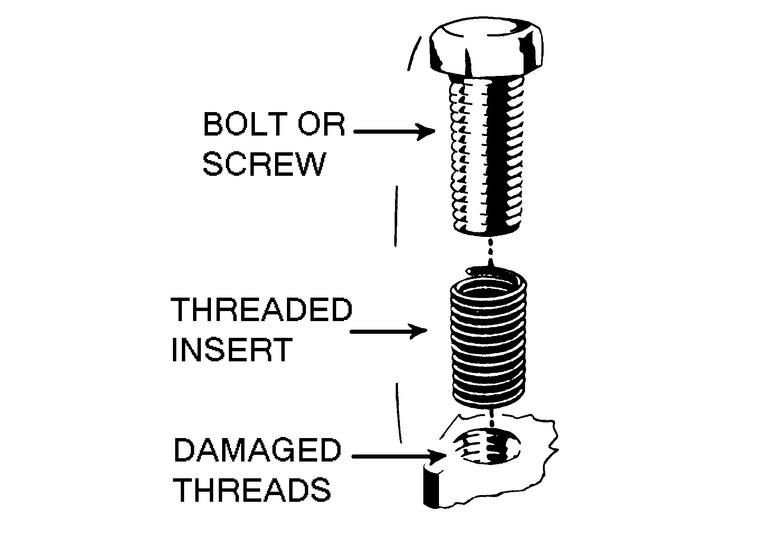
| Fig. 1: Damaged bolt hole threads can be replaced with
thread repair inserts
|
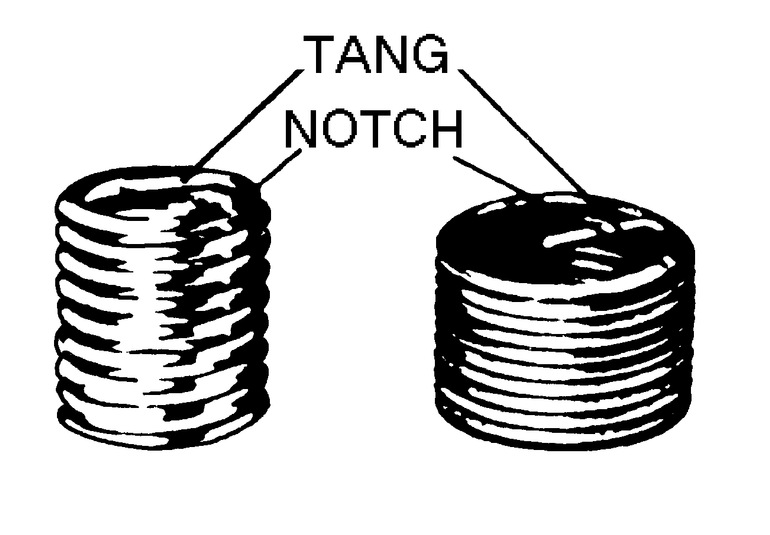
| Fig. 2: Standard thread repair insert (left), and spark
plug thread insert
|
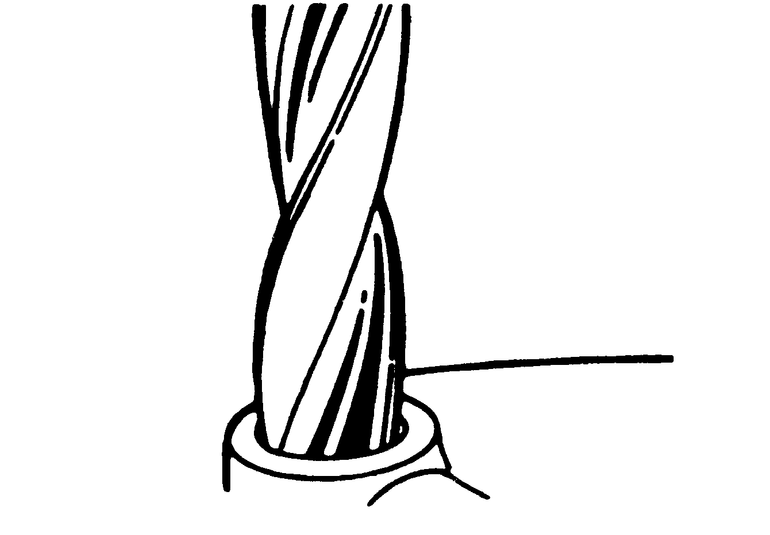
| Fig. 3: Drill out the damaged threads with the specialized
drill. Be sure to completely through the hole or to the bottom of a blind
hole
|
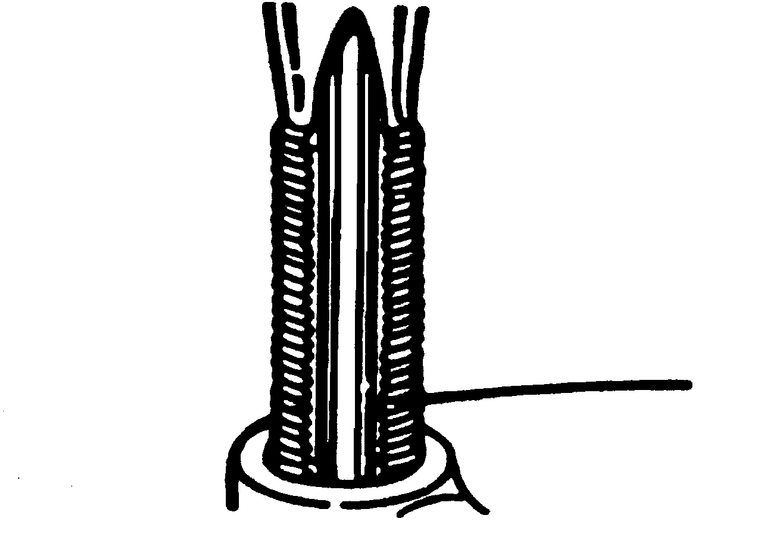
| Fig. 4: Using the kit, tap the hole in order to receive
the thread insert. Keep the tap well oiled and back it out frequently
to avoid clogging the threads.
|
| Fig. 5: Screw the threaded insert onto the installer
tool until the tang engages the slot. Thread the insert into the hole
until it is 1⁄4 – 1⁄2 turn
below the top surface, then remove the tool and break off the tang using
a hammer and punch
|