A main radiator, sub-radiator, and reservoir tank are utilized. They can be
removed individually or as an assembly. To remove as an assembly, proceed as
follows:
- Remove the grille.
- Remove the drain plug, and drain the coolant.
CAUTION
When draining the coolant, keep in mind that cats and dogs are attracted
by ethylene glycol antifreeze, and are quite likely to drink any that is
left in an uncovered container or in puddles on the ground. This will prove
fatal in sufficient quantity. Always drain the coolant into a sealable container.
Coolant should be reused unless it is contaminated or several years old.
- Disconnect the radiator hoses from the top of the main and sub-radiators,
and from the bottom of the main radiator (water pump side).
- Disconnect the heater control cable, by removing the circlip which retains
the inner cable, and the nut which retains the sheath to the bracket. Loosen
the clamp which retains the heater duct to the blower casing, and remove the
blower casing mounting bolts.
WARNING
Do not remove the bolt between the radiators.
To remove only the main radiator, proceed as follows:
- Remove the grille.
- Remove the drain plug and drain the coolant.
- Disconnect all hoses from the main radiator.
- Remove the center and right hand radiator mounting bolts, and the 4 screws
which retain the radiator bracket.
- Remove the main radiator and bracket, leaving the sub-radiator suspended
on the left hand mounting bolt and the blower motor casing.
To remove only the sub-radiator:
- Remove the grille.
- Remove the drain plug and drain the coolant.
- Disconnect the radiator shroud from the blower casing.
- Remove the center and left hand radiator retaining bolts, and remove the
sub-radiator.
- Install in the reverse order of removal.
- On 1982–84 models, remove the cover from underneath, on the right
side of the vehicle. You may want to connect a hose to the drain plug to carry
coolant away on these models. Drain the cooling system by removing the drain
plug in the bottom of the radiator. After loosening the drain plug, remove
the radiator cap, which will allow the coolant to drain faster.
- Loosen the hose clamps and remove the inlet (upper) and outlet (lower) hoses
from the radiator. Disconnect inlet and outlet oil cooler lines (automatic
transaxle).
- Remove the two radiator mounting bolts.
| Fig. 1: Unfasten the radiator retaining bolts
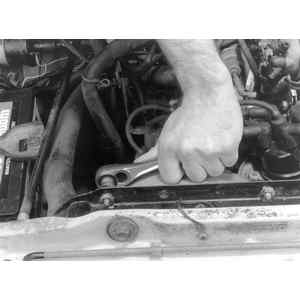
|
| Fig. 2: Disconnect the thermoswitch wiring
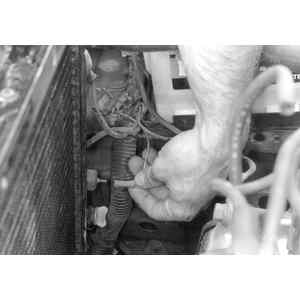
|
- Before removing the radiator from the vehicle, disconnect the wiring harness
of the following items:
- Thermostat
- Thermoswitch wiring
- Oil pressure switch wiring
- Fan motor wiring
- Secondary terminal to the distributor
- Remove the fan and motor assembly from the radiator by removing the 4 bolts
which hold the assembly to the radiator.
- Install the radiator in the reverse order of removal.
| Fig. 3: Remove the radiator from the vehicle
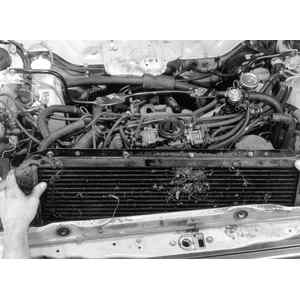
|

