In order to remove the ball joints, it will be necessary to remove the steering
knuckle/hub assembly from the car first. See the Knuckle and Spindle removal
and installation procedures later in this section for the correct procedure.
Knuckle and spindle removal is also necessary for bearing service. After completing
removal, perform the following Steps:
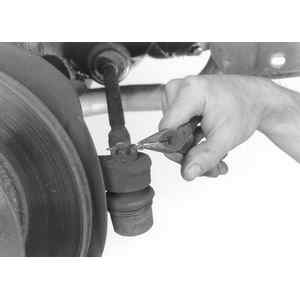
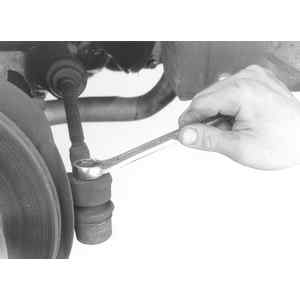
- Remove the cotter pin from the castellated nut. Unfasten the nut.
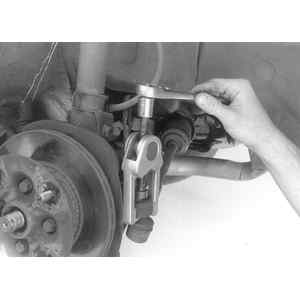
- Extract the ball joint with a puller.
- Repeat for the other ball joint.
- Reverse the above steps to install the ball joint.
- Torque the ball joint stud nuts to 43–65 ft. lbs. (58–88 Nm).
The single ball joint on these models is integral with the lower control arm
(transverse link). If the ball joint is defective, the entire assembly must
be replaced. See control arm removal and installation in this section.
- Raise the front wheel and use a jackstand to safely support the vehicle.
- Remove the cotter pin and castle nut from the stud on top of the ball joint.
- Remove the bolts and self-locking nuts which attach the ball joint to the
transverse link. Detach the ball joint.
- Reverse the above process to install the ball joint.
- Tighten the self-locking nuts to 38 ft. lbs. (51 Nm) and the castle nut
to 90 ft. lbs. (122 Nm).
NOTE: Use new self-locking nuts, the old ones may not be
reused.
- Raise the front of the car and support it with jackstands. Remove the wheels.
- Remove the cotter pin and the castellated nut.
- Remove the bolt on the steering knuckle.
- Remove the ball joint.
- If you're considering reusing it, inspect the joint for damage to the grease,
boot or stress cracks.
| Fig. 1: Use a pair of pliers to remove the cotter
pin
|
| Fig. 2: Use a wrench or socket to remove the castellated
nut
|
To install:
- Insert the ball stud, ungreased, into the steering knuckle, install the
bolt, and torque it to 22–29 ft. lbs. (29–39 Nm)
- Connect the joint to the transverse link and install the castellated nut,
torquing to 29 ft. lbs. (39 Nm). Then, torque the nut further, just until
the castellations are aligned with the hole in the end of the ballstud.
- Install a new cotter pin and bend it around the nut.
| Fig. 3: Use a puller to separate the ball joint from
the steering knuckle
|

