- Carefully remove the wiper arms and windshield molding.
- Put protective tape on the body to prevent damage.
- Apply soapy water to the surface of the adhesive agent so the knife blade
slides smoothly.
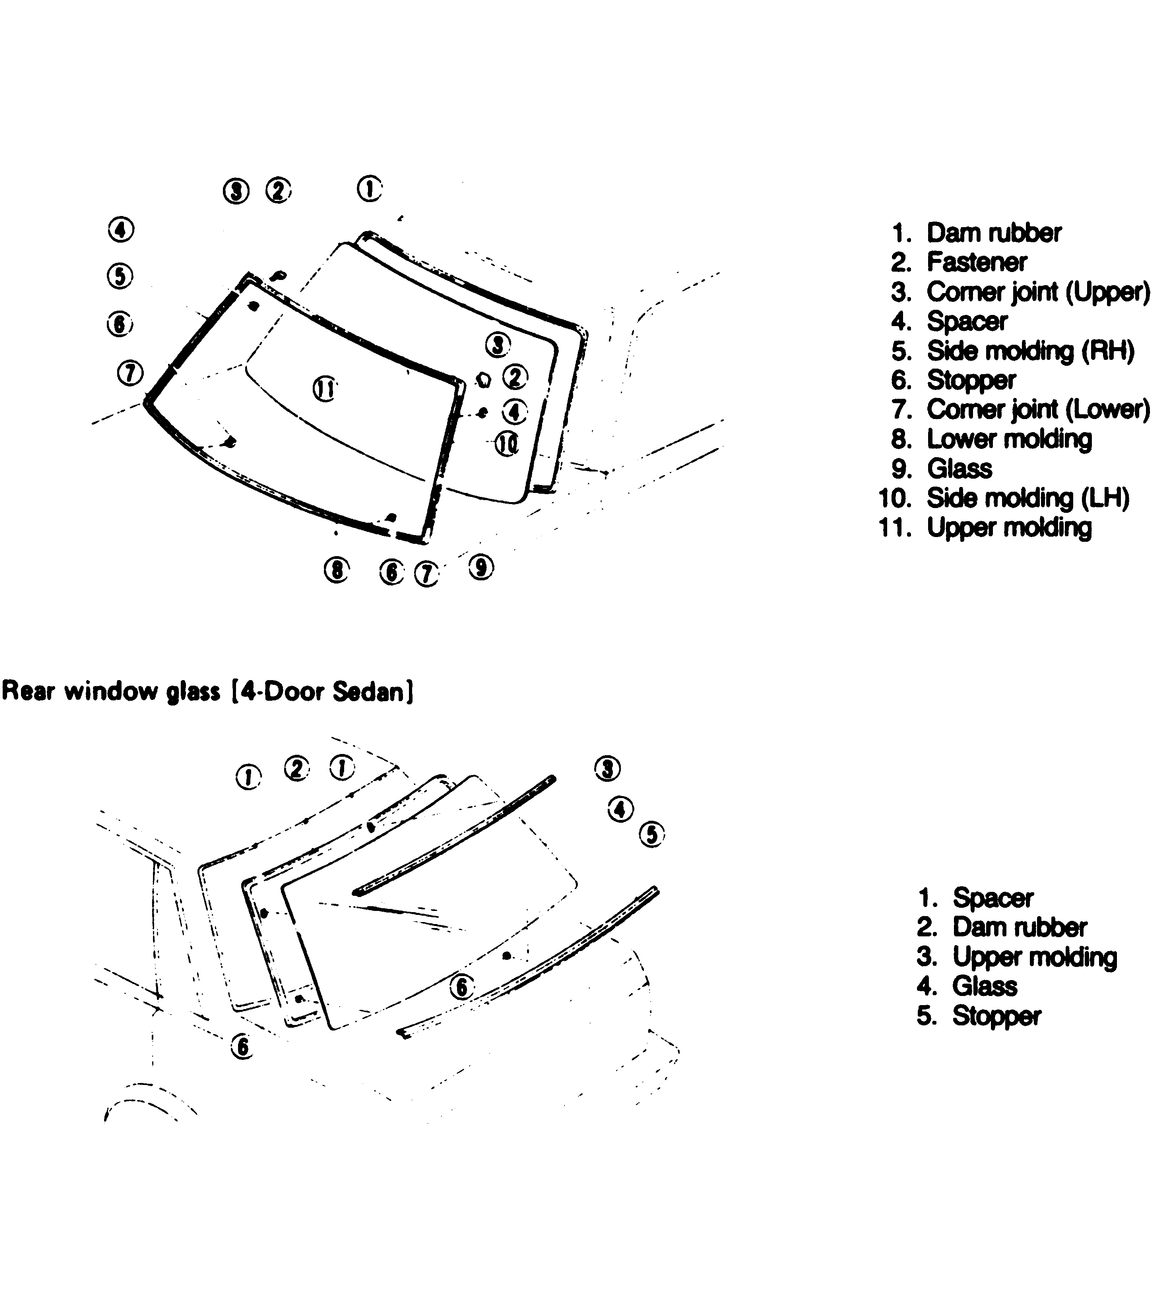
| Fig. 1: Exploded view of rear window glass
|
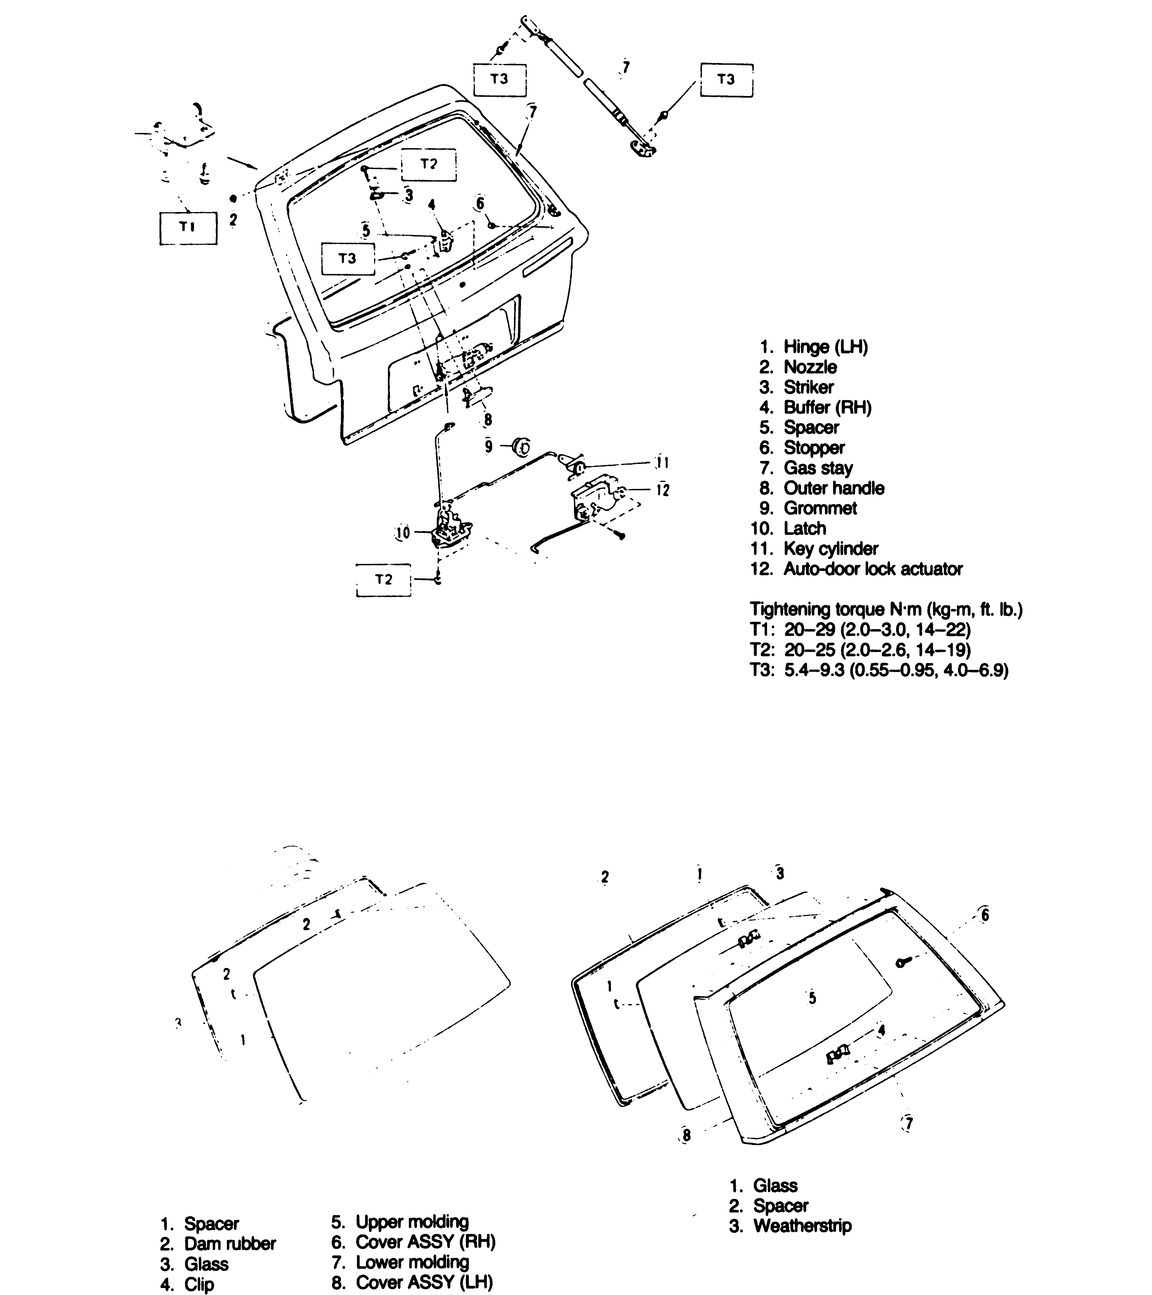
| Fig. 2: Exploded view rear gate and glass on station
wagons
|
- Cut off excess adhesive agent.
- Remove stoppers and spacers from glass.
- Put the windshield knife into layer of adhesive.
- Hold windshield knife in one hand and cut adhesive by pulling putty knife
parallel to the glass while holding knife edge at a right angle. Make sure
that the knife stays along the surface of the glass.
NOTE: When first putting knife into layer of adhesive,
select a point with a wide gap between the body and glass.
- Working from the inside of the car, apply even pressure to the windshield
and push it outward, while an assistant removes it from the car.
To install:
- After cutting layer of adhesive, remove the dam rubber left on the body.
- Remove the remaining space stopper. At this time, also remove two-sided
tape from spacer the stopper completely.
- Using a cutting knife, cut layer of adhesive sticking to the body and finish
it into a smooth surface of about 0.07 in. (2mm) in thickness.
- Thoroughly remove chips, dirt and dust from the body surface.
- Clean the body wall surface and the upper surface of the layer of adhesive
with a solvent such as alcohol.
CAUTION
Never smoke or have any form of an open flame nearby when using alcohol,
as it is extremely flammable.
- Place new spacer stoppers into positions from which the old ones where removed.
- Remove the tack paper from the back of the spacer stopper and stick it to
the body firmly.
- Place the windshield onto the body then adjust the position of the glass
so that the gap between the body and glass is uniform on all sides.
- Matchmark the body and glass in several places.
- Remove the glass from the body and clean the surface of glass to be adhered
with alcohol.
- Using a sponge, apply primer to the part of the glass and the part of the
body to be adhered.
- Allow the primer to dry for about 10 minutes before proceeding to the next
step.
NOTE: Cover all surfaces that primer may come into contact
with, as it is very hard to remove.
- Cut the nozzle tip of the adhesive cartridge to a 45°angle, open the
cartridge, attach the nozzle and place it into the gun.
- Apply the adhesive uniformly to all sides of adhesion surface while operating
gun along the face of the glass edge. Adhesive build up should be 0.47–0.5
in. (12–15mm) from glass surface.
- With the help of an assistant, place the glass onto the body and align the
matchmarks. Press the glass firmly into position, then add adhesive where
needed.
- Install the upper windshield molding and remove the excess adhesive with
a spatula. Clean with alcohol or white gasoline.
- After the molding has been installed, do not open the doors or move the
car unless it is absolutely necessary. If the doors must be opened, lower
the windows, and open and close the doors very gently. After one hour the
car can be tested for water leakage.
- Install the front lower molding, front pillar cover, wiper wheel assembly
and wiper arm assembly.
NOTE: When testing for water leakage, do not squirt a strong
hose stream on the vehicle. If the vehicle must be moved, do so gently,
sudden shock could cause the windshield to shift. After completing all operations,
leave the vehicle alone for 24 hours. After 24 hours the vehicle may be
driven, but should not be subjected to heavy shock for at least three days.