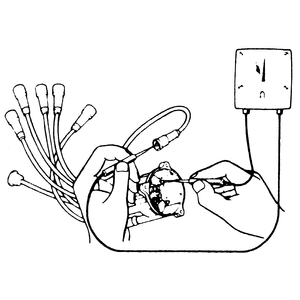
| Fig. 1: Checking plug wire resistance through the distributor
cap with an ohmmeter
|
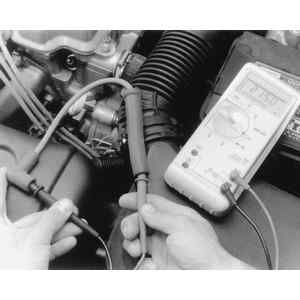
| Fig. 2: Checking individual plug wire resistance with
a digital ohmmeter
|
At every tune-up/inspection, visually check the spark plug cables for burns cuts, or breaks in the insulation. Check the boots and the nipples on the distributor cap and/or coil. Replace any damaged wiring.
Every 30,000 miles (48,000 km) or 60 months, the resistance of the wires should be checked with an ohmmeter. Wires with excessive resistance will cause misfiring, and may make the engine difficult to start in damp weather.
To check resistance, remove the distributor cap, leaving the wires attached. Connect one lead of an ohmmeter to an electrode within the cap. Connect the other lead to the corresponding spark plug terminal (remove it from the plug for this test). Replace any wire which shows excessive resistance.
It should be remembered that resistance is also a function of length; the longer the wire the greater the resistance. The following is a guide to the resistance of spark plug wires:
If the spark plug wires are found to be defective, replace the wires one at a time. Install the boot firmly over the spark plug. Route the wire over the same path as the original. Insert the nipple firmly into the tower on the cap or the coil.
NOTE: A little smear of dielectric grease inside the boots of the spark plug wires will prevent corrosion, and aid in boot removal the next time the plugs are serviced.