Previous Next

REMOVAL

Except 1.2L Engine

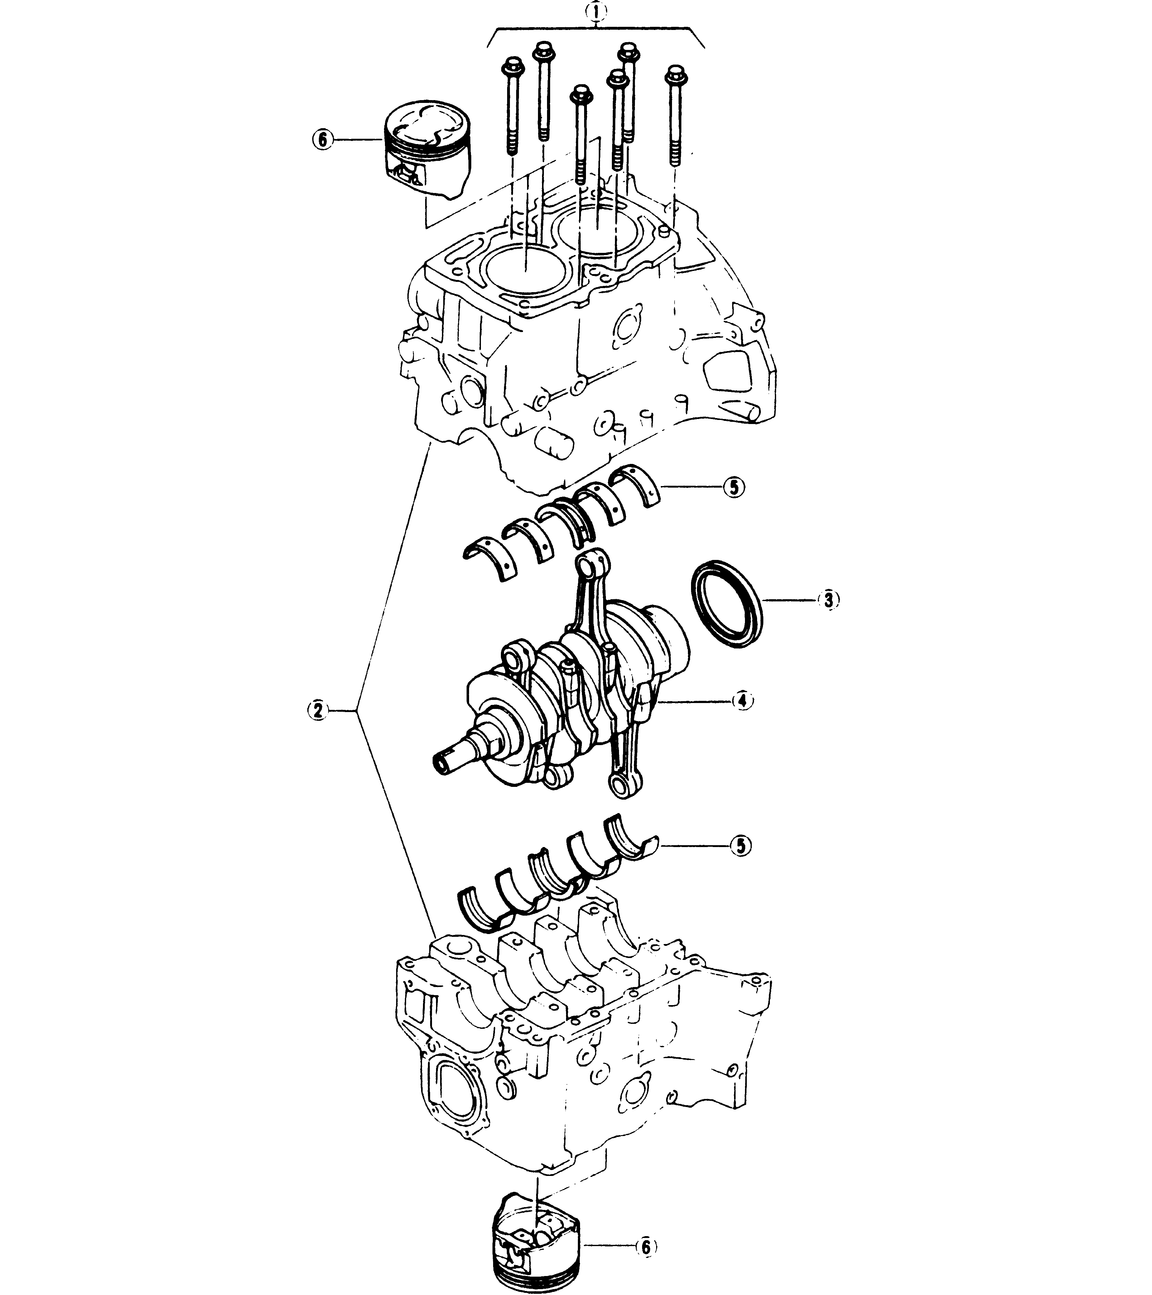
Fig. 1: Cylinder block assembly — except 1.2L engine

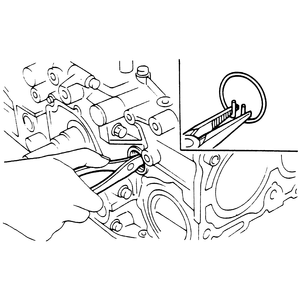
Fig. 2: Removing the piston pins

Fig. 3: Removing the piston circlip

Fig. 4: Use a suitable ridge cutter to remove the ridge from the cylinder bore

  1. Remove the engine from the vehicle. Separate the engine from the transaxle.
  2. Remove the intake manifold. Remove the oil pan and oil strainer. Remove the flywheel assembly.
  3. Remove the timing belt, timing covers and related components.
  4. Remove the cylinder head-to-engine bolts, in the reverse order of the torquing sequence. Remove the cylinder heads and gaskets.
  5. Using an Allen wrench, remove the crankcase plugs of No. 1 and No. 2 pistons from the cylinder block.
  6. Using a wrench on the crankshaft pulley bolt, rotate the crankshaft so that the No. 1 and No. 2 pistons are at the Bottom Dead Center (BDC) of the their compression stroke.
  7. Using needlenose pliers, inserted through the crankcase plug holes, remove the wrist pin-to-pistons circlips.
  8. Using a Wrist Pin Removal tool No. 399094310 or equivalent, through the rear service holes, remove the wrist pins through the crankcase plug holes.

    NOTE: Keep the circlips and the wrist pins together for each cylinder so that they DO NOT become mixed up.

  9. In the same manner, remove the piston pins from the other cylinders.
  10. Rotate the engine, so that the No. 1 piston side is facing upward, then remove the crankcase halve nuts and bolts.
  11. Separate the crankcase halves. Remove the front oil seal, the O-ring and the back-up ring; be sure to replace them with new ones when reassembling the engine.

    NOTE: Keep the pistons and the wrist pins together for each cylinder so that they DO NOT become mixed. Mark the pistons and the connecting rods so that the direction is not changed when they are installed.

  12. Remove the crankshaft together with the connecting rods, the distributor gear and the crankshaft gear as an assembly.
  13. Remove the ridge from the top of the cylinder (unworn area), using a Ridge Reamer tool, to facilitate the removal of the pistons by performing the following procedures:
    1. Place the piston at the bottom of its bore and cover it with a rag.
    2. Cut the ridge away using a ridge reamer, exercising extreme care to avoid cutting too deeply.
    3. Remove the rag and remove the cuttings that remain on the piston.
  14. Using a hammer handle or a wooden bar, force the pistons out through the top of the cylinder block.
1.2L Engine

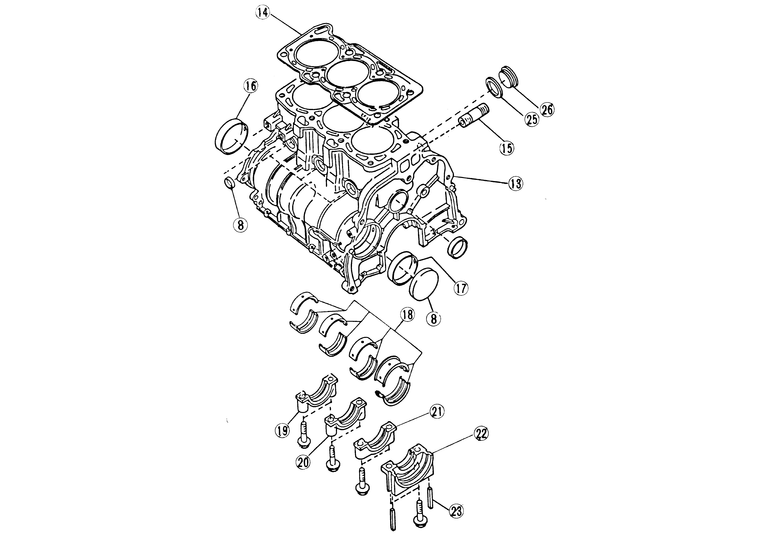
Fig. 5: Cylinder block assembly — 1.2L engine

  1. Remove the engine from the vehicle.
  2. Remove the timing belt, belt covers and related components. Remove the cylinder heads.
  3. Remove the oil pan and the oil strainer assembly.
  4. Stamp the cylinder number on the machined surfaces of the bolt bosses of the connecting rod and cap for identification when reinstalling. If the pistons are to be removed from the connecting rod, mark the cylinder number on the piston with a silver pencil or quick drying paint for proper cylinder identification and cap to rod location.
  5. Examine the cylinder bore above the ring travel. If a ridge exists, remove it with a ridge reamer before attempting to remove the piston and rod assembly.
  6. Remove the rod bearing cap and bearing.
  7. Install a guide hose over the rod bolt threads; this will prevent damage to the bearing journal and rod bolt threads.
  8. Using a hammer handle, remove the rod/piston assemblies through the top of the cylinder bore

Previous Next