CAUTION
When draining the coolant, keep in mind that cats and dogs are attracted to
ethylene glycol antifreeze, and could drink any that is left in an uncovered
container or in puddles on the ground. This will prove fatal in sufficient quantity.
Always drain the coolant into a sealable container. Coolant should be reused
unless it is contaminated or several years old.
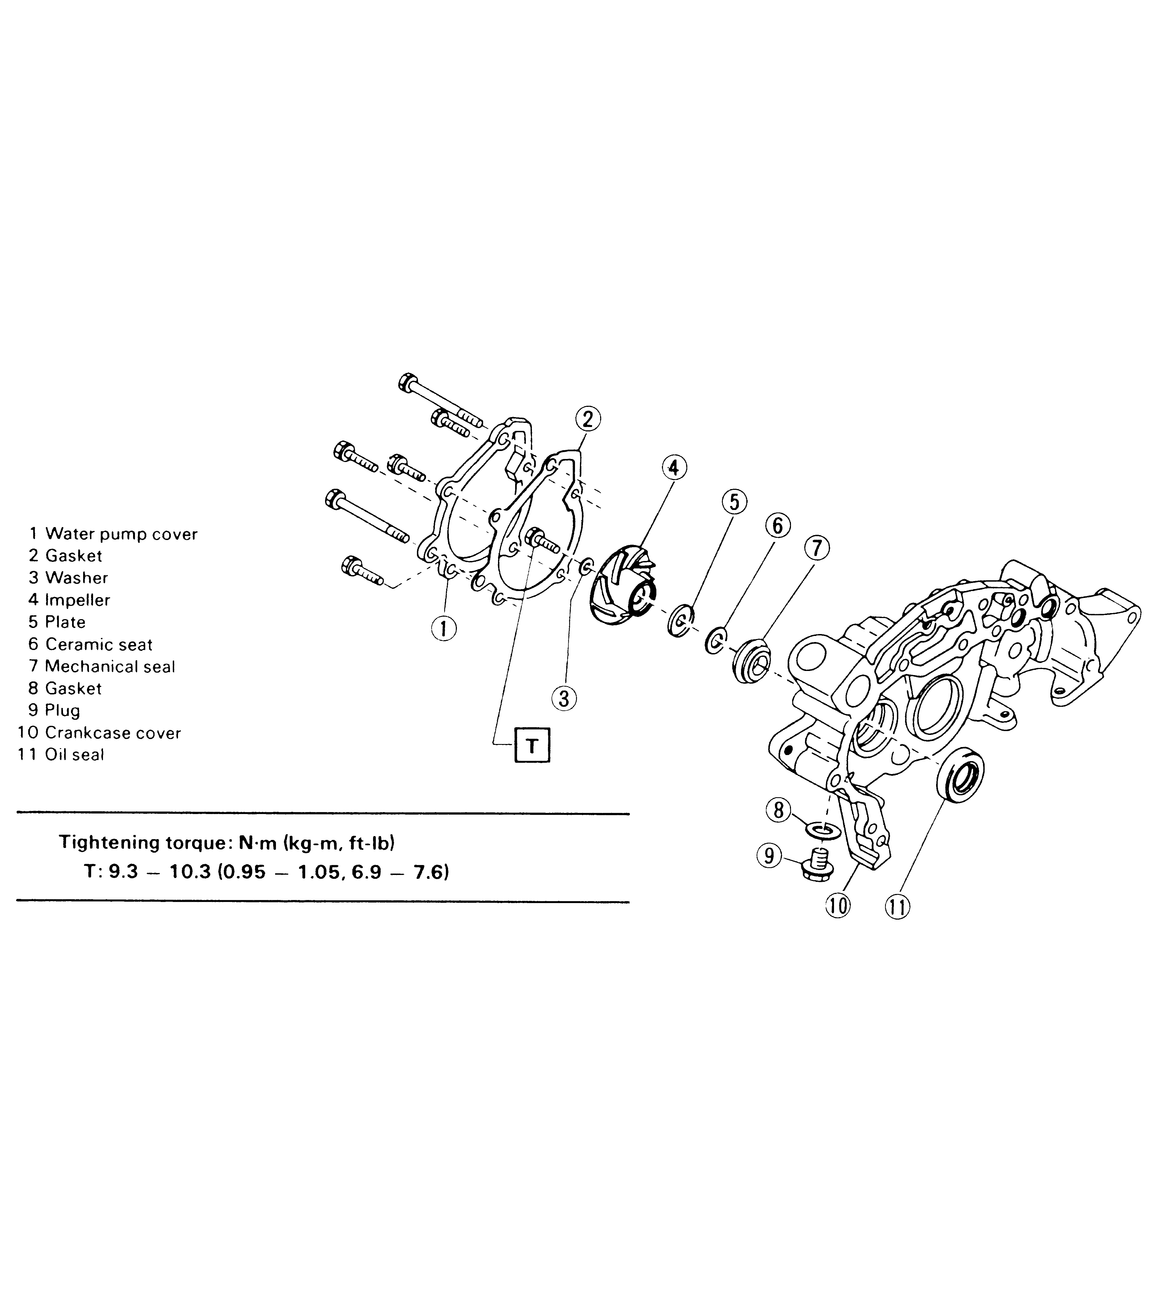
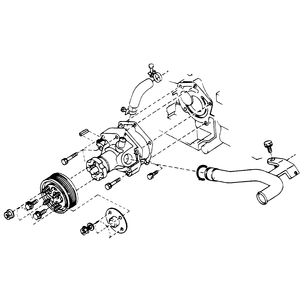
| Fig. 1: Water pump assembly — 1.2L engine
|
- Disconnect the negative battery cable.
- Drain the coolant and engine oil into a suitable containers.
- Remove the dipstick and tube.
- Remove the alternator. Refer to the procedure in Section 2.
- Remove the crankshaft pulley.
- Remove the timing belt cover.
- Remove the timing belt, tensioner and camshaft sprocket, as described later
in this section.
- Remove the rear timing belt cover.
- Raise and safely support the vehicle on jackstands.
- Remove the flywheel housing cover.
- Remove the oil pan, oil pan plate and oil strainer.
- Remove the air suction manifold bracket from the air manifold and crankcase
cover.
- Remove the water pump cover retainer bolts from the crankcase cover. Lift
the water pump cover off and clean all gasket material from both mating surfaces.
- Remove the water pump impeller bolt and impeller, as well as the seal.
- Install a new water pump seal using seal installer 499795400 or equivalent.
Install the water pump impeller and bolt. Tighten the bolt to 7–9 ft.
lbs. (9–12 Nm).
- Install the water pump cover to the crankcase cover. Tighten the retainer
bolts to 8–12 ft. lbs. (10–16 Nm).
- Lower the vehicle and install all remaining components. Tighten to specifications.
- Refill the crankcase with clean oil. Refill the cooling system.
- Start the vehicle and check for leaks.
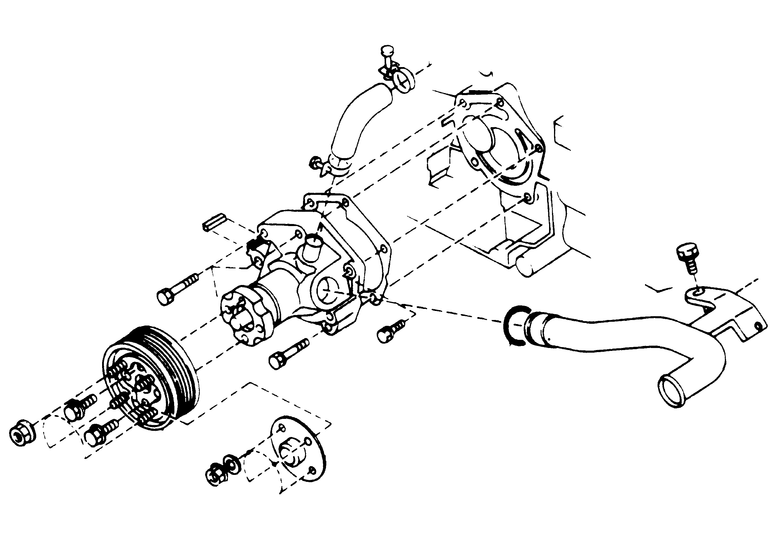
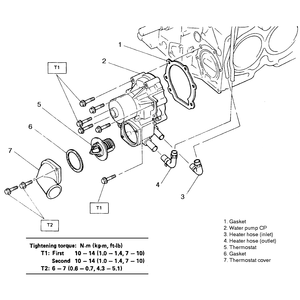
| Fig. 2: Water pump assembly — 1.6L, 1.8L
and 2.7L engines
|
- Drain the coolant into a suitable container.
- Disconnect the radiator outlet hose and water bypass hose from the water
pump.
- Loosen the pulley nuts. Loosen the alternator assembly and remove the drive
belt.
- Remove the front belt cover.
- Unfasten the water pump mounting bolts and remove the water pump.
- Installation is the reverse of removal.
- Clean the gasket material from both mating surfaces. Always use new gaskets
during installation.
- Install the water pump and pump mounting bolts. Tighten the mounting bolts
to 7–8 ft. lbs. (9–10 Nm).
- Install the alternator drive belt and drive belt cover. Adjust the drive
belt to the proper tension. Tighten the water pump pulley bolts to 7–8
ft. lbs. (9–10 Nm).
- Fill the radiator with coolant. Start the engine and allow it to reach operating
temperature. Check for leaks.
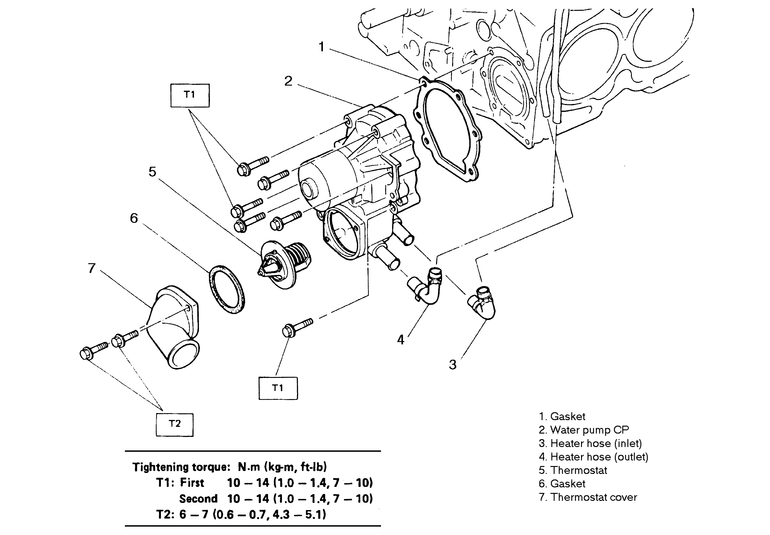
| Fig. 3: Water pump assembly — 2.2L, 2.5L
and 3.3L engines
|
| Fig. 4: Water pump bolt tightening sequence — 2.2L
and 2.5L engines
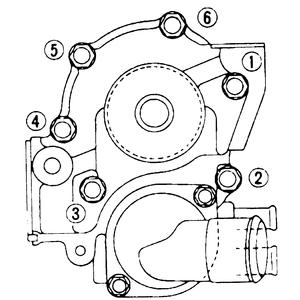
|
| Fig. 5: Water pump bolt tightening sequence — 3.3
engine
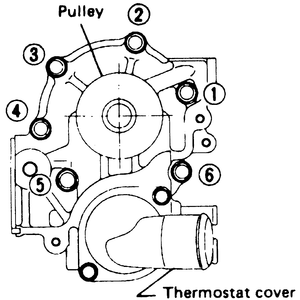
|
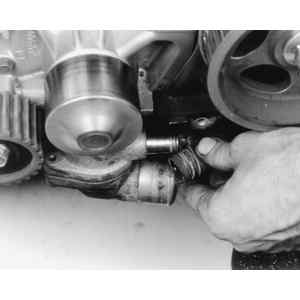
| Fig. 6: After loosening the hose clamps, detach the water
pump's hoses — 2.2L engine shown
|
| Fig. 7: Remove the water pump retainer bolts
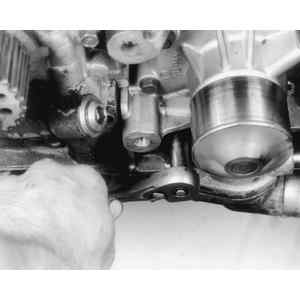
|
| Fig. 8: Remove the water pump from the engine

|
| Fig. 9: Remove the water pump gasket
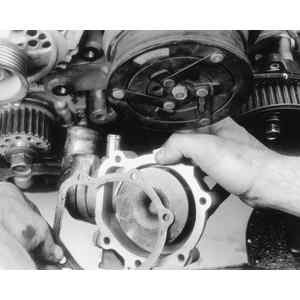
|
- Disconnect the negative battery cable.
- Drain the coolant into a suitable container.
- Disconnect the radiator outlet hose.
- Remove the radiator fan motor assembly.
- Remove the accessory drive belts.
- Remove the timing belt, tensioner and camshaft angle sensor. Refer to the
procedure in this section for removal and installation steps.
- Remove the left side camshaft pulley(s) and left side rear timing belt cover.
Remove the tensioner bracket.
- Disconnect the radiator hose and heater hose from the water pump.
- Remove the water pump retainer bolts.
- Remove the water pump.
- Installation is the reverse of removal. Pay particular attenstion to the
following information.
- Clean the gasket mating surfaces thoroughly. Always use new gaskets during
installation.
- Install the water pump and tighten the bolts, in sequence, to 7–10
ft. lbs. (10–14 Nm). After tightening the bolts once, retighten to the
same specification again.
- Fill the system with coolant and connect the negative battery cable.
- Start the engine and allow it to reach operating temperature and check for
leaks.