Previous Next

Engine Fan

REMOVAL & INSTALLATION

1.2L Engine
  1. Disconnect the negative battery cable.
  2. Tag and disconnect the fan motor lead wire.
  3. Remove the cooling fan frame mounting bolts.
  4. Remove the cooling fan assembly from the vehicle.
  5. Remove the fan motor-to-frame mounting bolts.
  6. Remove the fan blade assembly mounting nut, then remove the fan blade from the motor.
  7. Installation is the reverse of removal. Secure the fan blade mounting nut to 4 ft. lbs. (5 Nm).
  8. Install the fan motor to the motor frame then secure with the mounting bolts to 4 ft. lbs. (5 Nm).
  9. Attach the fan to the radiator and install the 3 fan motor frame-to-radiator support. Tighten the bolts to 4 ft. lbs. (5 Nm).
  10. Start the engine and check for correct fan operation.
1.6L, 1.8L and 2.7L Engines
WITHOUT A/C
  1. Disconnect the negative battery cable.
  2. Unfasten the fan motor electrical connector at the motor assembly, then remove the harness from the bracket on the fan frame.
  3. Remove the fan motor frame mounting bolts, then remove the frame assembly.
  4. Remove the fan motor-to-frame mounting bolts and remove the fan motor.
  5. Remove the fan blade mounting nut, then remove the blade from the fan motor.
  6. Installation is the reverse of removal. Secure all components accordingly.
  7. Start the engine and check for proper fan operation.
WITH A/C
  1. Disconnect the negative battery cable.
  2. Loosen, but do not remove the fan clutch mounting nuts.
  3. Remove the accessory drive belt.
  4. Remove the fan shroud mounting bolts.
  5. Remove the fan clutch assembly and shroud by removing the clutch mounting nuts loosened earlier. Remove the fan and shroud together.
  6. Remove the fan nuts to separate the fan blade and clutch assembly.
  7. Installation is the reverse of removal. Secure each component as follows:
  8. Start the engine and check for proper fan operation.
2.2L and 2.5L Engines

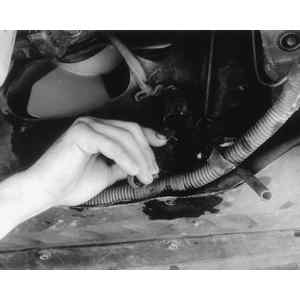
Fig. 1: Disconnect the fan motor harness from the fan cover — 2.2L engine shown

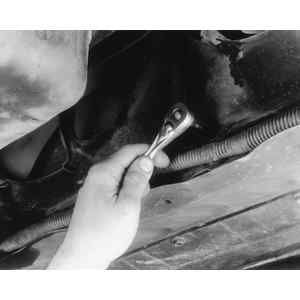
Fig. 2: Unfasten the fan cover-to-radiator bolts . . .

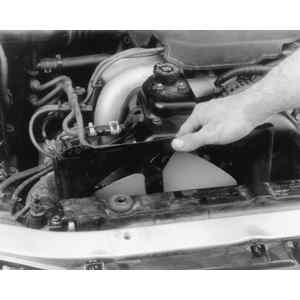
Fig. 3: . . . then lift the fan and cover assembly out of the engine compartment

  1. Disconnect the negative battery cable.
  2. Unfasten the fan motor electrical connector.
  3. Remove the coolant reservoir tank.
  4. Remove the 4 fan shroud bolts.
  5. Remove the fan blade retainer nut, then remove the motor retainer nuts to separate the motor from the shroud.
  6. Installation is the reverse of removal. Secure the fan motor to the shroud, and tighen the nuts to 2–3 ft. lbs. (3–4 Nm).
  7. Start the engine and check for proper fan operation.
3.3L Engine
  1. Disconnect the negative battery cable.
  2. Unfasten the electrical connector from the cooling fan assembly.
  3. Remove the upper radiator bracket.
  4. Remove the two bolts securing the cooling fan frame to the radiator.
  5. Remove the cooling fan assembly.
  6. Remove the cooling fan from the frame assembly.
  7. Installation is the reverse of removal. Secure all components accordingly.
  8. Start the vehicle and check for proper fan operation.

Previous Next