Refer to the combination switch procedure in this section for removal and
installation steps for headlight switch assemblies incorporated into the combination
switch assembly.
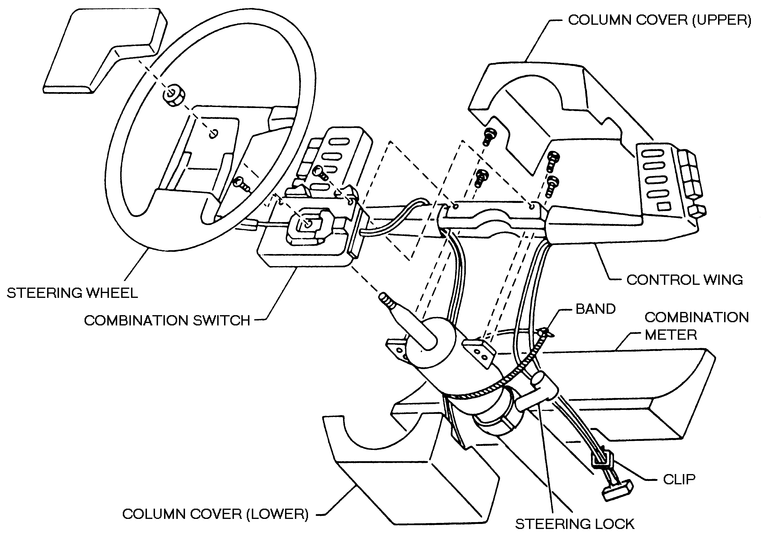
| Fig. 1: Control wing assembly — XT

|
The headlight switch is installed on a control wing at the left side of the
steering wheel.
- Disconnect the negative battery cable.
- Remove the lower steering column cover retainer screws and the upper and
lower trim covers.
- Remove the steering wheel. Refer to Section 8 for removal and installation
steps.
- Disconnect the electrical harness-to-steering column clip and band.
- Remove the combination switch-to-steering column screws and the switch
assembly from the steering wheel.
- Remove the left control wing-to-steering column screws, then remove the
left control wing from the steering column.
- Remove the control wing case screws and separate the case halves from
each other; this will provide access to the headlight switch.
- To replace the headlight switch knob, use a pin rod to lightly push the
pawl (inside the switch knob) inward, and pull the knob outward.
- Remove the headlight switch retainer screws, and remove the switch from
the case.
To install:
- Position the headlight switch in the case, and secure in place with the
retainer screws. To install the knob onto the switch, place the knob on
the switch, place your finger on the back side of the switch, and squeeze
the knob onto the switch.
NOTE: When reassembling the control wing cases, be careful
not to get the electrical harness caught between the cases.
- Attach the wing case halves together, and install the retainer screws.
- The remainder of installation is the reverse of removal. Tighten each
component to specifications.
- Test the headlight switch to make sure it works correctly.