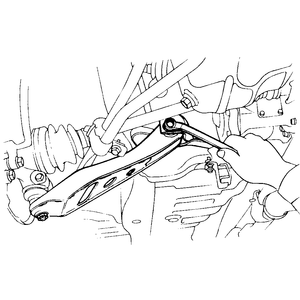
| Fig. 1: Removing the control arm-to-subframe retainer
bolt
|
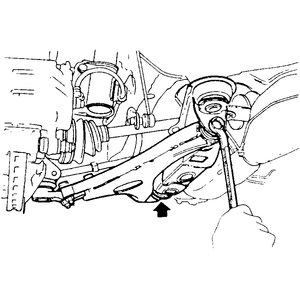
| Fig. 2: Lower control arm assembly. Arrow indicates control
arm-to-subframe retainer bolt — Sedan, Coupe, Loyale,
XT, Wagon and Brat
|
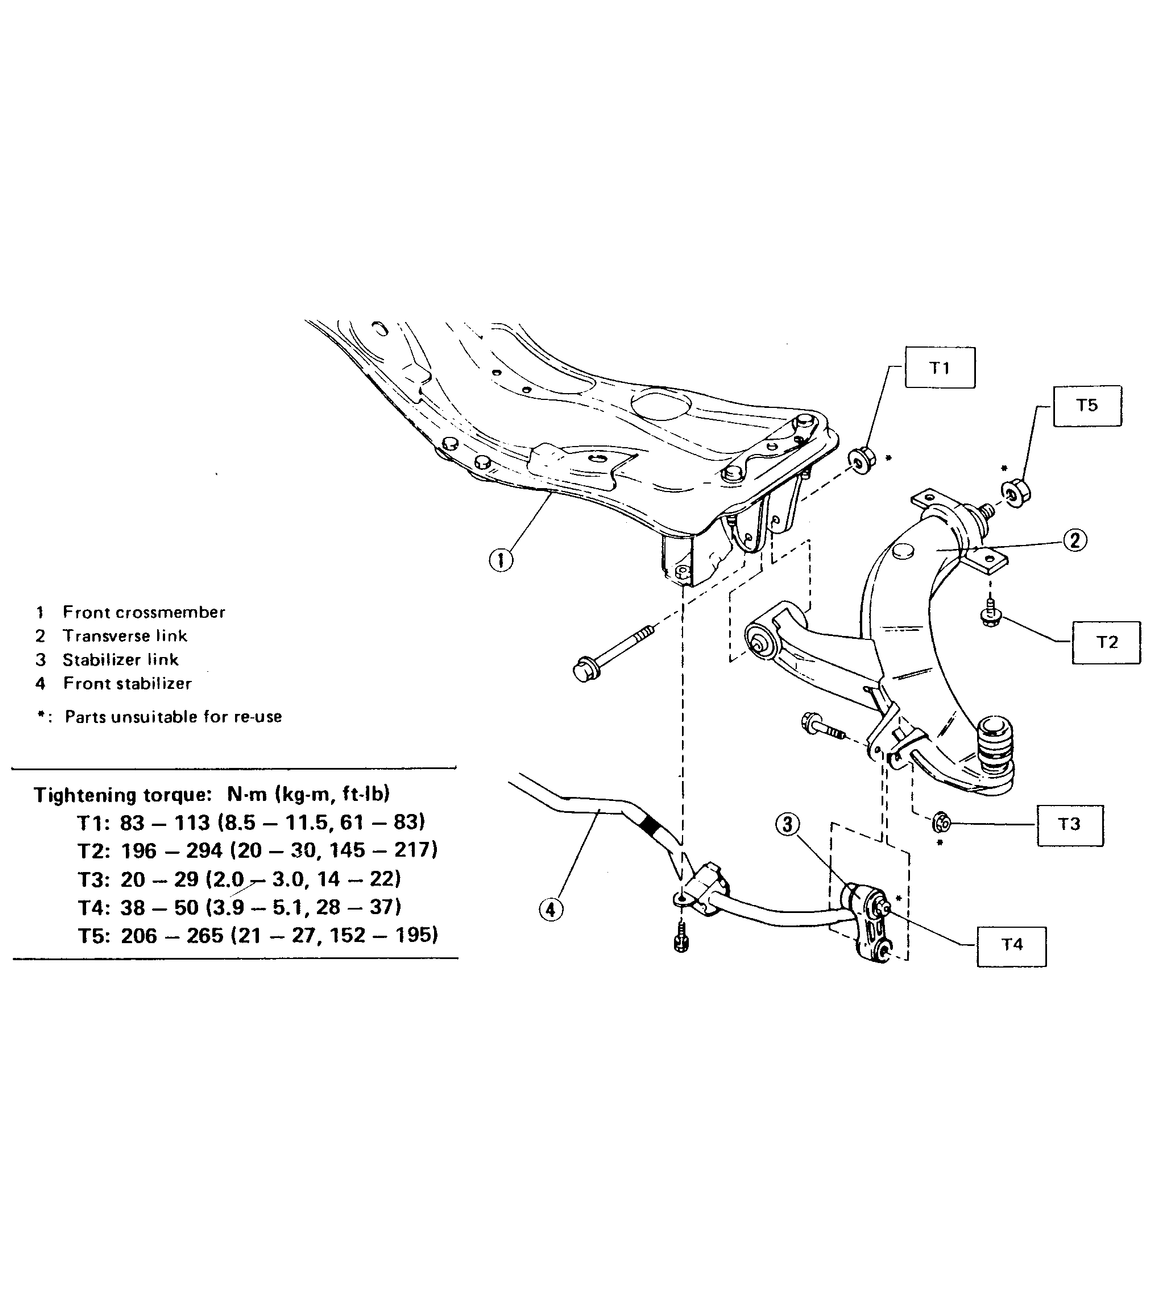
To install:
| Fig. 3: Lower control arm assembly — Legacy
and Impreza
|
To install:
NOTE: These bolts should be tightened to such an extent that they can still move back and forth in the oblong shaped hole in the bracket which holds the busing.
NOTE: Move the rear bushing back and forth until the lower control arm link-to-rear bushing clearance is established before tightening the bolts.
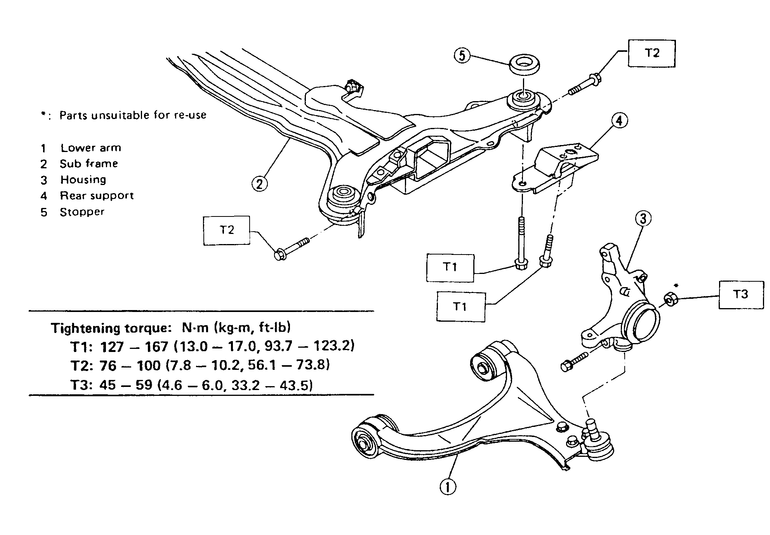
| Fig. 4: Lower control arm assembly — Legacy
and Impreza
|
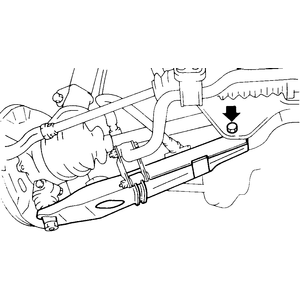
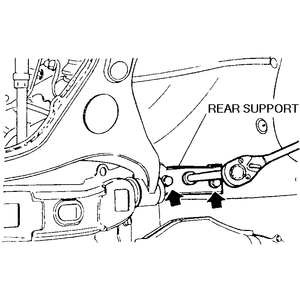
| Fig. 5: Remove the rear support bracket
|
| Fig. 6: Remove the bolts
|
To install:
NOTE: The lower control arm through-bolts must be tightened with the weight of the vehicle on the suspension.