Previous Next

Sway Bar

REMOVAL & INSTALLATION

Justy

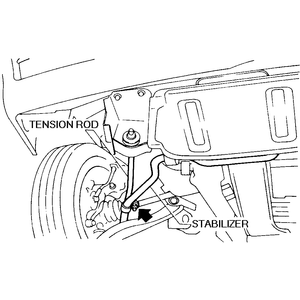
Fig. 1: Sway bar mount attached to the tension rod — Justy

  1. Disconnect the negative battery cable.
  2. Raise and safely support the vehicle on jackstands.
  3. Remove the sway bar bracket bolts from the outboard clamps at the tension rods.
  4. Remove the sway bar-to-frame mounting bolts, then remove the frame brackets and bushings.
  5. Remove the sway bar from the vehicle.

    To install:

  6. Position the sway bar on the vehicle and install the sway bar-to-frame bushings and brackets. Tighten the mounting bolts to 18 ft. lbs. (26 Nm).
  7. Install the outboard clamps and mounting bolts on the tension rods and tighten to 18 ft. lbs. (26 Nm).
  8. Lower the vehicle. Connect the negative battery cable.
Except Justy
  1. Disconnect the negative battery cable.
  2. Raise and safely support the vehicle on jackstands.
  3. Remove the front tire and wheel assemblies.
  4. Remove the sway bar link-to-lower control arm mounting nuts and bolts.
  5. On the Legacy and Impreza, remove the jack-up plate from the lower crossmember.
  6. On models with ABS, disconnect the sensor wiring and remove the retaining bolt.
  7. Remove the sway bar bracket-to-frame bolts and remove the sway bar from the vehicle.
  8. Installation is the reverse of removal. Secure all components to specifications.

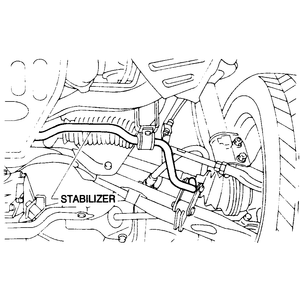
    Fig. 2: Sway bar mounting positions — Sedan, Coupe, Loyale, XT, Wagon and Brat

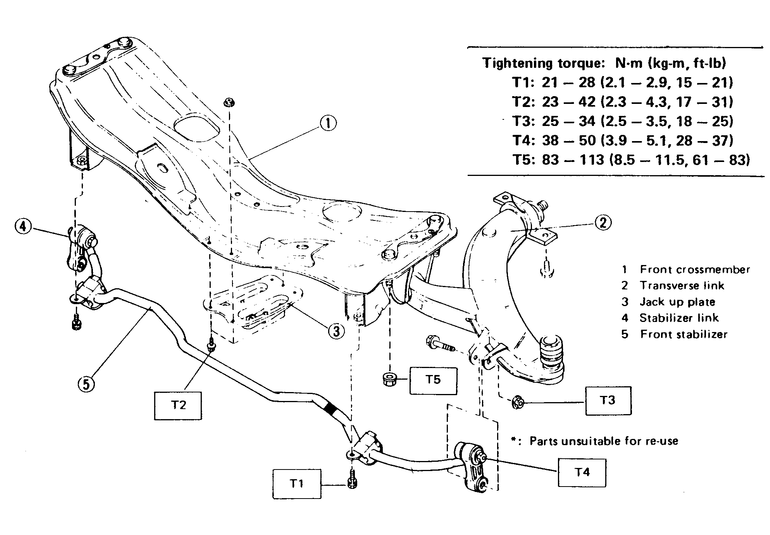
    Fig. 3: Sway bar and mounting components — Legacy and Impreza

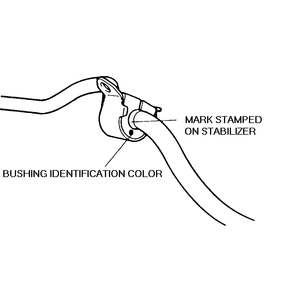
    Fig. 4: Bushing identification mark

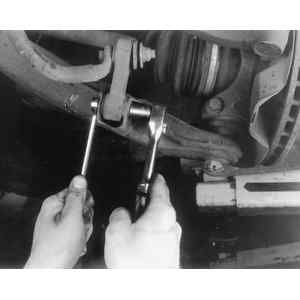
    Fig. 5: Loosening the sway bar link-to-control arm retainer nut and bolt

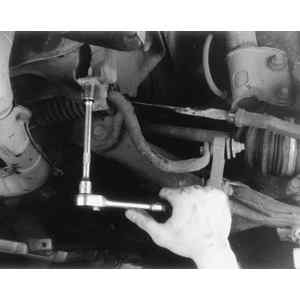
    Fig. 6: Loosening the sway bay bushing bracket retainer bolt

Previous Next