Raise the vehicle and support safely on jackstands.
Remove the front wheel, handbrake cable, caliper and caliper bracket. Support
the caliper from a suspension part using a piece of wire. Make sure the brake
hose is not distorted.
Remove the axle shaft nut and pull the disc off the axle shaft with a puller.
Remove the 4 bolts which hold the disc to the hub.
Separate the hub from the rotor.
Installation is the reverse of removal. Secure the hub-to-rotor retainer
bolts to 36–51 ft. lbs. (48–69 Nm).
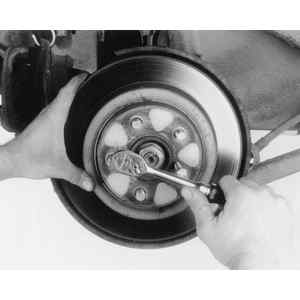
Fig. 1: To separate the rotor from the hub assembly,
install and tighten two bolts into the rotor's holes
Raise and safely support the vehicle on jackstands.
Remove the rear wheel and tire assembly.
Remove the brake caliper and bracket assembly, and suspend out of the way
with a piece of wire.
Remove the castle nut.
Remove the conical spring(s) around one or more of the lug studs.
Thread two suitably sized metric bolts into the holes in the rotor hat.
Evenly tighten both bolts to separate the rotor from the hub assembly.
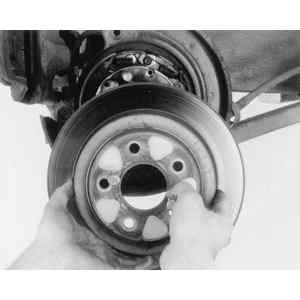
Fig. 2: When the rotor is freed from the hub, slide
it off the studs
Pull the rotor from the hub and halfshaft.
To install:
Install the hub and disc assembly on the axle shaft. Install the conical
spring(s) and castle nut. Ensure that each conical spring is installed in
the correct direction, then temporarily tighten the castle nut.
Install the caliper assembly and tighten the bolts to specification.
Tighten the castle nut to specification. Install the wheels and lower the
vehicle.