Some models are equipped with a mechanical clutch system that is adjustable.
Other models are equipped with a hydraulic system that is not adjustable.
The clutch cable can be adjusted at the cable bracket where the cable is attached
to the side of the transaxle housing.
- Before servicing the vehicle, refer to the precautions in the beginning
of this section.
- Remove the circlip and clamp.
- Slide the cable end in the direction desired, then replace the circlip and
clamp into the nearest gutters on the cable end.
NOTE: The cable should not be stretched out straight nor
should it have right angle kinks in it. Any straightening should be gradual.
- Check the clutch for proper operation.
Adjust the pedal with the return stop bolt, so that its pad is on the same
level as the brake pedal pad.
Check to be sure that the stroke of the pedal is 5.04-5.43 in. (128-138mm).
Check the clutch release fork stroke. It should be 0.67 in. (17mm).
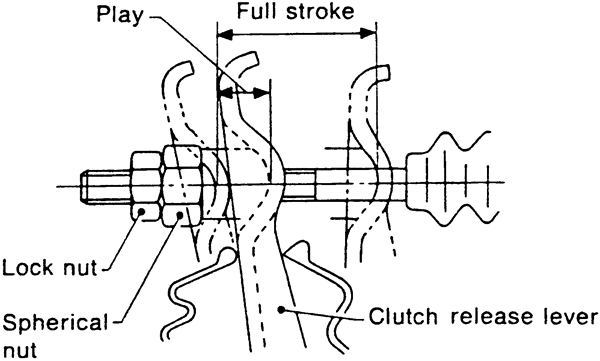
| Fig. 1: Be sure to tighten the locknut after making the
necessary adjustments-mechanical clutch
|
- Before servicing the vehicle, refer to the precautions in the beginning
of this section.
- Remove the clutch release lever return spring from the lever, and loosen
the locknut on the fork adjusting nut.
NOTE: Be careful not to twist the cable during adjustment
- Turn the adjusting nut (spherical nut) until a release fork free-play of
0.14-0.18 in. (3.5-4.5mm) is obtained.
- Tighten the locknut.
- Install the return spring on the lever. Hook the long hook side of the return
spring with the lever.
- Check the pedal free-play. It should be 0.12-0.16 in. (3.0-4.0mm).
- Adjust the pedal free-play, as necessary, with the pedal adjusting bolt.