Previous Next

Inspection

  1. Raise and support your vehicle to safely inspect the exhaust system.
  2. Place four safety-stands under the vehicle to provide enough room for you to slide under the vehicle and inspect the system completely.
  3. Start the inspection at the exhaust manifold or turbocharger pipe where the header pipe is attached and work your way to the back of the vehicle.
  4. On dual exhaust systems, remember to inspect both the left and right side exhaust pipes.
  5. Check the complete exhaust system for open seams, holes loose connections, or other deterioration which could permit exhaust fumes to seep into the passenger compartment. Inspect all mounting brackets and hangers for deterioration, some models may have rubber O-rings that can be overstretched and non-supportive.
  6. Replace these components as needed. It has always been a practice to use a pointed tool to poke up into the exhaust system where the deterioration spots are to see whether or not they crumble.
  7. Some models may have heat shield covering certain parts of the exhaust system.
  8. It will be necessary to remove these shields to have the exhaust visible for inspection.

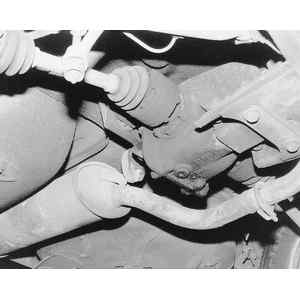
Make sure the exhaust components are not contacting the body or suspension

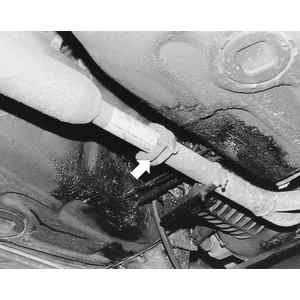
Check for overstretched or torn exhaust hangers

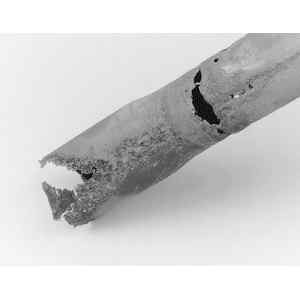
Example of a badly deteriorated exhaust pipe

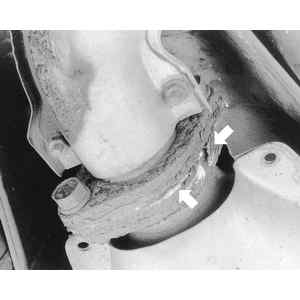
Inspect flanges for gaskets that have deteriorated and need replacement

Some systems, like this one, use large O-rings (doughnuts) in between the flanges

Previous Next