To Remove:
NOTE: Before conducting this procedure, drain the engine oil completely if applicable.
- Remove the following
- Intake manifold
- V-belt
- Crankshaft pulley
- Timing belt cover
- Timing belt assembly
- Camshaft sprocket
- Crankshaft sprocket
- Generator and a/c compressor with their brackets
- Cylinder head assembly
- Clutch disc and cover
- Flywheel. (MT model)
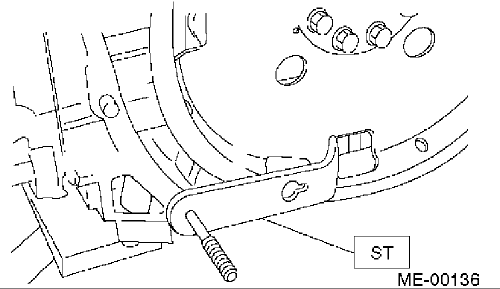
| Crank Shaft Stopper
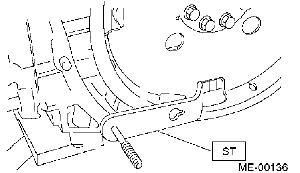
|
- Drive plate. (AT model) using st, lock crankshaft. St 498497100 crankshaft stopper
- Oil separator cover
- Water by-pass pipe for heater
- Oil filter. St 18332aa000 oil filter wrench (outer diameter: 68 mm (2.68 inch) ) st 18332aa010 oil filter wrench (outer diameter: 65 mm (2.56 inch) )
| Oil Cooler
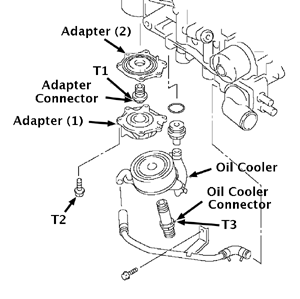
|
- Oil cooler
- Oil pan
- Oil strainer stay
- Oil strainer
- Baffle plate
- Water pipes
- Water pump
- Oil pump
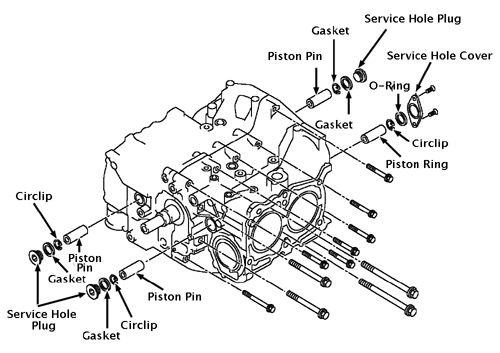
| Service Hole Plug

|
- Service hole cover and service hole plugs using hexagon wrench [14 mm (0.55 inch)]
| Piston Cir-clip
|
- Rotate the crankshaft to bring #1 and #2 pistons to bottom dead center position, and then remove the piston cir-clip through service hole of #1 and #2 cylinders
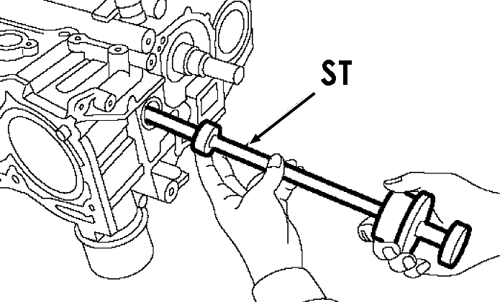
- Draw out the piston pin from #1 and #2 pistons using ST. ST 499097700 PISTON PIN
NOTE: Be careful not to confuse the original combination of piston, piston pin and cylinder.
- Remove the piston pins from #3 and #4 pistons
- Remove the bolts which connect the cylinder block on the side of #2 and #4 cylinders
- Back off the bolts which connect the cylinder block on the side of #1 and #3 cylinders two or three turns
- Set up the cylinder block so that #1 and #3 cylinders are on the upper side, then remove the cylinder block connecting bolts
- Separate the cylinder blocks (LH) and (RH)
CAUTION
When separating the cylinder block, do not allow the connecting rod to fall and damage the cylinder block.
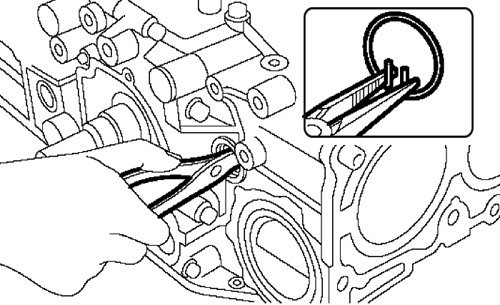
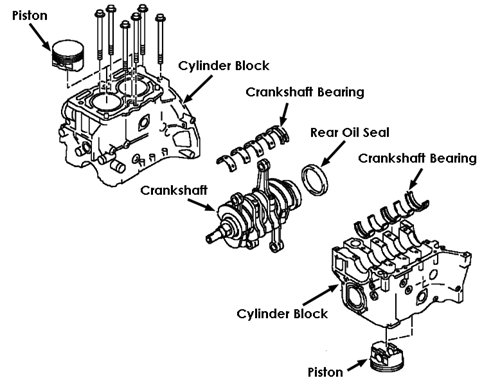
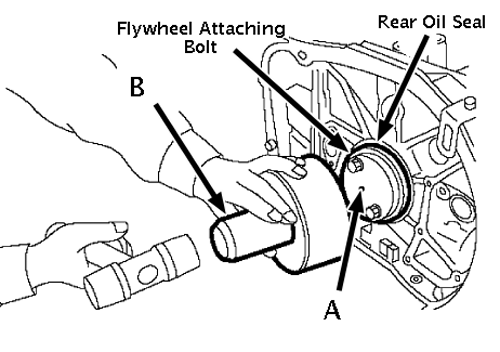
- Remove the rear oil seal
To Install:
- Remove oil in the mating surface of bearing and cylinder block before installation Apply a coat of engine oil to crankshaft pins
- Position the crankshaft on #2 and #4 cylinder block
- Apply fluid packing to the mating surface of #1 and #3 cylinder block, and position it on #2 and #4 cylinder block
- Apply engine oil to washers and thread of bolts
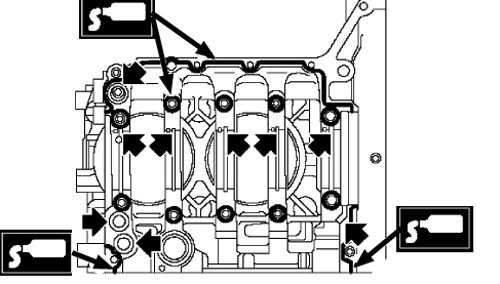
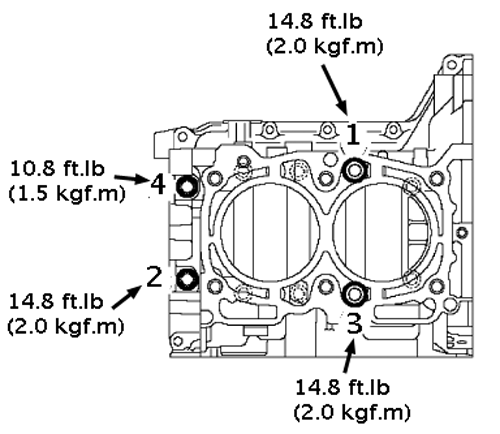
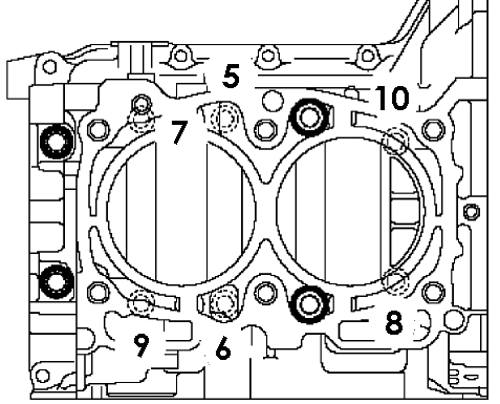
- Tighten the 10 mm cylinder block connecting bolts in alphabetical sequence shown in the figure (LH side)
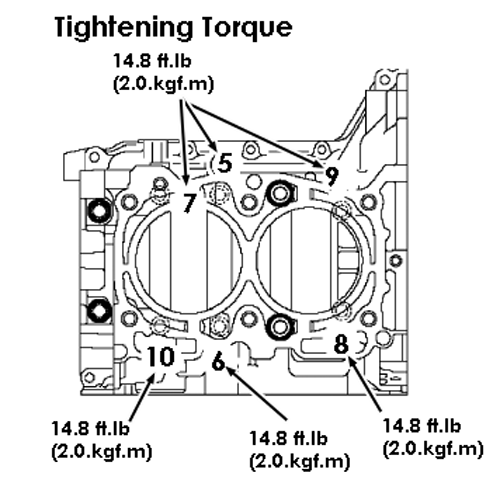
- Tighten the 10 mm cylinder block connecting bolts in alphabetical sequence shown in the figure (RH side)
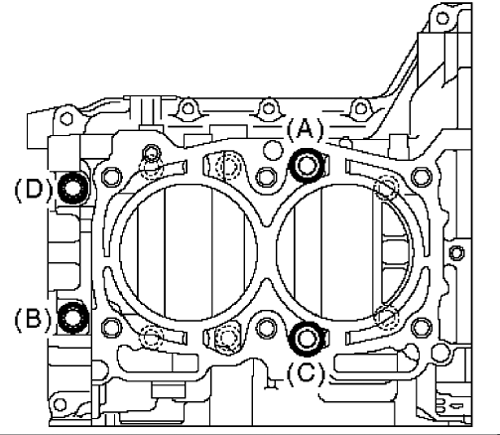
- Further tighten the LH side bolts (A - D) in alphabetical sequence
- Further tighten the RH side bolts (E - J) in alphabetical sequence
- Further tighten the LH side bolts (A - D) by 90° in alphabetical sequence
- Further tighten the RH side bolts (E - J) by 90° in alphabetical sequence
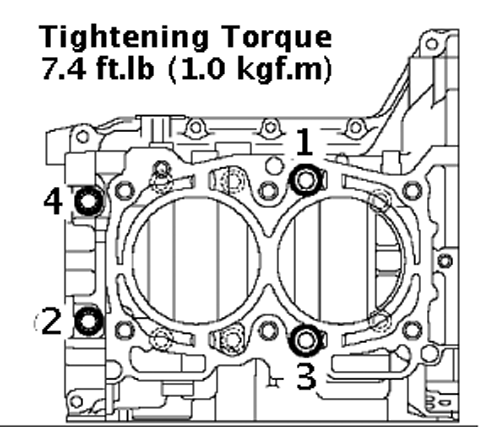
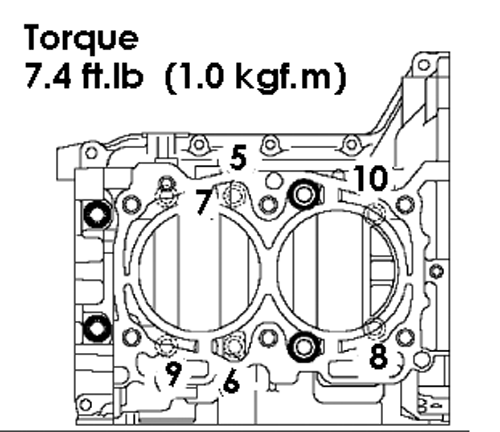
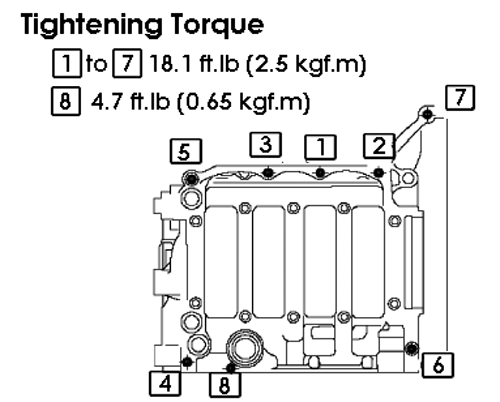
- Tighten the 8 mm and 6 mm cylinder block connecting bolts in alphabetical sequence shown in the figure
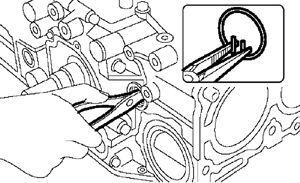
- Install the rear oil seal using ST1 and ST2. ST1 499597100 CRANKSHAFT OIL SEAL GUIDE ST2 499587200 CRANKSHAFT OIL SEAL INSTALLER
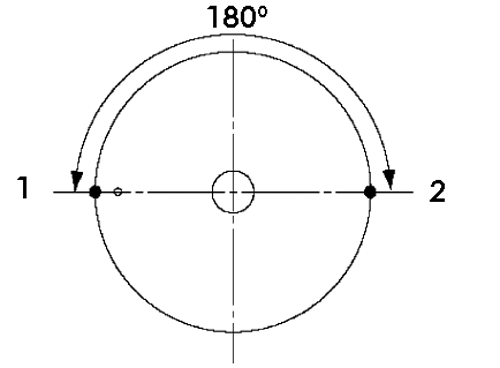
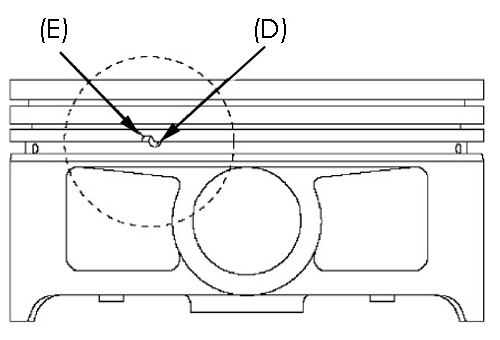
- Position the top ring gap at (A) or (B) in the figure
- Position the second ring gap at 180° on the reverse side for the top ring gap
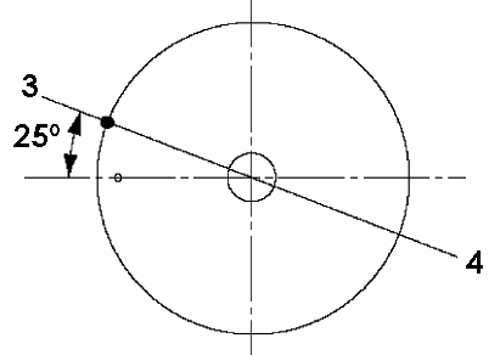
- Position the upper rail gap at (C) in the figure
- Align upper rail spin stopper (D) with piston side surface hole (E)
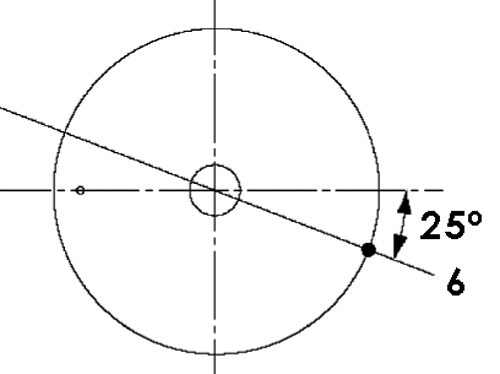
- Position the expander gap at (F) in the figure
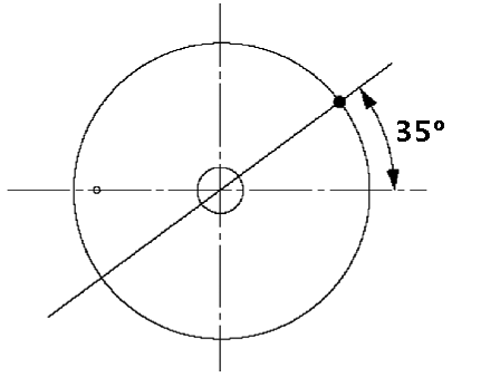
- Position the lower rail gap at (G) in the figure
NOTE: Ensure ring gaps do not face the same direction. Ensure ring gaps are not within the piston skirt area.
- Install the cir-clip. Install the cir-clips in piston holes located opposite of service holes in cylinder block, when positioning all pistons in the corresponding cylinders.
NOTE: Use new cir-clips.
- Turn the cylinder block so that #1 and #2 cylinders face upward.
- Using the ST1, turn the crankshaft so that #1 and #2 connecting rods are set at bottom dead center. ST1 499987500 CRANKSHAFT SOCKET
- Apply a coat of engine oil to the pistons and cylinders and insert pistons in their cylinders using ST2. ST2 498747300 PISTON GUIDE
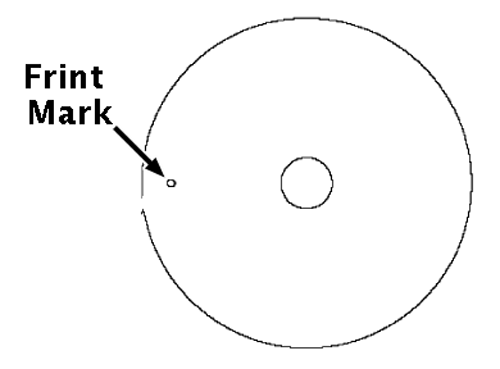
NOTE: Piston front mark faces towards the front of the engine.
- Apply a coat of engine oil to ST3, and then insert the ST3 into service hole to align piston pin hole with connecting rod small end. ST3 499017100 PISTON PIN GUIDE
- Apply a coat of engine oil to the piston pin and insert piston pin into piston and connecting rod through service hole.
- Using the ST, install the cir-clip.
NOTE: Use new cir-clips.
- Apply fluid packing around the service hole plug.
- Install the service hole plug and gasket.
NOTE: Use a new gasket.
- Turn the cylinder block so that #3 and #4 cylinders face upward. Using the same procedures as used for #1 and #2 cylinders, install the pistons and piston pins.
- Install the following