Fuel Pump Assembly Removal and Installation
Precautions: Precautions for Fuel System Service · General safety (00)
NOTICE:
The fuel pump assembly components except the fuel level sensor will lose their original performance if each part is removed from the fuel pump assembly.
Do not remove each of the fuel pump assembly components except the fuel level sensor. If any faulty condition is found, replace the fuel pump assembly with a new one.
Removal
1)Remove fuel tank from vehicle. 
2)Disconnect fuel hoses from fuel pump assembly.
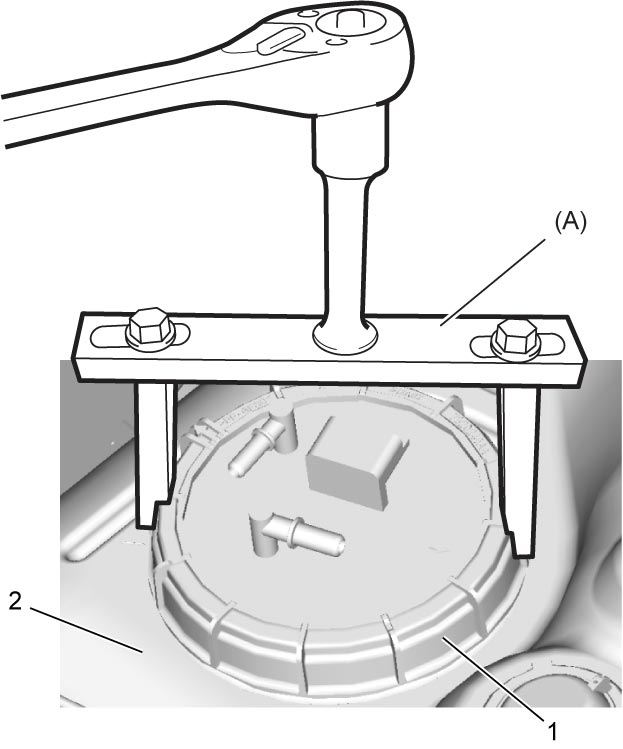
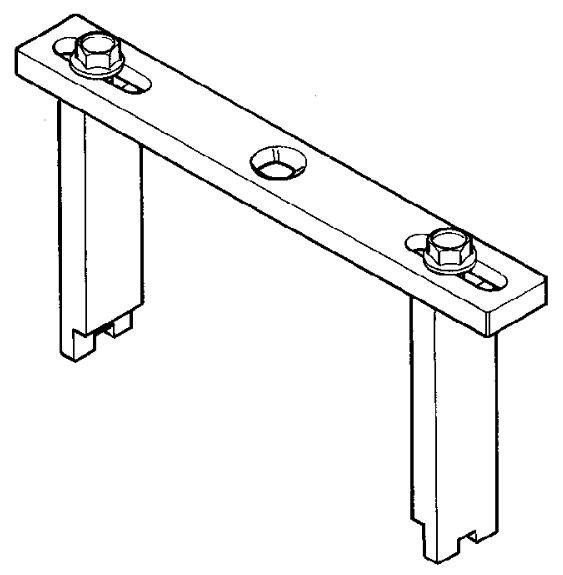
3)Remove fuel pump lock nut (1) from fuel tank (2) using special tool.

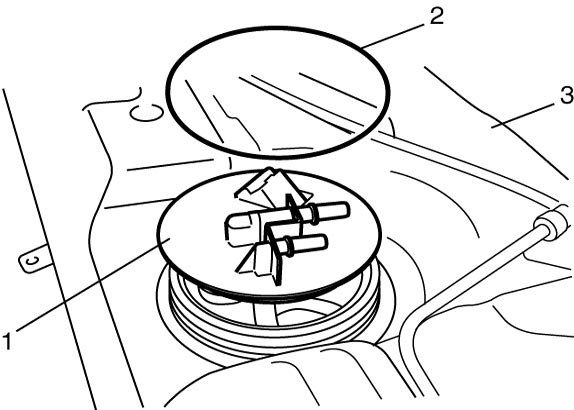
4)Remove fuel pump assembly (1) and O-ring (2) from fuel tank (3).
Installation
 WARNING:
Failure to take proper precautions when reinstalling the fuel tank connections can result in fuel leakage or damage.
Clean the outside surface of the pipe where each quick joint is to be installed, push the pipe into the joint until the joint lock clicks, and then check that the pipe is connected securely.
1)Clean mating surfaces of fuel pump assembly (1) and fuel tank.
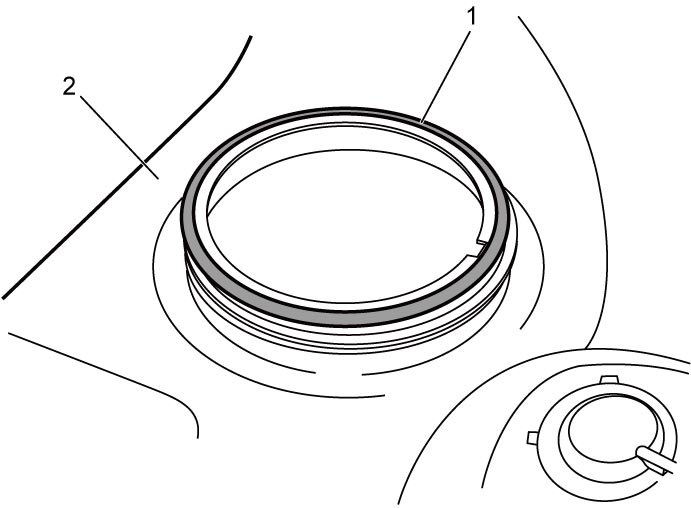
2)Install new O-ring (1) to fuel tank (2).
3)Install fuel pump assembly (1) to fuel tank (2) as follows.
a)Align arrow mark (3) on fuel pump assembly with cutout (4) of fuel tank.
b)Push fuel pump assembly down by hand until fuel pump assembly comes into contact with fuel tank as shown in figure.
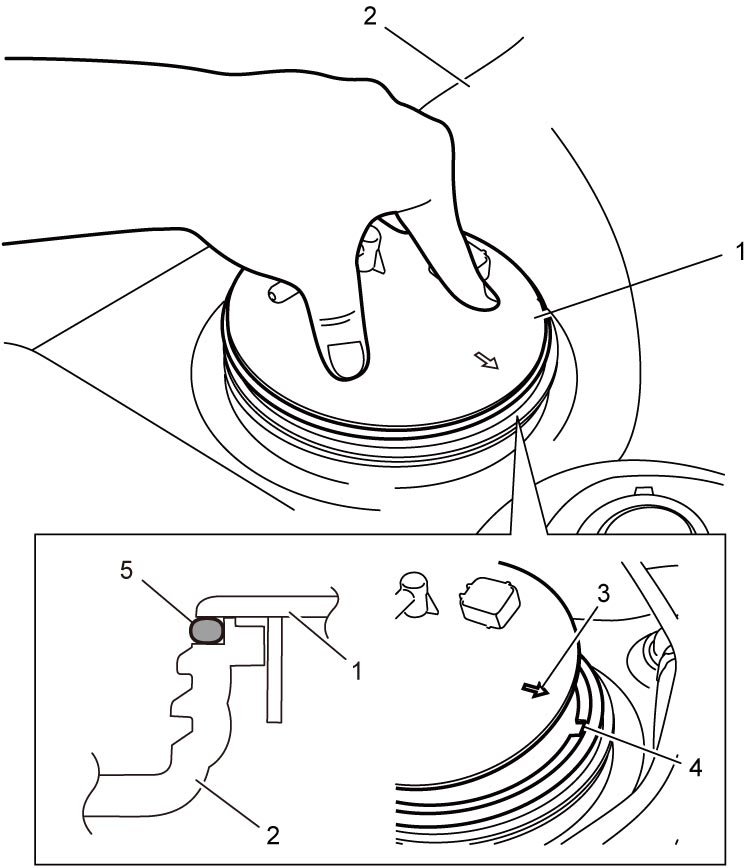
| 5. | O-ring |
c)In the state of Step b), tighten new fuel pump lock nut (1) by hand.
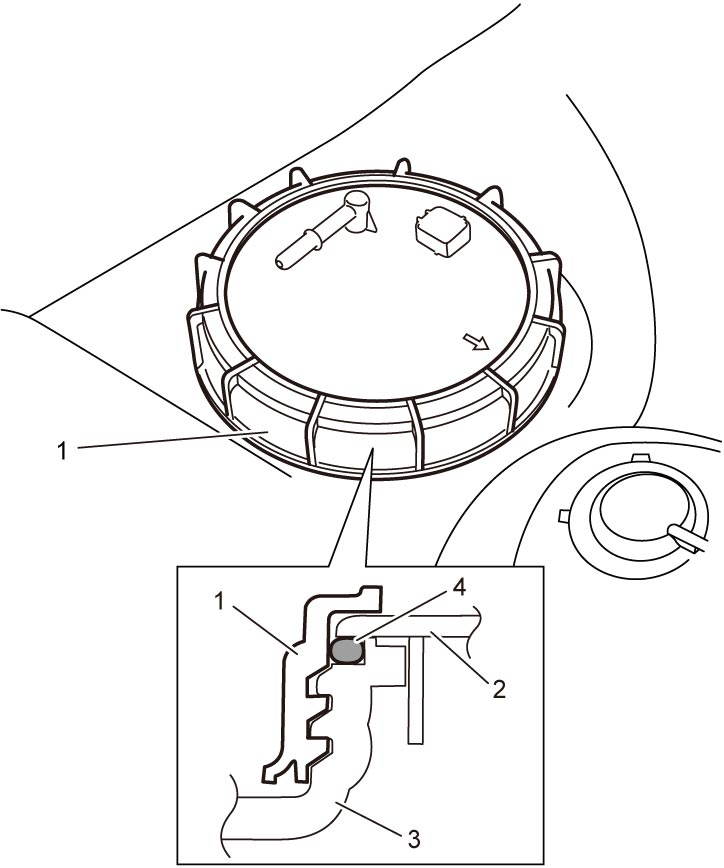
NOTICE:
Removed fuel pump lock nut cannot assure adequate sealing. If the fuel pump lock nut is reused, it may cause fuel leakage.
Never reuse the fuel pump lock nut.
NOTE:
Tighten lock nut while pressing straight on it so that it will not tilt.
| 2. | Fuel pump assembly | 4. | O-ring |
| 3. | Fuel tank |
d)Using special tool, tighten fuel pump lock nut (1) until indexes (3) of fuel pump lock nut and fuel tank are aligned.
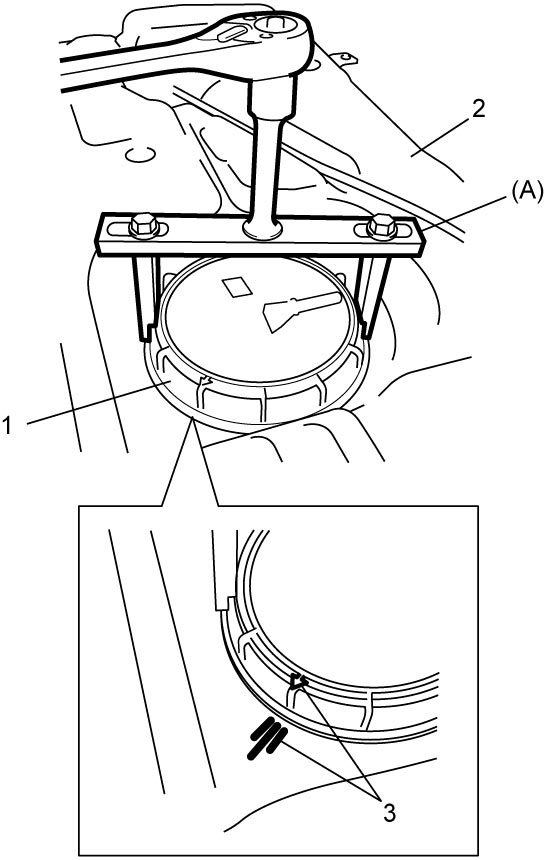
NOTE:
Indexes are aligned when fuel pump lock nut is tightened by approx. 1 and 1/3 rotations.
4)Install fuel tank to vehicle.