Front Brake Caliper Disassembly and Reassembly
Precautions: Precautions for Brakes · General safety (00)
Disassembly
Caliper
1)Clean surfaces around caliper with brake cleaner before disassembly.
2)Remove brake piston by blowing air into the hole for front brake flexible hose joint bolt.
 CAUTION:
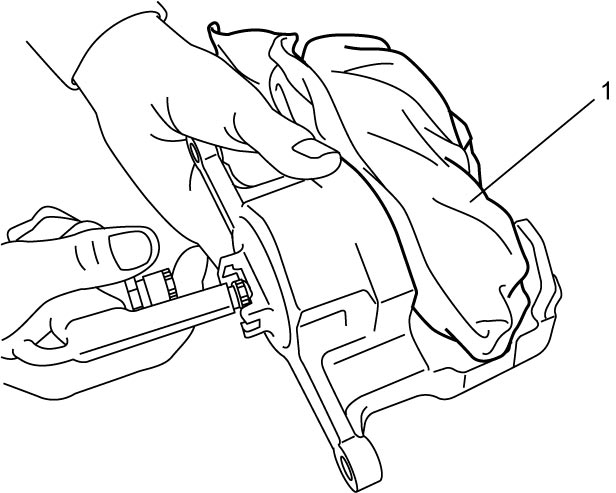

CAUTION:
If you place your fingers in front of the piston when you push it out with compressed air, you may hurt your fingers.
Do not place your fingers in front of the piston when removing it using compressed air.
NOTICE:
Using compressed air that is under high pressure can force the disc brake piston quickly out of the cylinder and damage the piston.
Use a moderate air pressure to push the piston out of the cylinder slowly. In addition, place a cloth (1) in front of the piston to prevent it from being damaged.
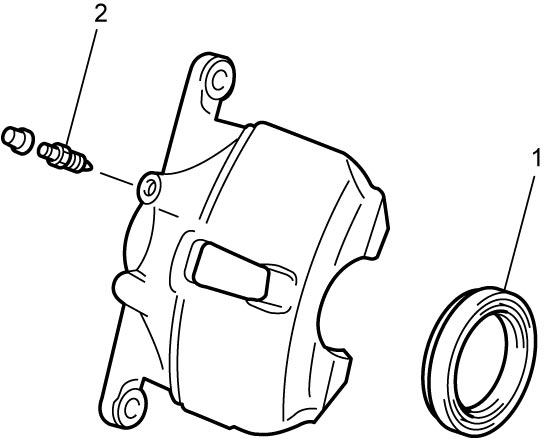
3)Remove cylinder boot (1) and bleeder plug (2).
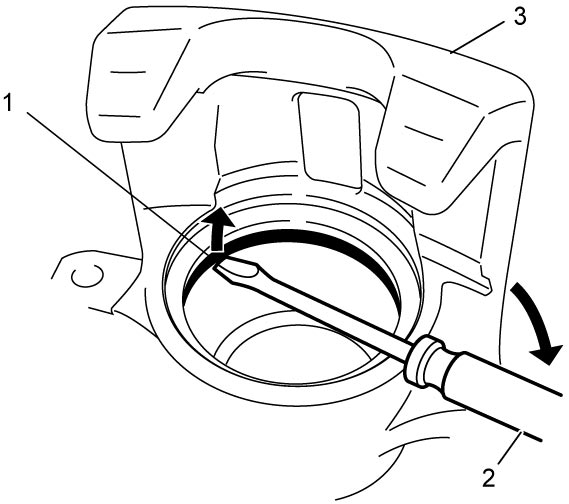
4)Remove piston seal (1) from caliper cylinder of front brake caliper (3) using flat-bladed screwdriver (2) or the like.
NOTICE:
If the inside surface of the cylinder (bore wall) and outside surface of piston are damaged, brake fluid leakage may result.
Be extremely careful not to damage the inside surface of the cylinder and outside surface of piston when removing the piston seal.
Slide pin
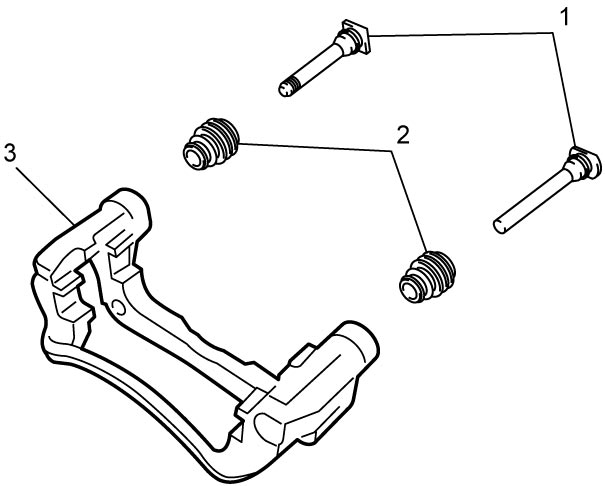
Remove slide pins (1) and pin boots (2) from front brake caliper carrier (3).
Reassembly
WARNING:
Failure to take proper precautions when assembling the brake caliper can result in brake system failure, which could lead to an accident.
•Clean each part before installation using the same brake fluid as that in the master cylinder reservoir.
Never use any other brake fluid or volatile solvent.
•Before installing the piston seal and cylinder boot to the cylinder, apply rubber grease included in the piston seal set or brake fluid to them.
•Fit a new piston seal securely into the groove of the cylinder checking that it is not twisted.
Never use any other brake fluid or volatile solvent.
•Before installing the piston seal and cylinder boot to the cylinder, apply rubber grease included in the piston seal set or brake fluid to them.
•Fit a new piston seal securely into the groove of the cylinder checking that it is not twisted.
NOTE:
Use rubber grease whose viscosity varies very little even at –40 °C (–40 °F).
Caliper
1)Perform the following steps before installing brake piston to front brake caliper.
a)Check entire periphery of brake piston and inside surface of cylinder for rust, corrosion and any other damage. If check result is not OK, replace front brake caliper.
b)After applying rubber grease included in piston seal set of supply parts or specified brake fluid to new piston seal (1), fit the seal into groove in cylinder taking care not to twist the seal.
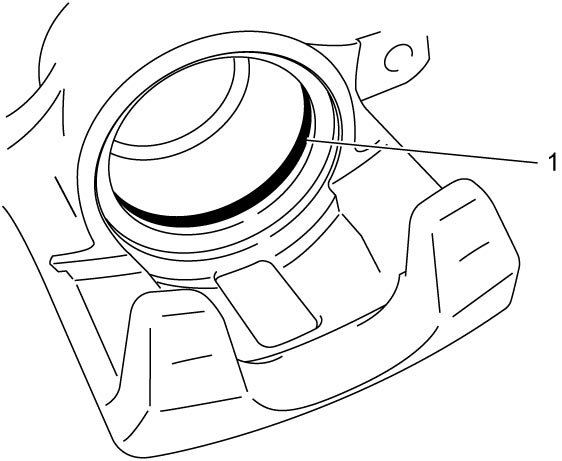
Brake fluid specification
Refer to reservoir cap of brake master cylinder or Owner’s Manual.
c)Apply rubber grease included in piston seal set of supply parts or specified brake fluid to new cylinder boot (1). And then install it onto brake piston as shown.
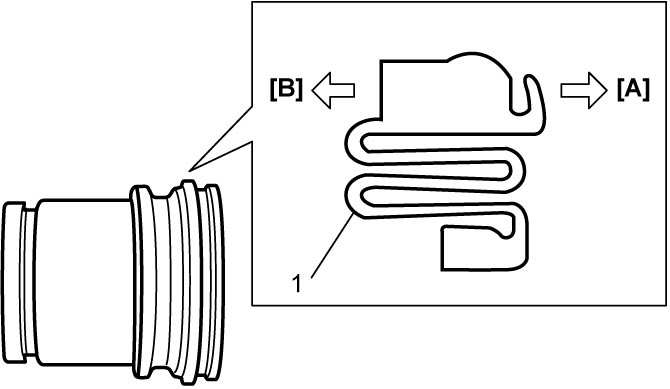
| [A]: | Caliper cylinder side | [B]: | Brake pad side |
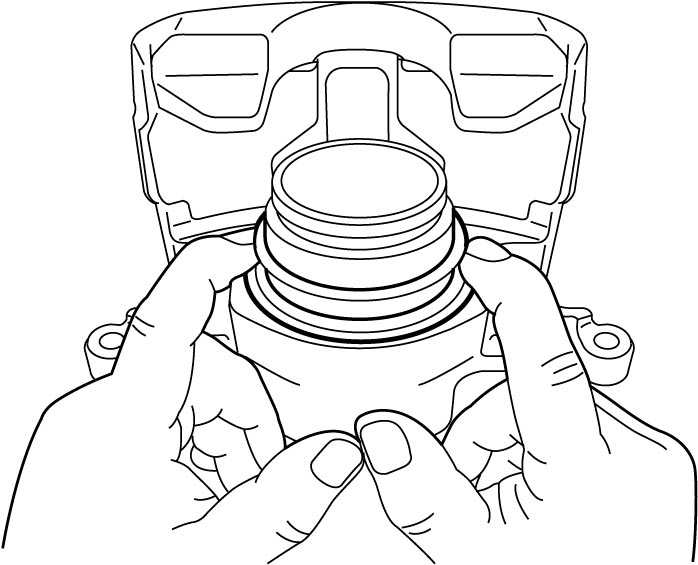
2)Fit cylinder boot with piston into boot groove in caliper cylinder by hand as shown below.
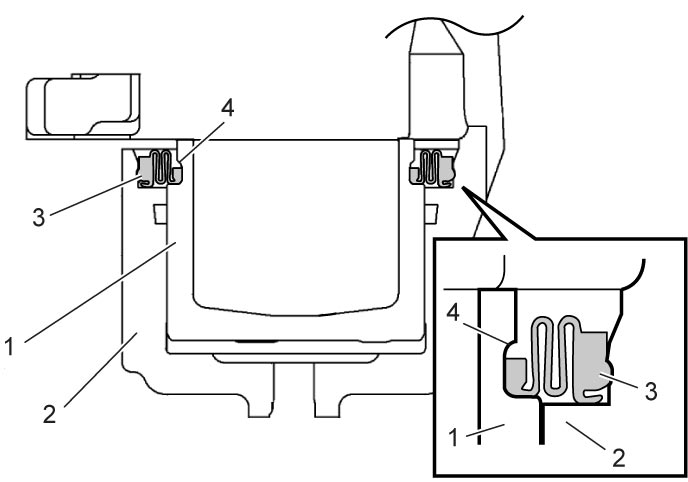
3)Insert brake piston (1) into cylinder (2) by hand and fit cylinder boot (3) in boot groove (4) on brake piston.
NOTE:
Check that boot is securely fitted in boot grooves in piston and cylinder.
4)To check that boot is fitted in its groove in cylinder properly, pull piston a little outward without moving it fully out.
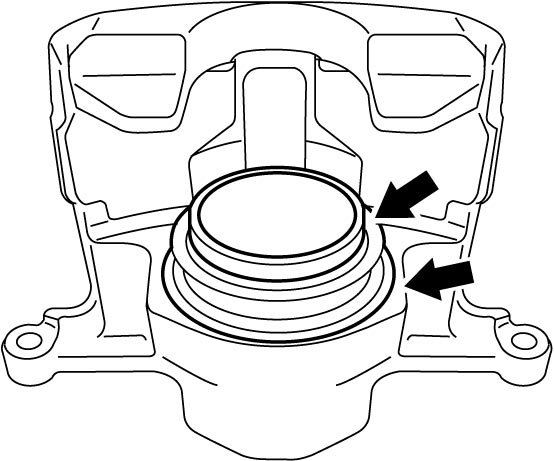
5)Insert piston into cylinder by hand.
Slide pin
1)Check the following points before installing slide pins to front brake caliper carrier.
a)Check slide pin for rust, corrosion and other damage. Replace slide pin if defective.
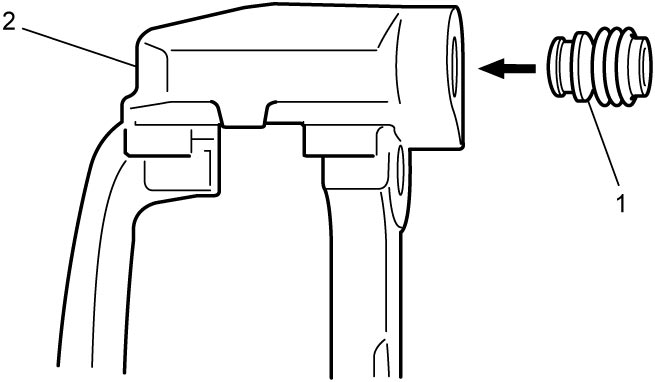
b)Apply rubber grease included in pin boot set of supply parts to inside of new pin boot (1).
c)Install pin boot (1) to front brake caliper carrier (2) with its end directed as shown below.
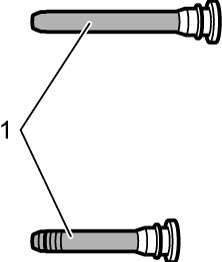
d)Apply rubber grease included in pin boot set of supply parts to slide pins (1).
2)Install slide pin without bushing (1) into upper side and slide pin with bushing (2) into lower side of front brake caliper carrier (3) as shown.
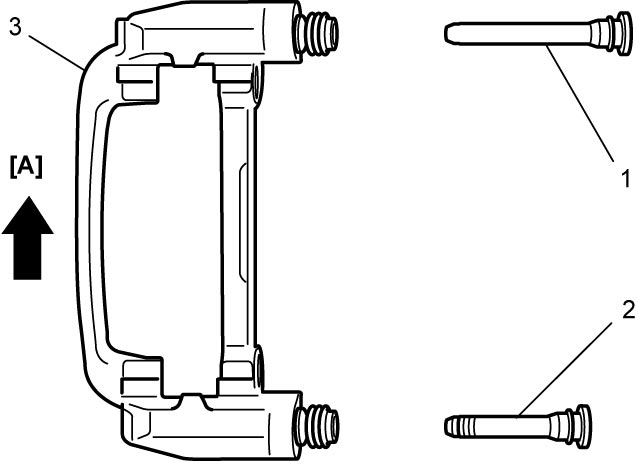
| [A]: | Upward |