 |
Remove the service hole cover from the engine under cover.
FUEL INJECTOR > REMOVAL |
| 1. DISCHARGE FUEL SYSTEM PRESSURE |
| 2. DISCONNECT CABLE FROM NEGATIVE BATTERY TERMINAL |
| 3. DRAIN ENGINE COOLANT |
|
Remove the service hole cover from the engine under cover.
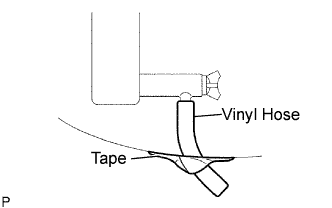
Install a vinyl hose onto the drain on the radiator side.
Fix the vinyl hose with tape.
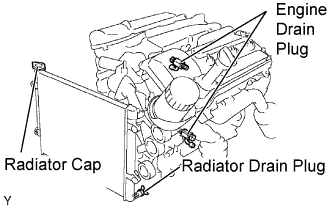 |
Loosen the 3 drain plugs on the engine and radiator, and drain the coolant.
Remove the radiator cap.
Drain the coolant from the reservoir tank.
Tighten the 3 drain plugs.
Remove the vinyl hose from the radiator.
| 4. REMOVE V-BANK COVER |
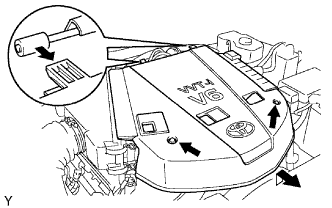 |
Remove the 2 nuts, then remove the V-bank cover.
| 5. DISCONNECT NO. 2 VENTILATION HOSE |
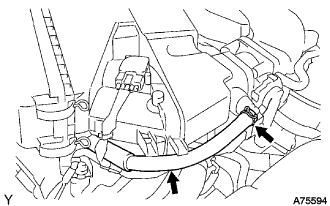 |
Disconnect the No. 2 ventilation hose.
| 6. REMOVE AIR CLEANER ASSEMBLY |
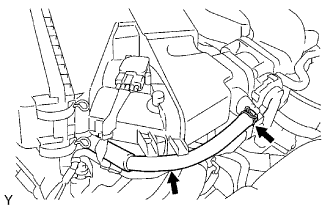 |
Disconnect the ventilation hose No. 2.
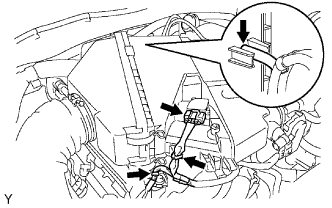 |
Disconnect the vacuum hose.
Disconnect the mass air flow meter connector.
Remove the 2 wire harness clamps.
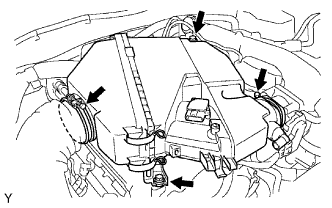 |
Loosen the 2 hose clamps.
Remove the 2 bolts, then remove the air cleaner.
| 7. REMOVE INTAKE AIR SURGE TANK |
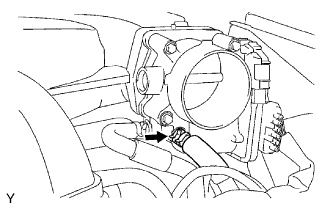 |
Disconnect the No. 5 water by-pass hose.
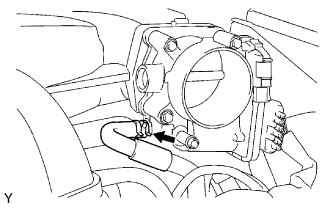 |
Disconnect the No. 4 water by-pass hose.
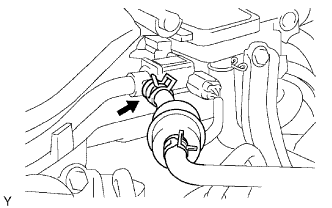 |
Disconnect the fuel vapor feed hose.
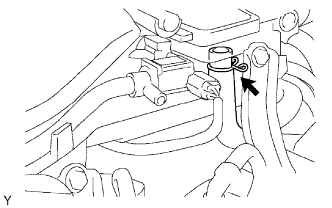 |
Disconnect the ventilation hose.
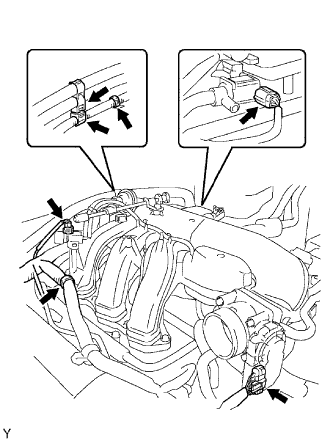 |
Disconnect the 2 VSV connectors.
Disconnect the throttle motor connector.
Remove the 3 wire harness clamps and hose clamp.
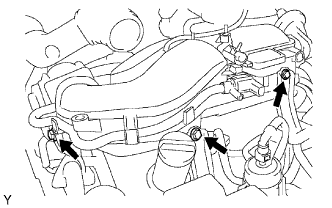 |
Remove the 3 upper bolts which are used to secure the 2 surge tank stays and throttle body bracket.
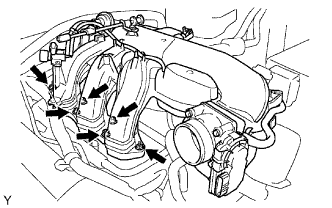 |
Using an 8 mm socket hexagon wrench, remove the 4 bolts.
Remove the 2 nuts, then remove the intake air surge tank and gasket.
| 8. DISCONNECT NO. 1 FUEL PIPE SUB-ASSEMBLY |
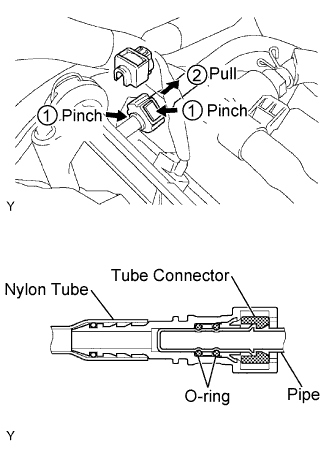 |
Remove the fuel pipe clamp.
Pinch the tube connector, and then pull the fuel pipe out of the pipe as shown in the illustration.
| 9. DISCONNECT NO. 2 FUEL PIPE SUB-ASSEMBLY |
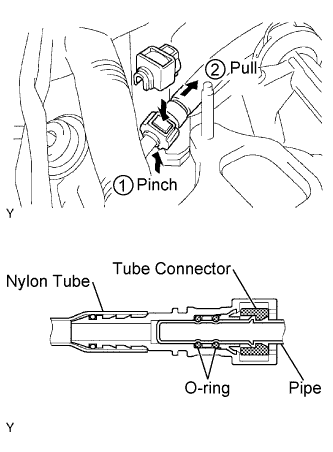 |
Remove the fuel pipe clamp.
Pinch the tube connector, and then pull the fuel pipe out of the pipe as shown in the illustration.
| 10. REMOVE FUEL DELIVERY PIPE SUB-ASSEMBLY |
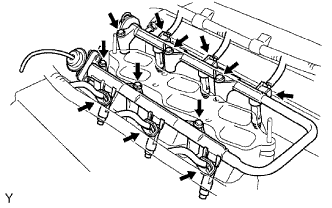 |
Disconnect the 6 fuel injector connectors.
Remove the 6 bolts and fuel delivery pipe together with the 6 fuel injectors.
| 11. REMOVE FUEL INJECTOR |
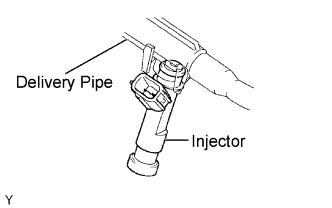 |
Pull the 6 injectors out of the delivery pipe.