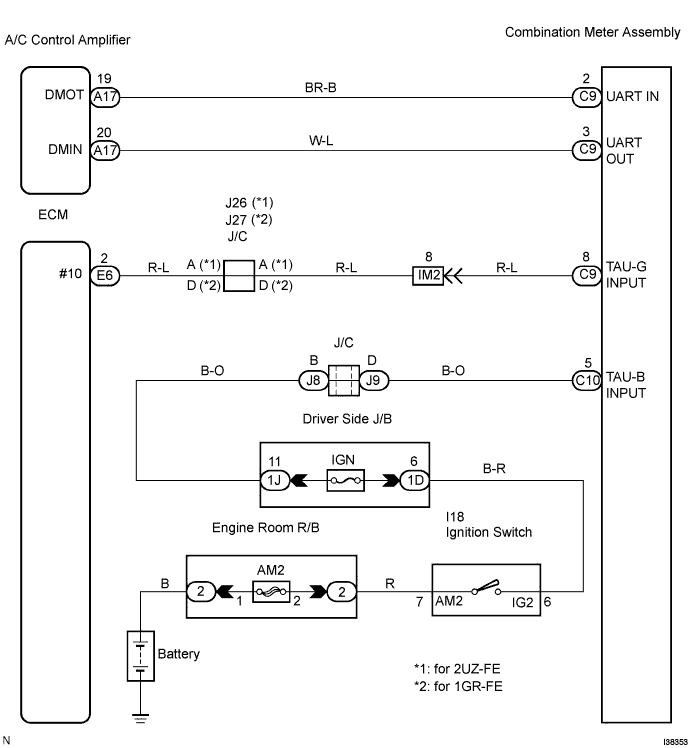
METER / GAUGE SYSTEM > Multi-display Power Source Circuit |
| 1.INSPECT COMBINATION METER ASSEMBLY (TAU-B) |
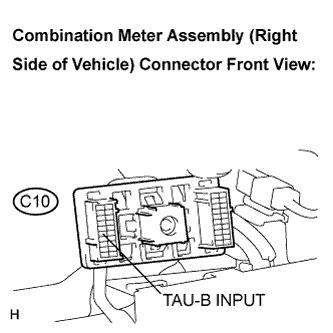 |
Remove the combination meter assembly.
Measure the voltage according to the value(s) in the table below.
| Tester connection | Condition | Specified condition |
| C10-5 (TAU-B INPUT) - Body ground | Ignition switch ON | 10 to 14 V |
|
| ||||
| OK | |
 |
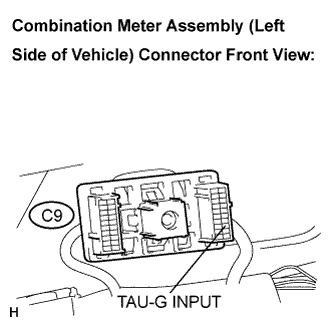
| 2.INSPECT COMBINATION METER ASSEMBLY (TAU-G) |
 |
Check the input signal waveform.
Remove the combination meter assembly.
Connect the oscilloscope to terminal C9-8 (TAU-G INPUT) and body ground.
Start the engine.
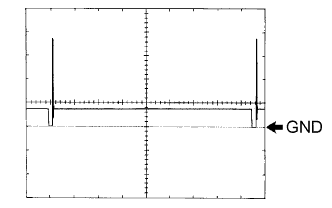 |
Check the signal waveform according to the condition(s) in the table below.
| Item | Condition |
| Tool setting | 10 V/DIV., 20 ms/DIV. |
| Vehicle condition | Engine idle speed |
|
| ||||
| OK | |
|
| Go to step 4 |
| 3.CHECK HARNESS AND CONNECTOR (ECM - COMBINATION METER) |
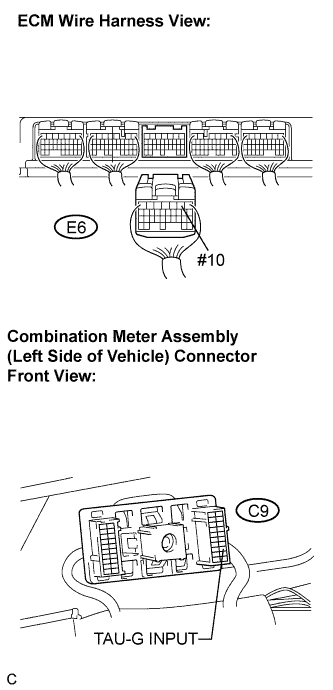 |
Disconnect the E6 and C9 connectors.
Measure the resistance according to the value(s) in the table below.
| Tester connection | Condition | Specified condition |
| E6-2 (#10) - C9-8 (TAU-G INPUT) | Always | Below 1 Ω |
| E6-2 (#10) - Body ground | Always | 10 kΩ or higher |
|
| ||||
| OK | |
|
| 4.CHECK AIR CONDITIONING AMPLIFIER ASSEMBLY (LCD DISPLAY) |
Check the LCD display appears.
|
| ||||
| OK | |
|
| 5.CHECK HARNESS AND CONNECTOR (AIR CONDITIONING AMPLIFIER - COMBINATION METER) |
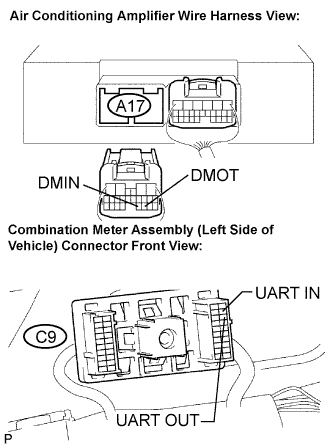 |
Disconnect the A17 and C9 connectors.
Measure the resistance according to the value(s) in the table below.
| Tester connection | Condition | Specified condition |
| A17-19 (DMOT) - C9-2 (UART IN) | Always | Below 1 Ω |
| A17-19 (DMOT) - Body ground | Always | 10 kΩ or higher |
| A17-20 (DMIN) - C9-3 (UART OUT) | Always | Below 1 Ω |
| A17-20 (DMIN) - Body ground | Always | 10 kΩ or higher |
|
| ||||
| OK | ||
 | ||
| ||

