MIRROR (EXT) OUTER REAR VIEW MIRROR REASSEMBLY
CAUTION / NOTICE / HINT
- HINT:
- ·
Use the same procedure for the RH and LH sides.
·The procedure listed below is for the LH side.
PROCEDURE

 81740
1.INSTALL SIDE TURN SIGNAL LIGHT ASSEMBLY LH
87945
2.INSTALL OUTER MIRROR COVER LH
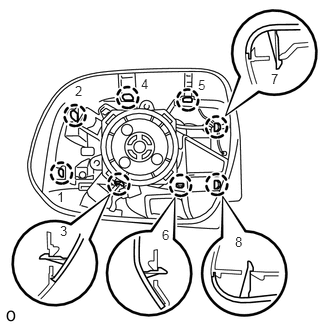
Attach the 8 claws in the order shown in the illustration to install the mirror cover.
- NOTICE:
-
When installing the cover, be careful not to damage the side turn signal light or cover.
Check that there is no gap between the cover and mirror body.
- HINT:
-
If there is a gap between the cover and body, noise will occur while driving.
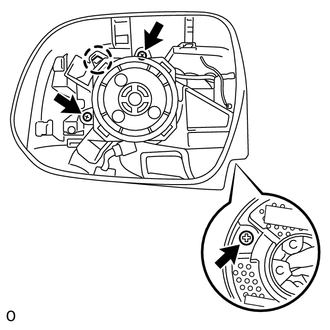
Attach the claw and install the 3 screws.
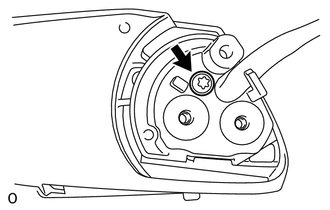
Using a T25 "TORX" socket wrench, install the screw.
- Torque:
- 3.8 N*m (39 kgf*cm, 34 in.*lbf)
- HINT:
- ·
Clean the threads of the screw with non-residue solvent.
·Apply adhesive to the threads of the screw.
- Adhesive:
Toyota Genuine Adhesive 1324, Three Bond 1324 or equivalent
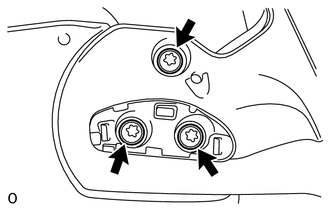
Using a T25 "TORX" socket wrench, install the 3 screws.
- Torque:
- 3.8 N*m (39 kgf*cm, 34 in.*lbf)
- HINT:
- ·
Clean the threads of the screws with non-residue solvent.
·Apply adhesive to the threads of the screw.
- Adhesive:
Toyota Genuine Adhesive 1324, Three Bond 1324 or equivalent
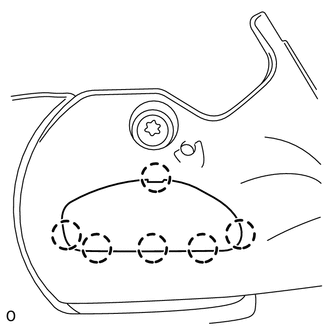
Attach the 6 claws to install the cover.
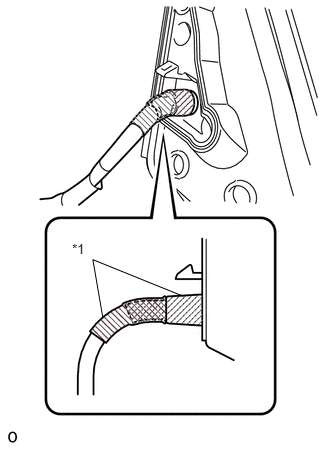
Apply 2 new pieces of tape so that they overlap as shown in the illustration.
- NOTICE:
-
Make sure the tape is securely attached so that there are no gaps between the tape and the cable.
| *1 | Tape |
87961
3.INSTALL OUTER MIRROR LH