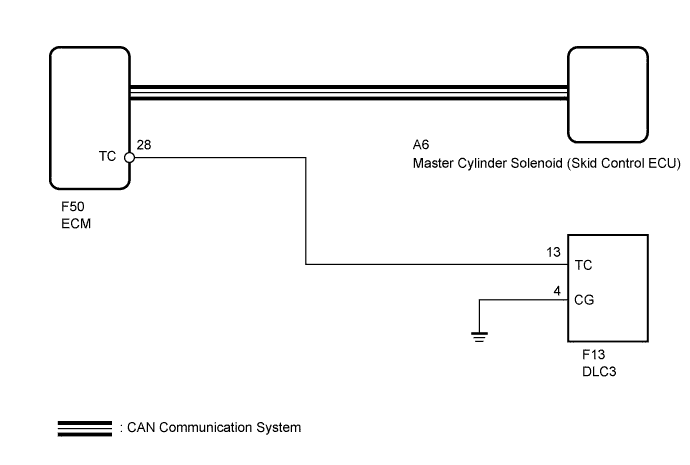
VEHICLE STABILITY CONTROL SYSTEM > TC and CG Terminal Circuit |
| 1.INSPECT DLC3 |
Turn the ignition switch to ON.
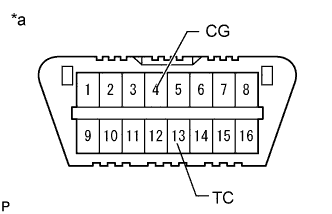 |
Measure the voltage according to the value(s) in the table below.
| Tester Connection | Switch Condition | Specified Condition |
| F13-13 (TC) - F13-4 (CG) | Ignition switch ON | 11 to 14 V |
| *a | Front view of DLC3 |
|
| ||||
| OK | |
 |
| 2.CHECK CAN COMMUNICATION LINE |
Turn the ignition switch off.
Connect the Techstream to the DLC3.
Turn the ignition switch to ON.
Turn the Techstream on.
Select CAN Bus Check from the System Selection Menu screen and follow the prompts on the screen to inspect the CAN bus (Click here).
|
| ||||
| OK | |
|
| 3.CHECK DTC (CAN COMMUNICATION SYSTEM) |
Turn the ignition switch off.
Connect the Techstream to the DLC3.
Turn the ignition switch to ON.
Turn the Techstream on.
Check for DTCs (Click here).
| Result | Proceed to |
| CAN system DTC is not output | A |
| CAN system DTC is output | B |
|
| ||||
| A | |
|
| 4.CHECK HARNESS AND CONNECTOR (ECM - DLC3) |
Turn the ignition switch off.
Disconnect the F50 ECM connector.
Measure the resistance according to the value(s) in the table below.
| Tester Connection | Condition | Specified Condition |
| F50-28 (TC) - F13-13 (TC) | Always | Below 1 Ω |
|
| ||||
| OK | |
|
| 5.CHECK HARNESS AND CONNECTOR (DLC3 - BODY GROUND) |
Measure the resistance according to the value(s) in the table below.
| Tester Connection | Condition | Specified Condition |
| F13-4 (CG) - Body ground | Always | Below 1 Ω |
|
| ||||
| OK | |
|
| 6.CHECK ECM (DLC3 INPUT) |
Using SST, connect terminals 13 (TC) and 4 (CG) of the DLC3.
|
Check that the malfunction indicator lamp is blinking.
| Result | Proceed to |
| MIL is blinking | A |
| MIL is not blinking | B |
| *a | Front view of DLC3 |
|
| ||||
| A | |
|
| 7.CHECK DTC (CAN COMMUNICATION SYSTEM) |
Turn the ignition switch off.
Connect the Techstream to the DLC3.
Turn the ignition switch to ON.
Turn the Techstream on.
Check for DTCs (Click here).
| Result | Proceed to |
| CAN communication system DTC is not output | A |
| CAN communication system DTC is output | B |
|
| ||||
| A | ||
 | ||
| ||

