 |
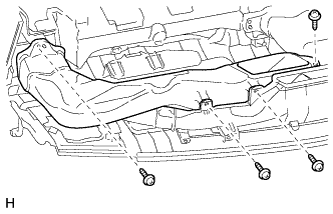
Remove the 4 screws and No. 1 heater to register duct.
SOLAR SENSOR > REMOVAL |
| 1. REMOVE INSTRUMENT PANEL SUB-ASSEMBLY |
Remove the instrument panel sub-assembly (Click here).
| 2. REMOVE NO. 1 HEATER TO REGISTER DUCT |
|
Remove the 4 screws and No. 1 heater to register duct.
| 3. REMOVE NO. 2 HEATER TO REGISTER DUCT |
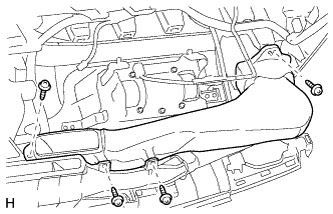 |
Remove the 4 screws and No. 2 heater to register duct.
| 4. REMOVE NO. 1 SIDE DEFROSTER NOZZLE DUCT |
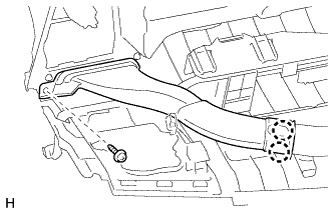 |
Remove the screw.
Detach the 2 claws to remove the No. 1 side defroster nozzle duct.
| 5. REMOVE NO. 2 SIDE DEFROSTER NOZZLE DUCT |
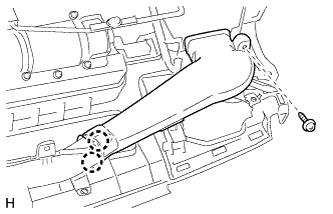 |
Remove the screw.
Detach the 2 claws to remove the No. 2 side defroster nozzle duct.
| 6. REMOVE NO. 3 HEATER TO REGISTER DUCT |
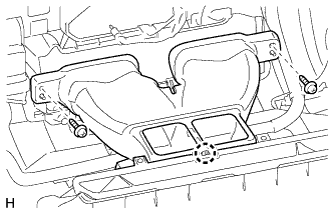 |
Remove the 2 screws.
Detach the claw to remove the No. 3 heater to register duct.
| 7. REMOVE AUTOMATIC LIGHT CONTROL SENSOR (SOLAR SENSOR) |
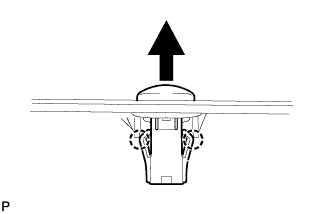 |
Disconnect the connector.
Detach the 2 claws and remove the sensor.