 |
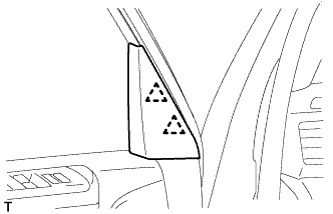
Detach the 2 clips to remove the front door lower frame bracket garnish LH.
BLACK OUT TAPE (for Front Door) > REMOVAL |
| Item | Temperature |
| Vehicle Body | 40 to 60°C (104 to 140°F) |
| Window Frame Moulding | 20 to 30°C (68 to 86°F) |
| Black Out Tape | 20 to 30°C (68 to 86°F) |
| Outside Stripe | 20 to 30°C (68 to 86°F) |
| 1. DISCONNECT CABLE FROM NEGATIVE BATTERY TERMINAL |
| 2. REMOVE FRONT DOOR LOWER FRAME BRACKET GARNISH LH |
|
Detach the 2 clips to remove the front door lower frame bracket garnish LH.
| 3. REMOVE NO. 2 DOOR INSIDE HANDLE BEZEL LH |
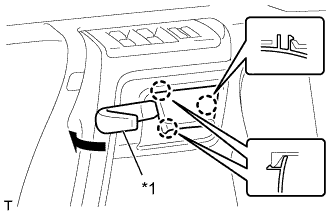 |
Using a moulding remover, detach the 3 claws to remove the No. 2 door inside handle bezel LH as shown in the illustration.
| *1 | Moulding Remover |
| 4. REMOVE FRONT DOOR TRIM BOARD SUB-ASSEMBLY LH |
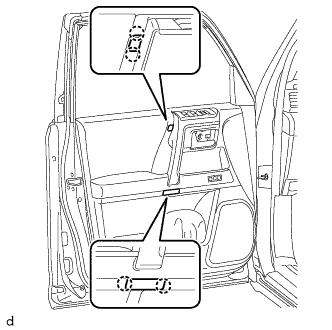 |
Detach the 4 claws to remove the 2 door armrest caps.
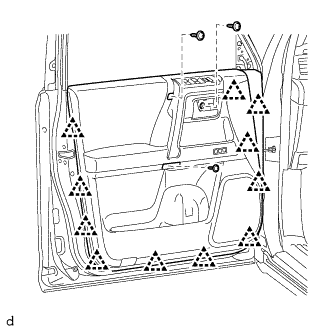 |
Remove the 3 screws.
Detach the 11 clips.
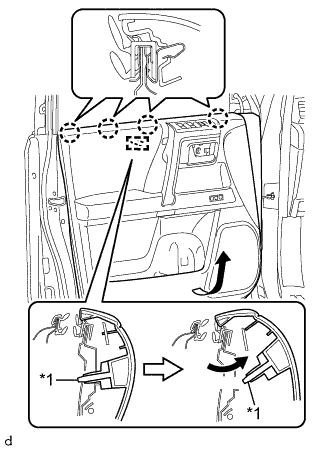 |
Pull out the front door trim board sub-assembly LH in the direction indicated by the arrow shown in the illustration.
Raise the front door trim board sub-assembly LH and detach the 4 claws and reference boss to remove the front door trim board sub-assembly LH together with the front door inner glass weatherstrip LH.
| *1 | Reference Boss |
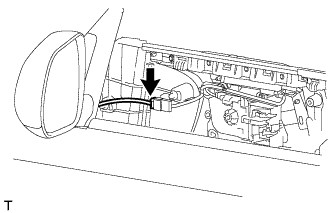 |
Disconnect the connector.
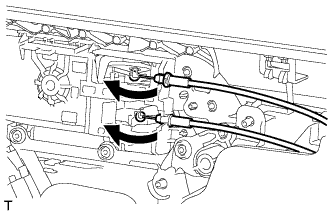 |
Disconnect the front door lock remote control cable assembly LH and front door inside locking cable assembly LH.
| 5. REMOVE FRONT DOOR INNER GLASS WEATHERSTRIP LH |
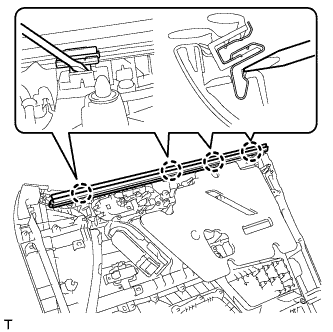 |
Using a screwdriver, detach the 4 claws to remove the front door inner glass weatherstrip LH from the front door trim board sub-assembly LH as shown in the illustration.
| 6. REMOVE FRONT DOOR SERVICE HOLE COVER LH |
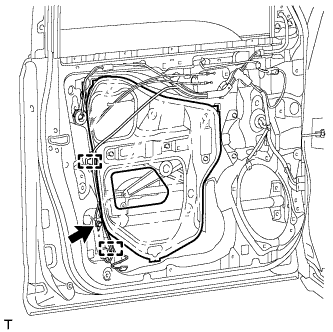 |
Remove the bolt.
Detach the 2 clamps and move the front door wire out of the way to remove the front door service hole cover LH.
| 7. REMOVE OUTER REAR VIEW MIRROR ASSEMBLY LH |
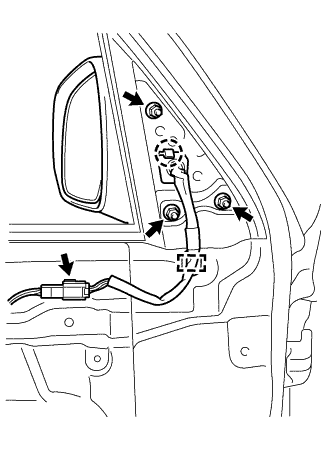 |
Disconnect the connector.
Detach the clamp to remove the 3 nuts.
Detach the claw to remove the outer rear view mirror assembly LH.
| 8. REMOVE FRONT DOOR GLASS SUB-ASSEMBLY LH |
Connect the multiplex network master switch assembly (for Driver Side).
Connect the power window regulator switch assembly (for Front Passenger Side).
Connect the cable to the negative (-) battery terminal.
Move the front door glass sub-assembly so that the front door glass bolts can be seen.
Disconnect the cable from the negative (-) battery terminal.
Disconnect the multiplex network master switch assembly (for Driver Side).
Disconnect the power window regulator switch assembly (for Front Passenger Side).
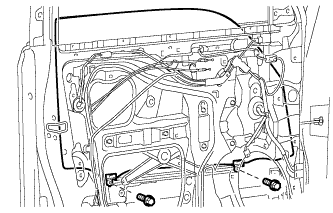 |
Remove the 2 bolts.
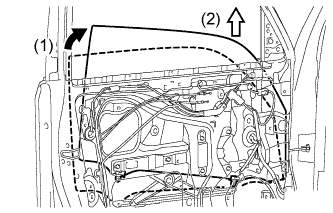 |
Remove the front door glass sub-assembly LH as indicated by the arrows in the order shown in the illustration.
| 9. REMOVE FRONT DOOR GLASS RUN LH |
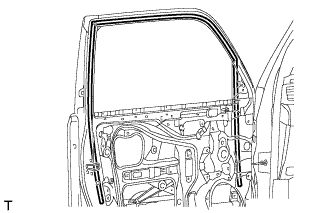 |
Remove the front door glass run LH.
| 10. REMOVE FRONT DOOR BELT MOULDING LH |
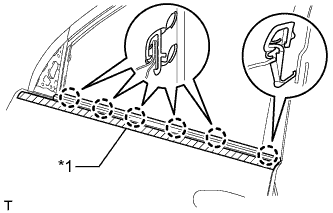 |
Put protective tape around the belt moulding.
| *1 | Protective Tape |
Detach the 6 claws and remove the front door belt moulding.
| 11. REMOVE FRONT DOOR WEATHERSTRIP LH |
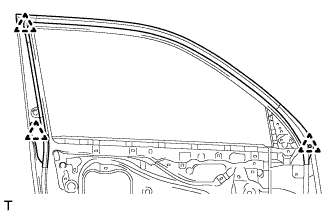 |
Detach the 3 clips and remove the upper part of the front door weatherstrip so that the moulding can be removed.
| 12. REMOVE FRONT DOOR REAR WINDOW FRAME MOULDING LH |
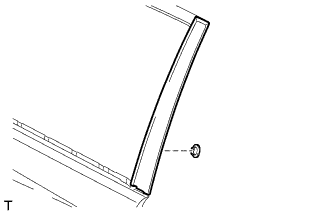 |
Remove the door window frame moulding clip.
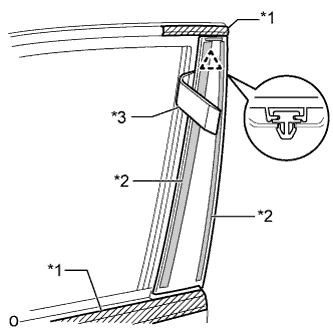 |
Put protective tape around the front door rear window frame moulding.
| *1 | Protective Tape |
| *2 | Double-sided Tape |
| *3 | Moulding Remover |
Using a moulding remover, detach the clip and remove the double-sided tape to remove the front door rear window frame moulding.
| 13. REMOVE NO. 1 BLACK OUT TAPE LH |
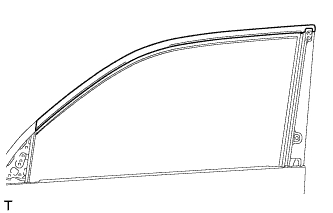 |
Pull back an edge of the black out tape and pull it parallel to the vehicle body to remove it.
| 14. REMOVE FRONT DOOR OUTSIDE STRIPE LH |
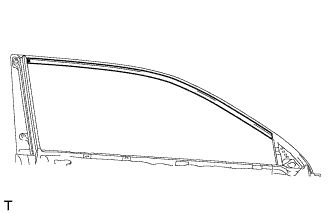 |
Pull back an edge of the front door outside stripe and pull it parallel to the vehicle body to remove it.
| 15. REMOVE FRONT DOOR LOWER OUTSIDE STRIPE LH |
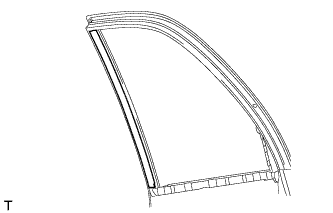 |
Pull back an edge of the lower front door outside stripe and pull it parallel to the vehicle body to remove it.