 |
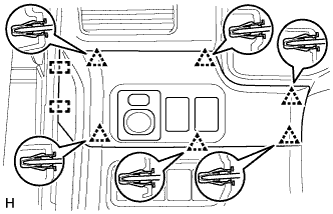
Detach the 6 clips and 2 guides.
ROOM TEMPERATURE SENSOR > REMOVAL |
| 1. DISCONNECT CABLE FROM NEGATIVE BATTERY TERMINAL |
| 2. REMOVE NO. 2 SWITCH HOLE BASE |
|
Detach the 6 clips and 2 guides.
Disconnect each connector and remove the No. 2 switch hole base.
| 3. REMOVE LOWER INSTRUMENT PANEL FINISH PANEL ASSEMBLY |
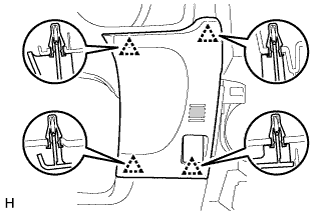 |
w/o Smart Key System:
Detach the 4 clips.
Disconnect the cooler thermistor and remove the lower instrument panel finish panel assembly.
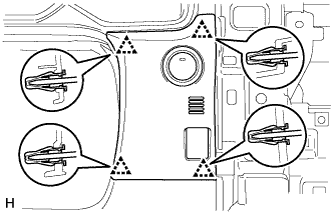 |
w/ Smart Key System:
Detach the 4 clips.
Disconnect the connector and cooler thermistor and remove the lower instrument panel finish panel assembly.
| 4. REMOVE INSTRUMENT CLUSTER FINISH PANEL SUB-ASSEMBLY |
Operate the tilt and telescopic lever to fully extend and lower the steering column assembly.
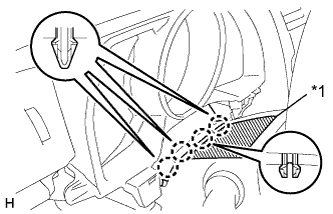 |
Place protective tape as shown in the illustration.
| *1 | Protective Tape |
Detach the 4 claws.
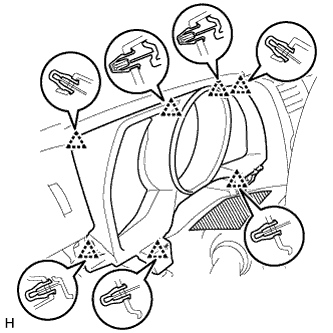 |
Detach the 7 clips and remove the finish panel.
| 5. REMOVE COMBINATION METER ASSEMBLY |
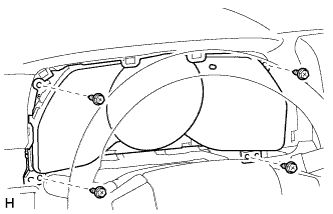 |
Remove the 4 screws.
Disconnect the connectors and remove the combination meter by pulling it up in the direction of the arrow in the illustration.
| 6. REMOVE COOLER THERMISTOR (ROOM TEMPERATURE SENSOR) |
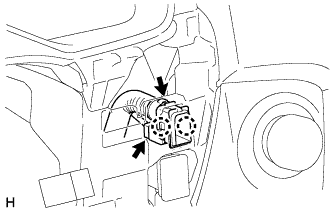 |
Disconnect the connector and hose.
Detach the 2 claws and remove the cooler thermistor.