 |
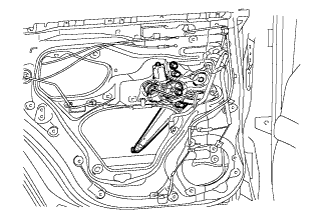
Operate the rear power window regulator switch assembly until the rear door window regulator sub-assembly LH reaches bottom dead center.
REAR DOOR WINDOW FRAME MOULDING > INSTALLATION |
| Item | Temperature |
| Vehicle Body | 40 to 60°C (104 to 140°F) |
| Window Frame Moulding | 20 to 30°C (68 to 86°F) |
| 1. INSTALL REAR DOOR FRONT WINDOW FRAME MOULDING LH |
Clean the vehicle body surface.
Using a heat light, heat the vehicle body surface.
Remove the double-sided tape from the vehicle body surface.
Wipe off any tape adhesive residue with cleaner.
Install a new rear door front window frame moulding.
Using a heat light, heat a new rear door front window frame moulding and the vehicle body surface.
Remove the peeling paper from the face of the rear door front window frame moulding.
Attach the clip and double-sided tape to install the rear door front window frame moulding.
Install a new door window frame moulding clip.
| 2. INSTALL REAR DOOR WEATHERSTRIP LH |
Attach the 3 clips to install the upper part of the rear door weatherstrip.
| 3. INSTALL REAR DOOR BELT MOULDING LH |
Attach the 7 claws to install the rear door belt moulding.
| 4. INSTALL REAR DOOR GLASS SUB-ASSEMBLY LH |
Connect the rear power window regulator switch assembly.
Connect the cable to the negative (-) battery terminal.
|
Operate the rear power window regulator switch assembly until the rear door window regulator sub-assembly LH reaches bottom dead center.
Disconnect the cable from the negative (-) battery terminal.
Disconnect the rear power window regulator switch assembly.
Install the front side of the rear door glass run LH.
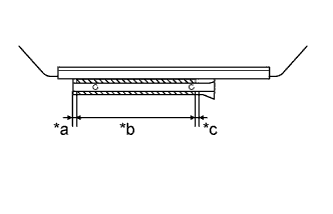 |
Apply MP grease to the sliding areas of the rear door glass channel sub-assembly LH as shown in the illustration.
| *a | 5.0 mm (0.197 in.) |
| *b | 157 mm (6.181 in.) |
| *c | 5.0 mm (0.197 in.) |
 | MP grease |
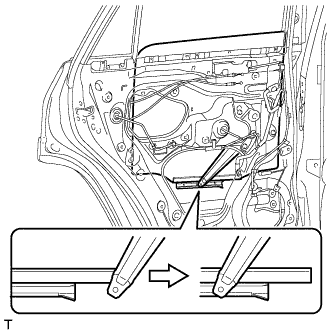 |
Slide the rear door glass sub-assembly LH as shown in the illustration to install it.
| 5. INSTALL REAR DOOR QUARTER WINDOW GLASS LH |
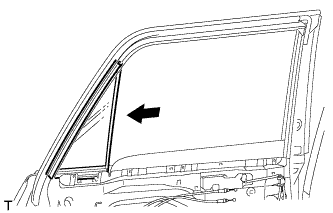 |
Install the rear door quarter window glass LH together with the rear door quarter window weatherstrip LH in the direction indicated by the arrow in the illustration.
| 6. INSTALL REAR DOOR WINDOW DIVISION BAR SUB-ASSEMBLY LH |
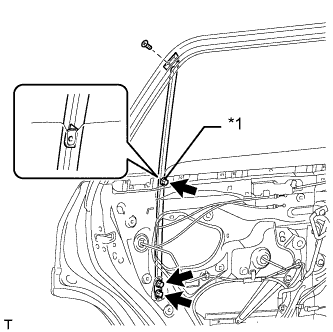 |
Install the temporary bolt to the rear door window rear lower frame sub-assembly LH.
| *1 | Temporary Bolt |
Temporarily install the rear door window rear lower frame sub-assembly LH to the rear door panel.
Install the screw.
Install the 2 bolts.
Tighten the temporary bolt to install the rear door window rear lower frame sub-assembly LH.
| 7. INSTALL REAR DOOR GLASS RUN LH |
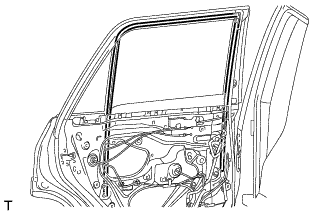 |
Install the rear door glass run LH.
| 8. INSTALL REAR DOOR SERVICE HOLE COVER LH |
Apply a new butyl tape to the rear door panel.
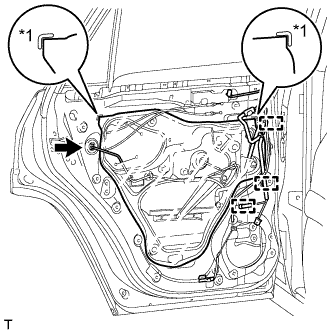 |
Pass the rear door lock remote control cable assembly LH and rear door inside locking cable assembly LH through a new rear door service hole cover LH.
Install the rear door service hole cover LH according to the reference points on the rear door panel.
| *1 | Reference Point |
Connect the connector.
Attach the 3 clamps and rear door wire.
| 9. INSTALL REAR DOOR INNER GLASS WEATHERSTRIP LH |
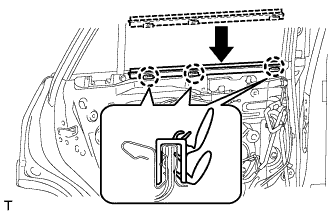 |
Attach the 3 claws to install the rear door inner glass weatherstrip LH as shown in the illustration.
| 10. INSTALL REAR DOOR TRIM BOARD SUB-ASSEMBLY LH |
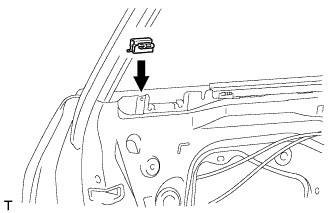 |
Attach the claw to install the clamp.
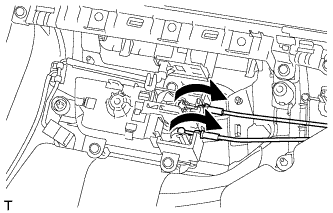 |
Connect the rear door lock remote control cable assembly LH and rear door inside locking cable assembly LH as shown in the illustration.
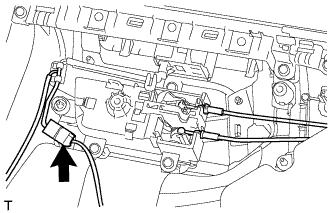 |
Connect the connector.
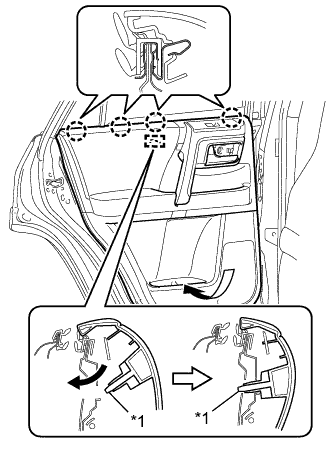 |
Attach the rear door trim board sub-assembly LH to the 4 claws of the rear door inner glass weatherstrip LH as shown in the illustration.
Attach the reference boss.
| *1 | Reference Boss |
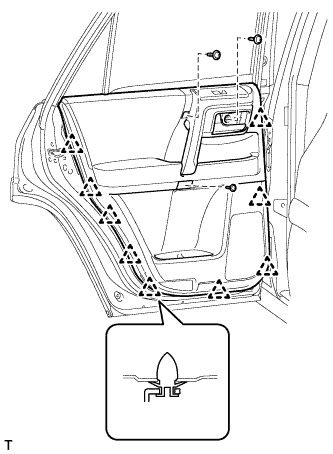 |
Attach the 9 clips to install the rear door trim board sub-assembly LH.
Install the 3 screws.
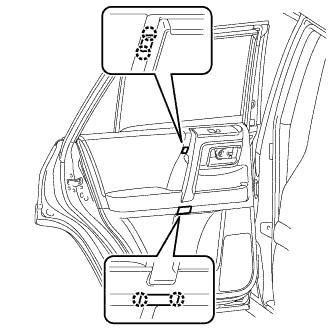 |
Attach the 4 claws to install the 2 door armrest caps.
| 11. INSTALL REAR DOOR INSIDE HANDLE BEZEL LH |
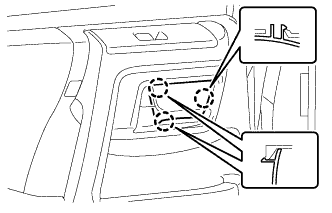 |
Attach the 3 claws to install the rear door inside handle bezel LH.
| 12. CONNECT CABLE TO NEGATIVE BATTERY TERMINAL |
| 13. CHECK SRS WARNING LIGHT |
Check the SRS warning light (Click here).