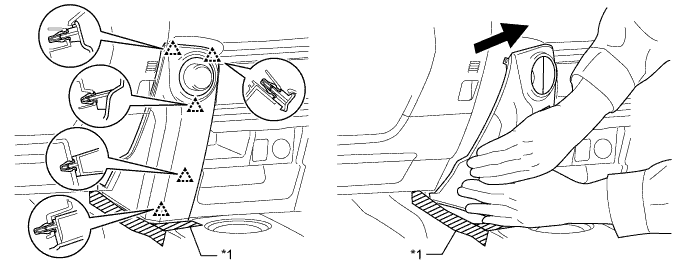
Grip the No. 1 instrument cluster finish panel garnish and pull it diagonally upward toward the rear to detach the 5 clips and remove the No. 1 instrument cluster finish panel garnish.
| *1 | Protective Tape | - | - |
ACCESSORY METER > REMOVAL |
| 1. DISCONNECT CABLE FROM NEGATIVE BATTERY TERMINAL |
| 2. REMOVE NO. 1 INSTRUMENT CLUSTER FINISH PANEL GARNISH |
Put protective tape around the No. 1 instrument cluster finish panel garnish.
Grip the No. 1 instrument cluster finish panel garnish and pull it diagonally upward toward the rear to detach the 5 clips and remove the No. 1 instrument cluster finish panel garnish.
| *1 | Protective Tape | - | - |
| 3. REMOVE NO. 2 INSTRUMENT CLUSTER FINISH PANEL GARNISH |
Open the instrument cluster finish panel lid.
Put protective tape around the No. 2 instrument cluster finish panel garnish.
Grip the No. 2 instrument cluster finish panel garnish and pull it diagonally upward toward the rear to detach the 5 clips and remove the No. 2 instrument cluster finish panel garnish.
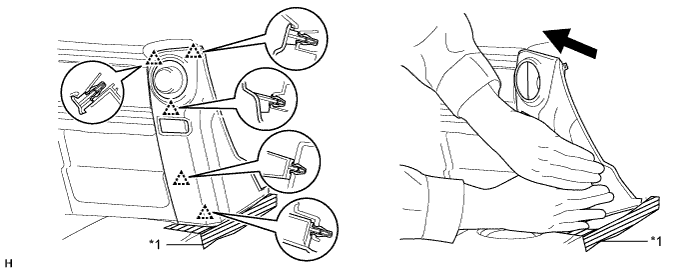
| *1 | Protective Tape | - | - |
| 4. REMOVE HEATER CONTROL ASSEMBLY |
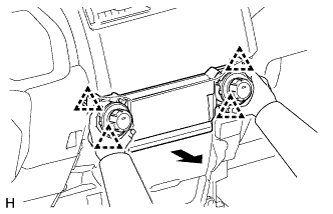 |
Detach the 4 clips and remove the heater control assembly.
| 5. REMOVE RADIO AND DISPLAY RECEIVER ASSEMBLY WITH BRACKETS (for Radio and Display Type) |
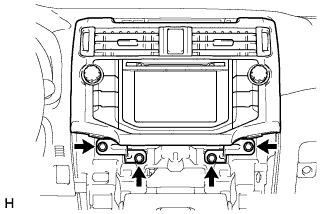 |
Remove the 4 bolts.
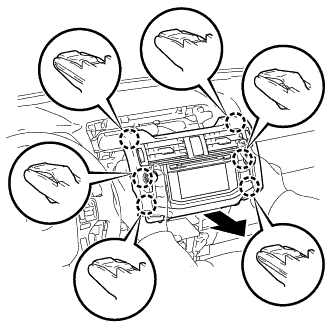 |
Pull the radio and display receiver assembly with brackets as shown in the illustration to detach the 6 claws on the backside of the radio and display receiver assembly with brackets.
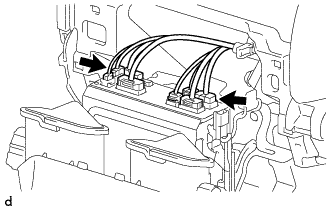 |
Disconnect each connector to remove the radio and display receiver assembly with brackets.
| 6. REMOVE NAVIGATION RECEIVER ASSEMBLY WITH BRACKETS (for Navigation Receiver Type) |
|
Remove the 4 bolts.
|
Pull the navigation receiver assembly with brackets as shown in the illustration to detach the 6 claws on the backside of the navigation receiver assembly with brackets.
Disconnect each connector to remove the navigation receiver assembly with brackets.
| 7. REMOVE ACCESSORY METER ASSEMBLY |
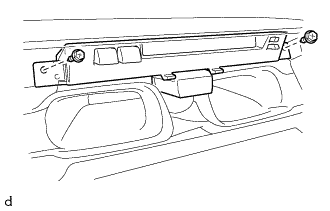 |
Remove the 2 screws.
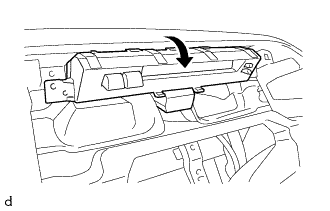 |
Disconnect the connector to remove the accessory meter assembly as shown in the illustration.