 |
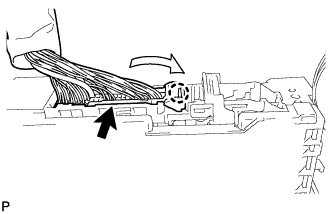
Attach the claw to install the connector as shown in the illustration.
- NOTICE:
- Be sure to connect each connector securely.
AUTOMATIC RUNNING BOARD ECU > INSTALLATION |
| 1. INSTALL SIDE AUTO STEP CONTROLLER ECU ASSEMBLY |
Engage the guide and install the side auto step controller ECU assembly.
Install the 2 bolts.
Connect the connector.
| 2. INSTALL DRIVER SIDE JUNCTION BLOCK ASSEMBLY |
|
Attach the claw to install the connector as shown in the illustration.
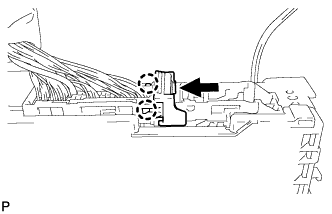 |
Attach the 2 claws to lock the connector lock as shown in the illustration.
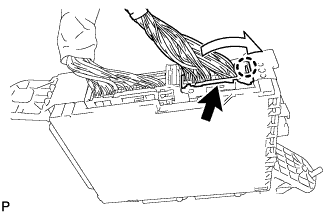 |
Attach the claw to connect the connector as shown in the illustration.
Install the driver side junction block assembly with the bolt and 2 nuts.
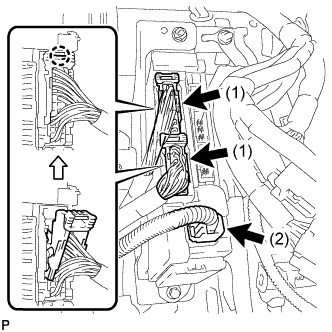 |
Connect the connector labeled (2).
Connect the 2 connectors labeled (1) as shown in the illustration.
Connect the 3 connectors.
| 3. INSTALL LOWER NO. 1 INSTRUMENT PANEL AIRBAG ASSEMBLY |
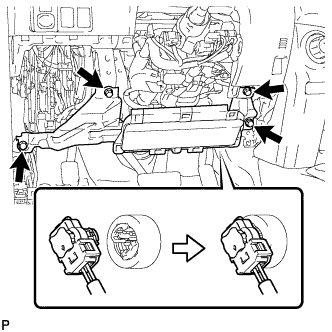 |
Connect the connector.
Install the airbag assembly with the 4 bolts.
| 4. INSTALL LOWER INSTRUMENT PANEL FINISH PANEL SUB-ASSEMBLY |
Connect each connector and hood lock control cable assembly.
Attach the 13 clips and 2 guides to install the lower instrument panel finish panel sub-assembly.
Install the 2 bolts <C>.
Attach the 2 claws to close the cover.
| 5. INSTALL NO. 1 INSTRUMENT CLUSTER FINISH PANEL GARNISH |
Attach the 5 clips to install the No. 1 instrument cluster finish panel garnish.
| 6. INSTALL COWL SIDE TRIM BOARD LH |
Attach the clip and claw to install the cowl side trim board LH.
Install the clip.
| 7. INSTALL DOOR SCUFF PLATE ASSEMBLY LH |
Attach the 4 clips, 10 claws and 2 guides to install the door scuff plate assembly LH.
| 8. CONNECT CABLE TO NEGATIVE BATTERY TERMINAL |
| 9. CHECK SRS WARNING LIGHT |
Check the SRS warning light (Click here).