 |
Disengage the clamp, and disconnect the mass air flow meter connector.
RADIATOR > REMOVAL |
| 1. REMOVE AIR CLEANER CASE SUB-ASSEMBLY |
|
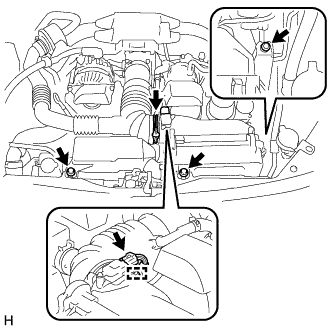
Disengage the clamp, and disconnect the mass air flow meter connector.
Remove the 3 bolts.
Loosen the hose clamp, and disconnect the hose.
Remove the air cleaner case sub-assembly.
| 2. REMOVE FRONT BUMPER COVER |
| 3. REMOVE NO. 1 ENGINE UNDER COVER |
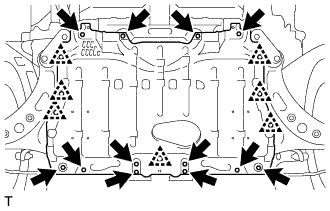 |
Disengage the 7 clips and remove the 12 bolts and No. 1 engine under cover.
| 4. DRAIN ENGINE COOLANT |
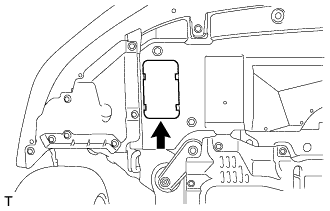 |
Remove the service hole cover from the front bumper under cover.
Connect a hose with an inside diameter of 8 mm (0.315 in.) to the drain plug.
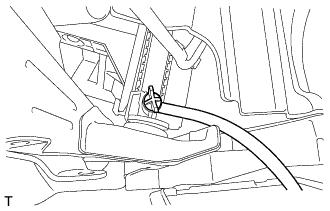 |
Loosen the radiator drain cock plug.
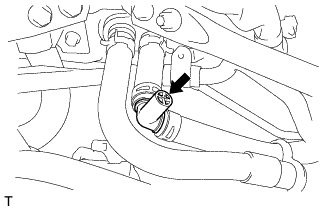 |
Open the air bleed plug on the heater hose side. (for LHD)
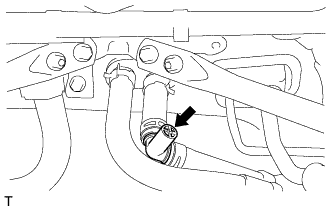 |
Open the air bleed plug on the heater hose side. (for RHD)
Remove the radiator cap and drain the coolant.
| 5. DISCONNECT OUTLET RADIATOR HOSE |
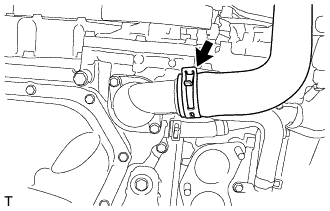 |
Loosen the hose clamp and disconnect the outlet radiator hose from the water outlet.
| 6. REMOVE RADIATOR RESERVE TANK ASSEMBLY |
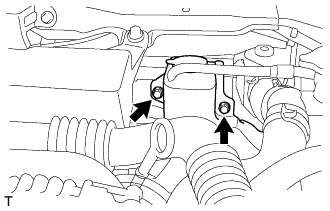 |
Remove the 2 bolts and radiator reserve tank assembly.
| 7. REMOVE AIR CLEANER DUCT |
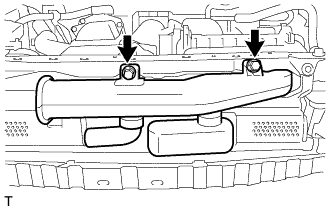 |
Remove the 2 bolts and air cleaner duct.
| 8. REMOVE RADIATOR COVER PLATE |
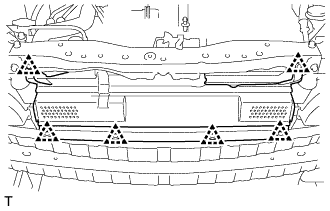 |
Remove the 6 clips and radiator cover plate.
| 9. REMOVE WATER FILLER SUB-ASSEMBLY |
Disconnect the radiator cap hose.
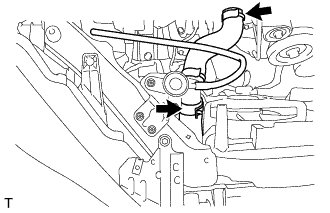 |
Detach the 2 water hose clamps.
Disconnect the inlet radiator hose and No. 1 radiator hose.
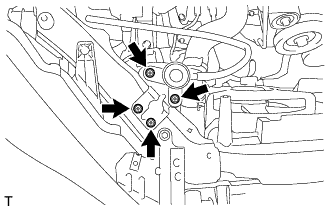 |
Remove the 4 bolts and the water filler sub-assembly with water filler bracket.
| 10. REMOVE HOOD LOCK ASSEMBLY (for LHD) |
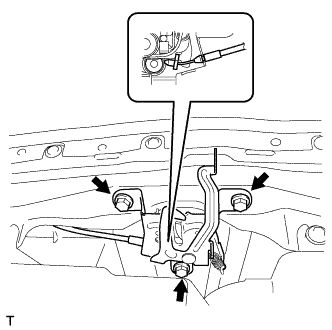 |
Remove the 3 bolts and hood lock assembly.
Disconnect the hood lock control cable assembly from the hood lock assembly.
| 11. REMOVE HOOD LOCK ASSEMBLY (for RHD) |
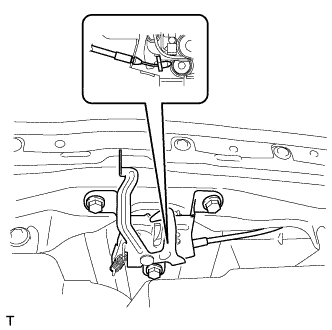 |
Remove the 3 bolts and hood lock assembly.
Disconnect the hood lock control cable assembly from the hood lock assembly.
| 12. REMOVE RADIATOR SUPPORT SUB-ASSEMBLY |
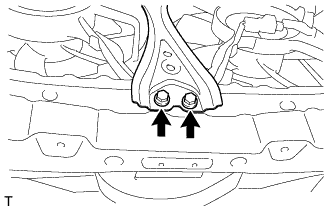 |
Remove the 2 bolts.
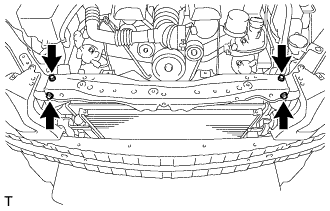 |
Remove the 4 bolts and radiator support sub-assembly.
| 13. SEPARATE COOLER CONDENSER ASSEMBLY |
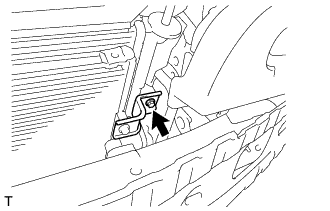 |
Remove the bolt.
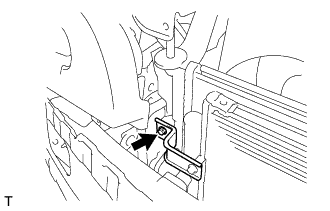 |
Remove the bolt.
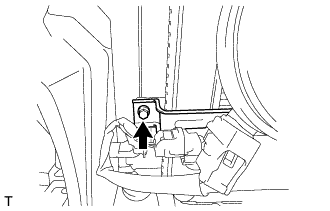 |
Remove the bolt.
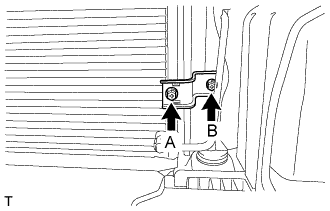 |
Remove the bolt A.
Remove the bolt B and separate the cooler condenser assembly from the radiator assembly.
| 14. REMOVE FAN SHROUD |
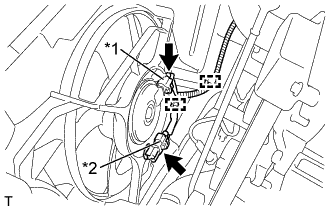 |
Disconnect the 2 wire harness clamps and the 2 cooling fan motor connectors.
| *1 | Cooling fan motor connector |
| *2 | No. 2 cooling fan motor connector (with Air Conditioning System) |
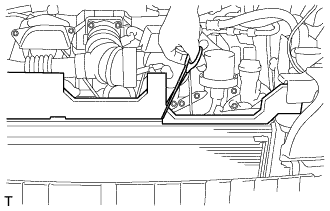 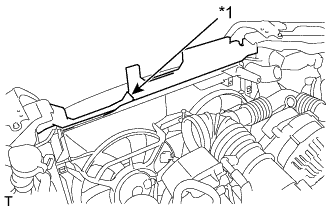 |
Mark the sponge on the upper surface of the fan shroud, and use scissors, etc. to cut the sponge.
| *1 | Cutting Line |
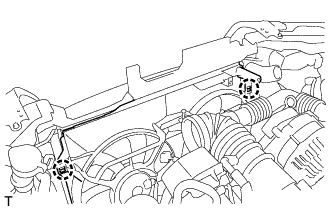 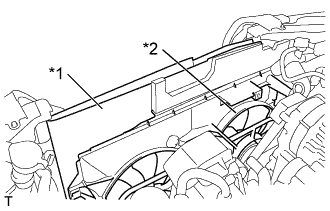 |
Detach the 2 claws and separate the fan shroud from the radiator assembly.
| *1 | Cardboard or Blanket |
| *2 | Fan shroud |
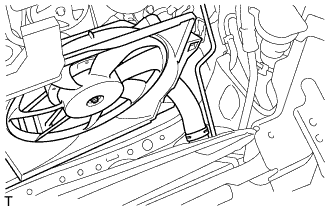 |
Remove the fan shroud from the radiator assembly.
| 15. REMOVE RADIATOR ASSEMBLY |
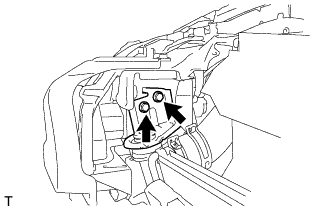 |
Remove the 2 bolts and radiator support RH.
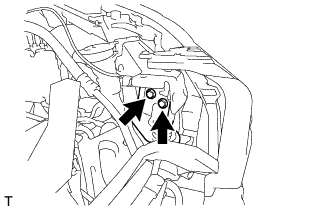 |
Remove the 2 bolts and radiator support LH.
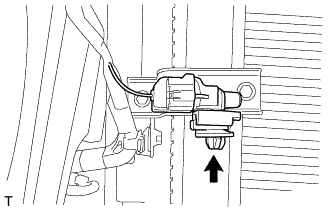 |
Detach the claw and disconnect the thermistor assembly.
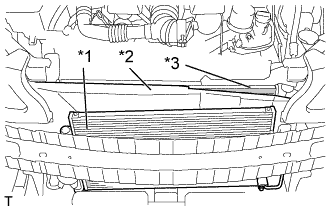 |
While lifting the outlet radiator hose, remove the radiator assembly.
| *1 | Cooler condenser assembly |
| *2 | Cardboard or Blanket |
| *3 | Radiator assembly |
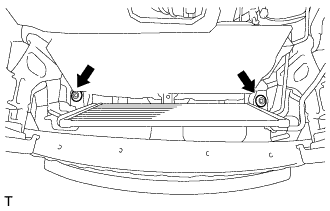 |
Remove the 2 radiator support cushions.
| 16. REMOVE INLET RADIATOR HOSE |
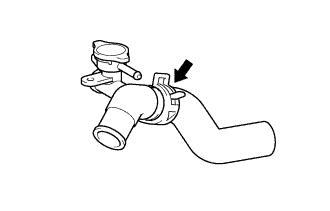 |
Remove the clamp and the inlet radiator hose from the water filler sub-assembly.
| 17. REMOVE NO. 1 RADIATOR HOSE |
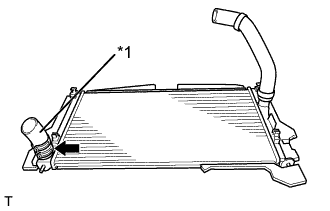 |
Remove the clamp and No. 1 radiator hose from the radiator assembly.
| *1 | No. 1 radiator hose |
| 18. REMOVE OUTLET RADIATOR HOSE |
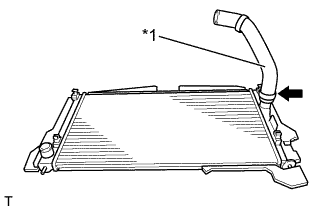 |
Remove the clamp and outlet radiator hose from the radiator assembly.
| *1 | Outlet radiator hose |
| 19. REMOVE RADIATOR PACKING (UPPER) |
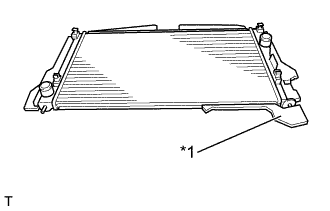 |
Remove the radiator packing.
| *1 | Radiator Packing |
| 20. REMOVE NO. 1 RADIATOR PACKING |
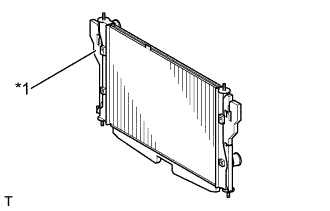 |
Remove the No. 1 radiator packing.
| *1 | No. 1 Radiator Packing |
| 21. REMOVE NO. 2 RADIATOR PACKING |
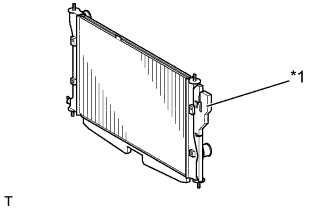 |
Remove the No. 2 radiator packing.
| *1 | No. 2 Radiator Packing |
| 22. REMOVE RADIATOR PACKING (LOWER) |
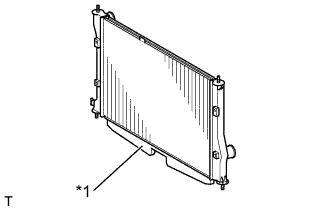 |
Remove the radiator packing.
| *1 | Radiator Packing |